

Understanding the Script Creation Process
Creating an agent script involves setting up a series of decision points and responses that guide the conversation with your clients.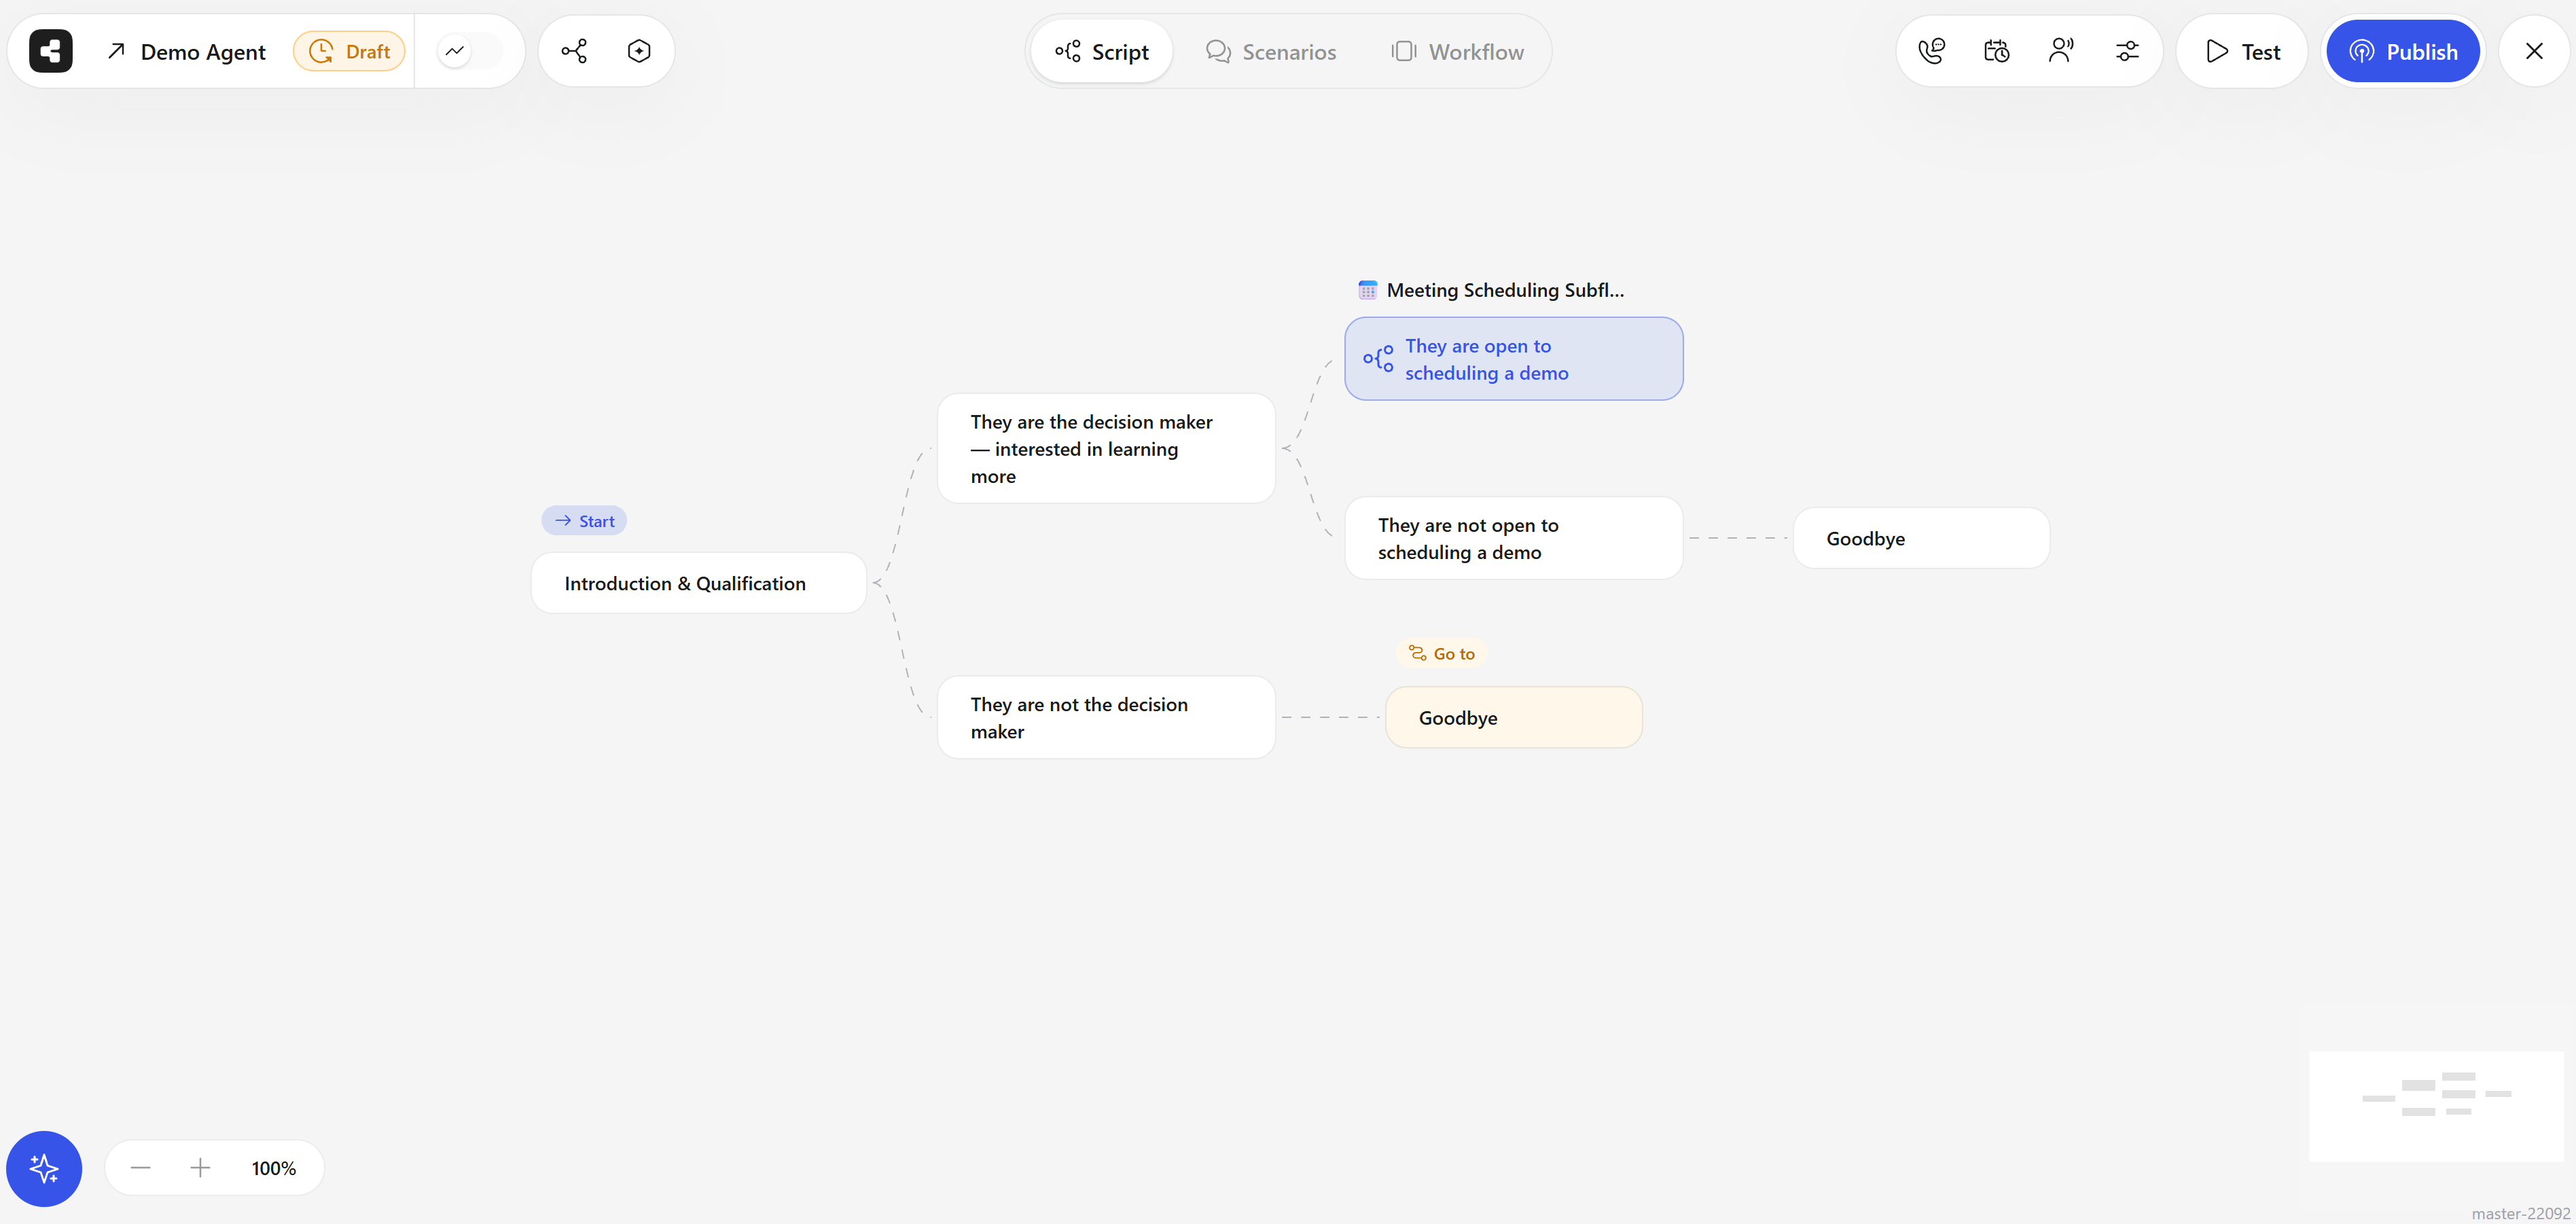
An example script: qualification up front, then a nested script for meeting scheduling
Steps to Create Your Script
Initiate with the Intro Script- Inbound Calls: As a suggestion, you might begin your script with an introductory script node where you confirm the client’s identity by asking for their name and inquiring about their well-being. However, feel free to adjust this approach based on your specific needs.
- Outbound Calls: As a suggestion, start by confirming the client’s identity and then proceed with the planned interaction. This is just a guideline, and you can tailor it as required.
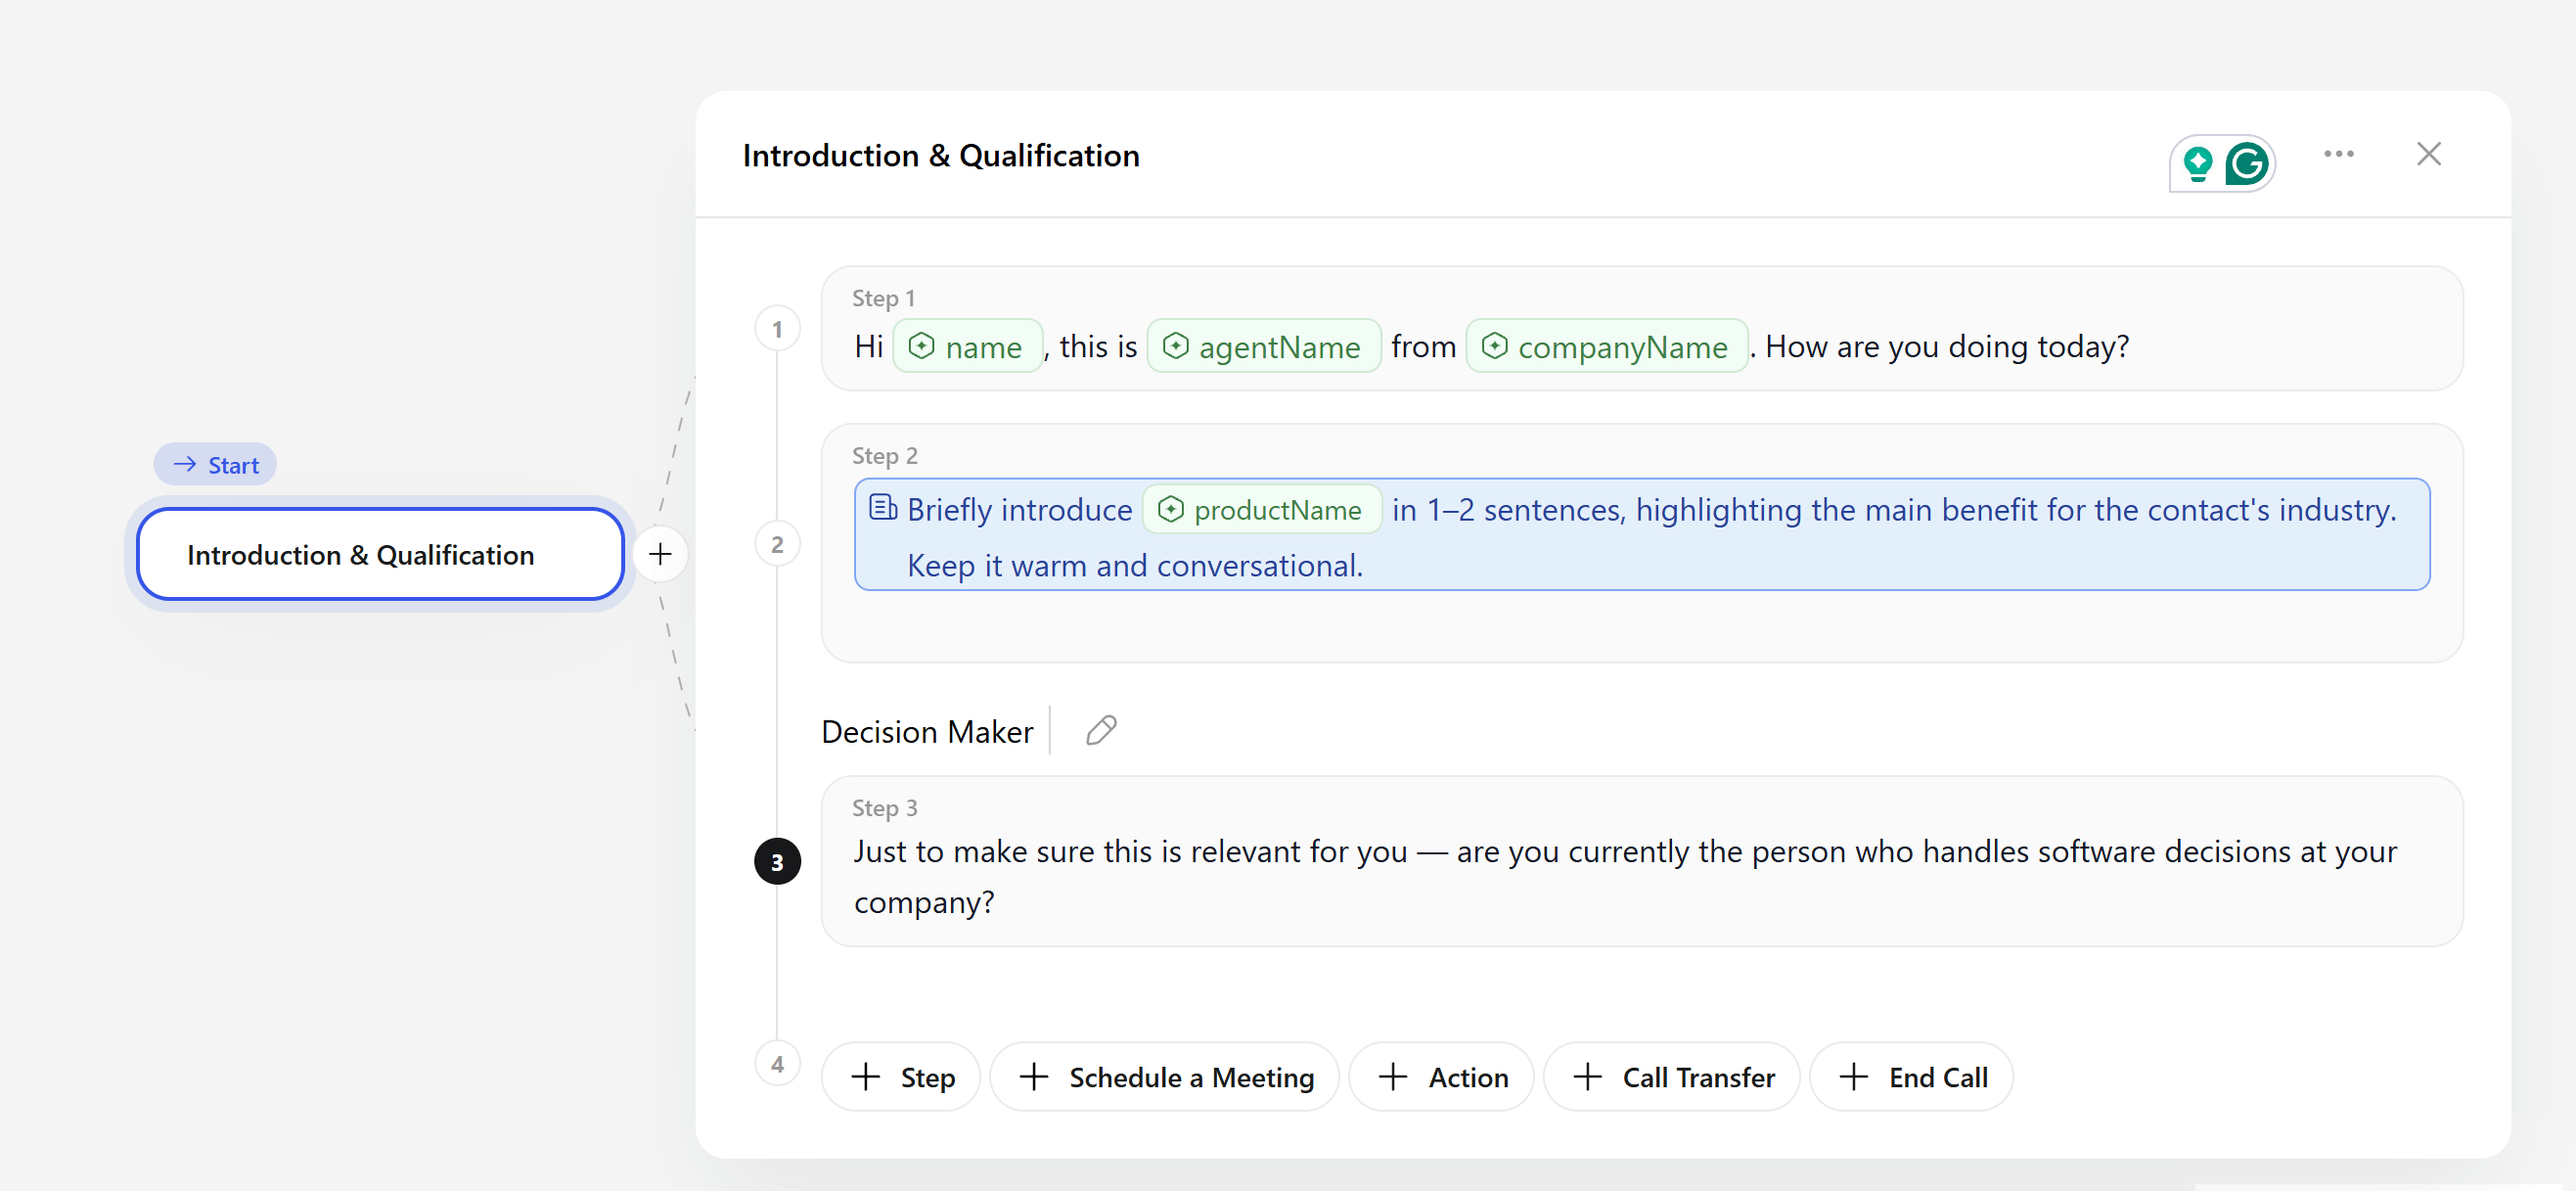
A node opens into its steps, with buttons to add a step, a meeting, an action, a transfer, or an end call
Branching the Conversation
-
After the initial engagement, introduce a question to guide the conversation. Based on the client’s response, you can expand the script:
- Click the
+button next to the current node. - Choose how to continue -
Add Subflow,Add Nested Script, orGo to Block. - In the new node, label it with a title that represents the client’s latest response which guides the agent to this node. Alternatively, you can simply give a title to this node based on its content.
- Click the
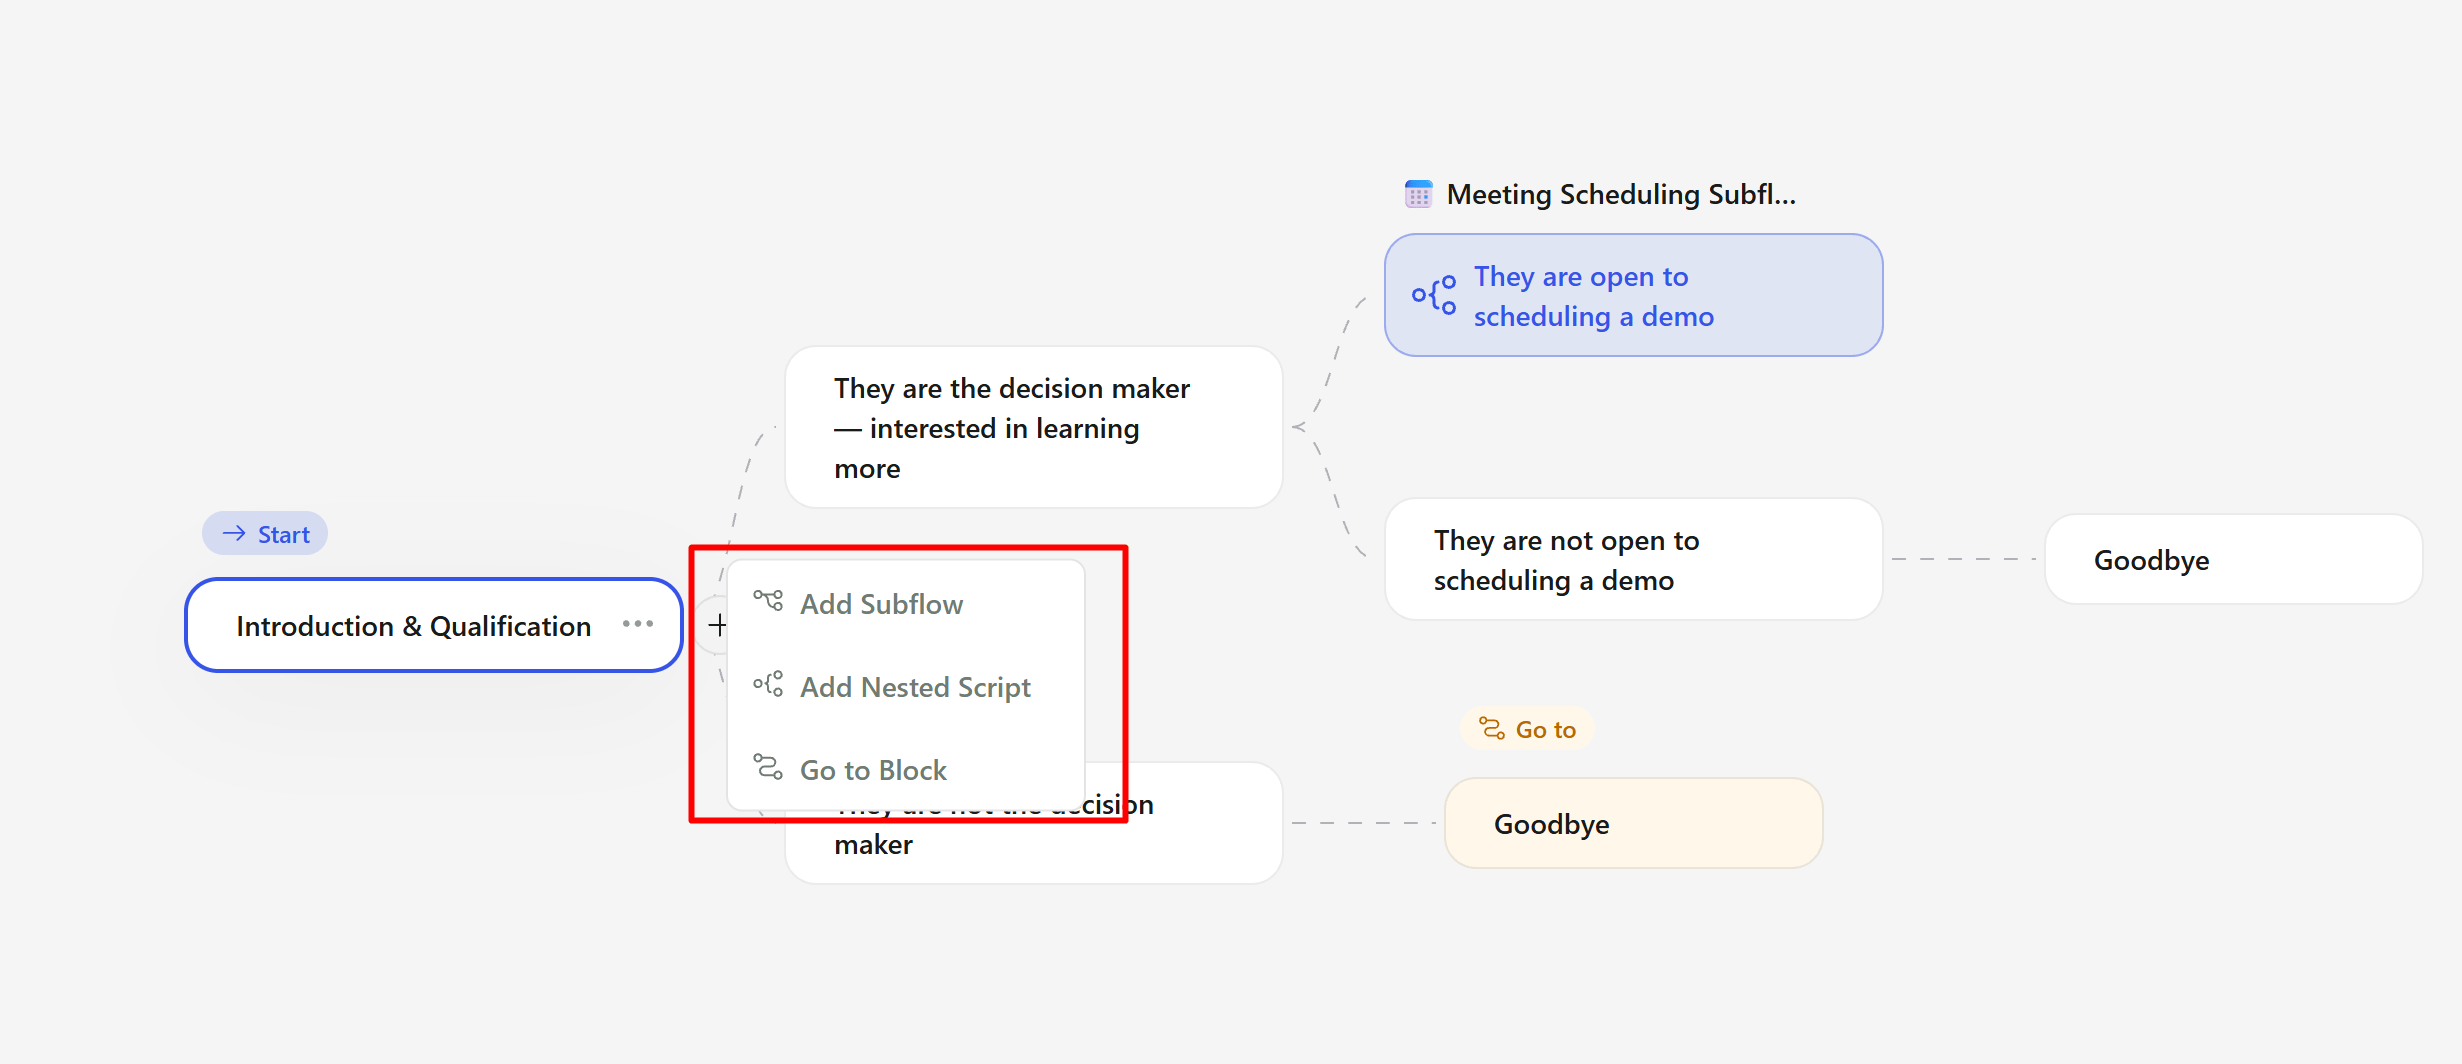
The + button offers three ways to continue the conversation
Nested Scripts
A nested script is a self-contained branch that lives on its own canvas. Use one when a part of the conversation is big enough to deserve its own flow - scheduling a meeting, handling an objection, running through a qualification checklist - and you don’t want it crowding the main script. Nested scripts are easy to spot: they are blue, and the label above the node names the script it opens. Click the node to open it. The breadcrumb in the top-left shows where you are and takes you back to the parent script.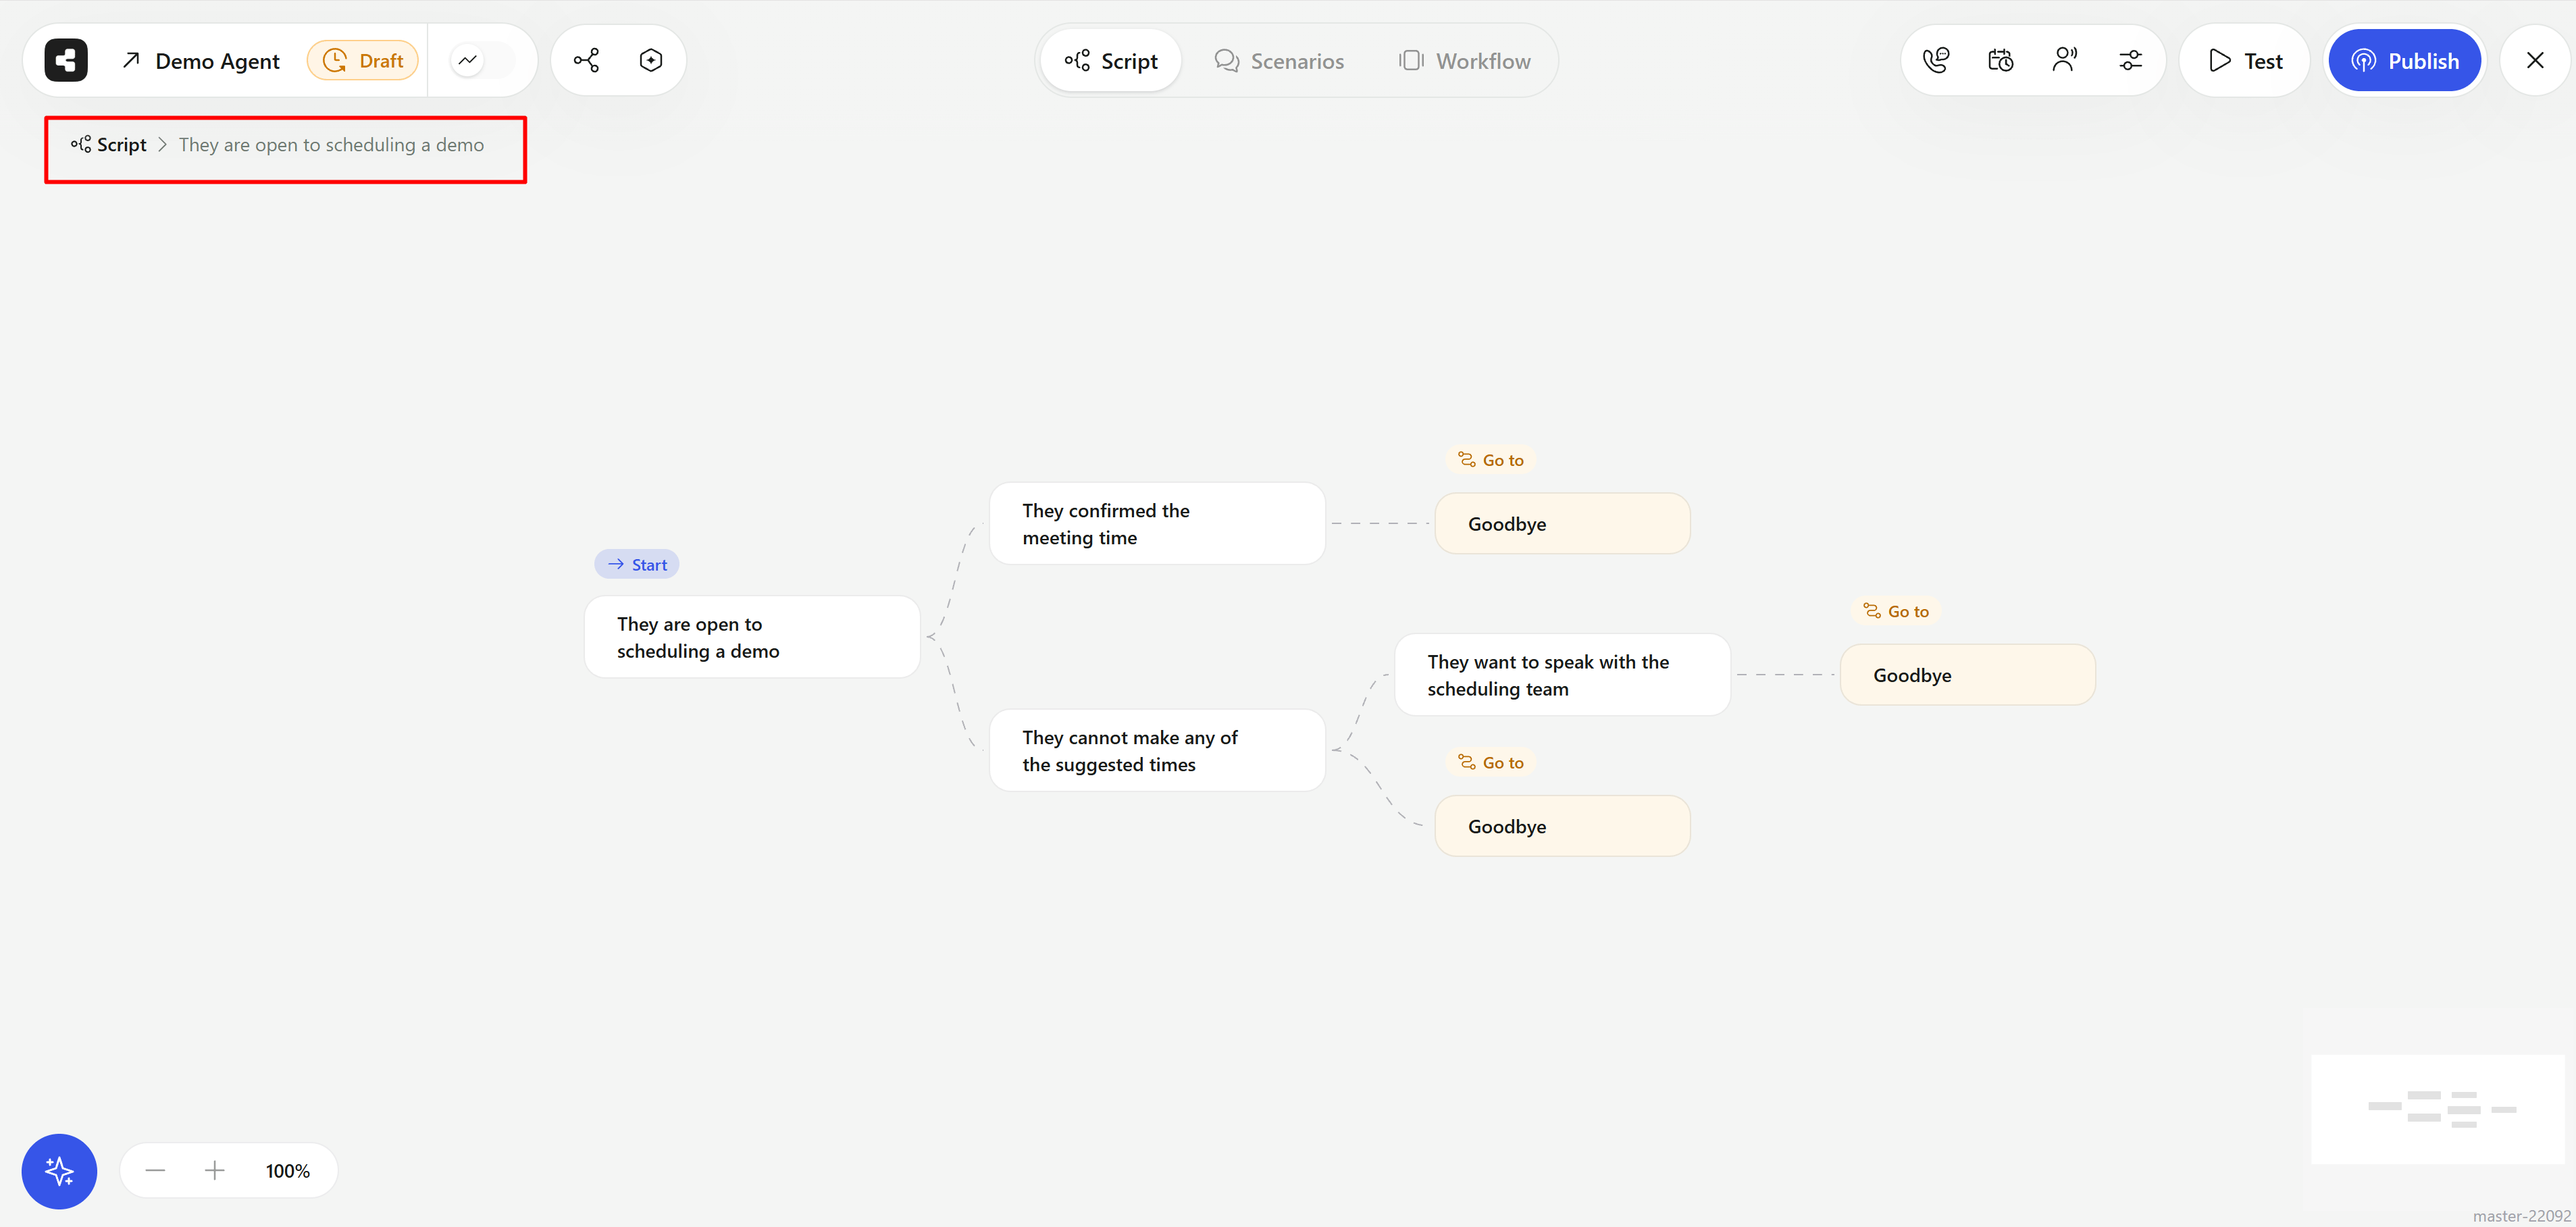
An opened nested script - the breadcrumb leads back to the main script
Managing Subflows, Nodes and Steps
- To modify your script effectively, you can move nodes, delete unnecessary subflows, or adjust branching logic.
- Moving or Deleting Steps:
- Position your cursor over the Subflow, click on the
•••icon to the right of the subflow name.
- Position your cursor over the Subflow, click on the
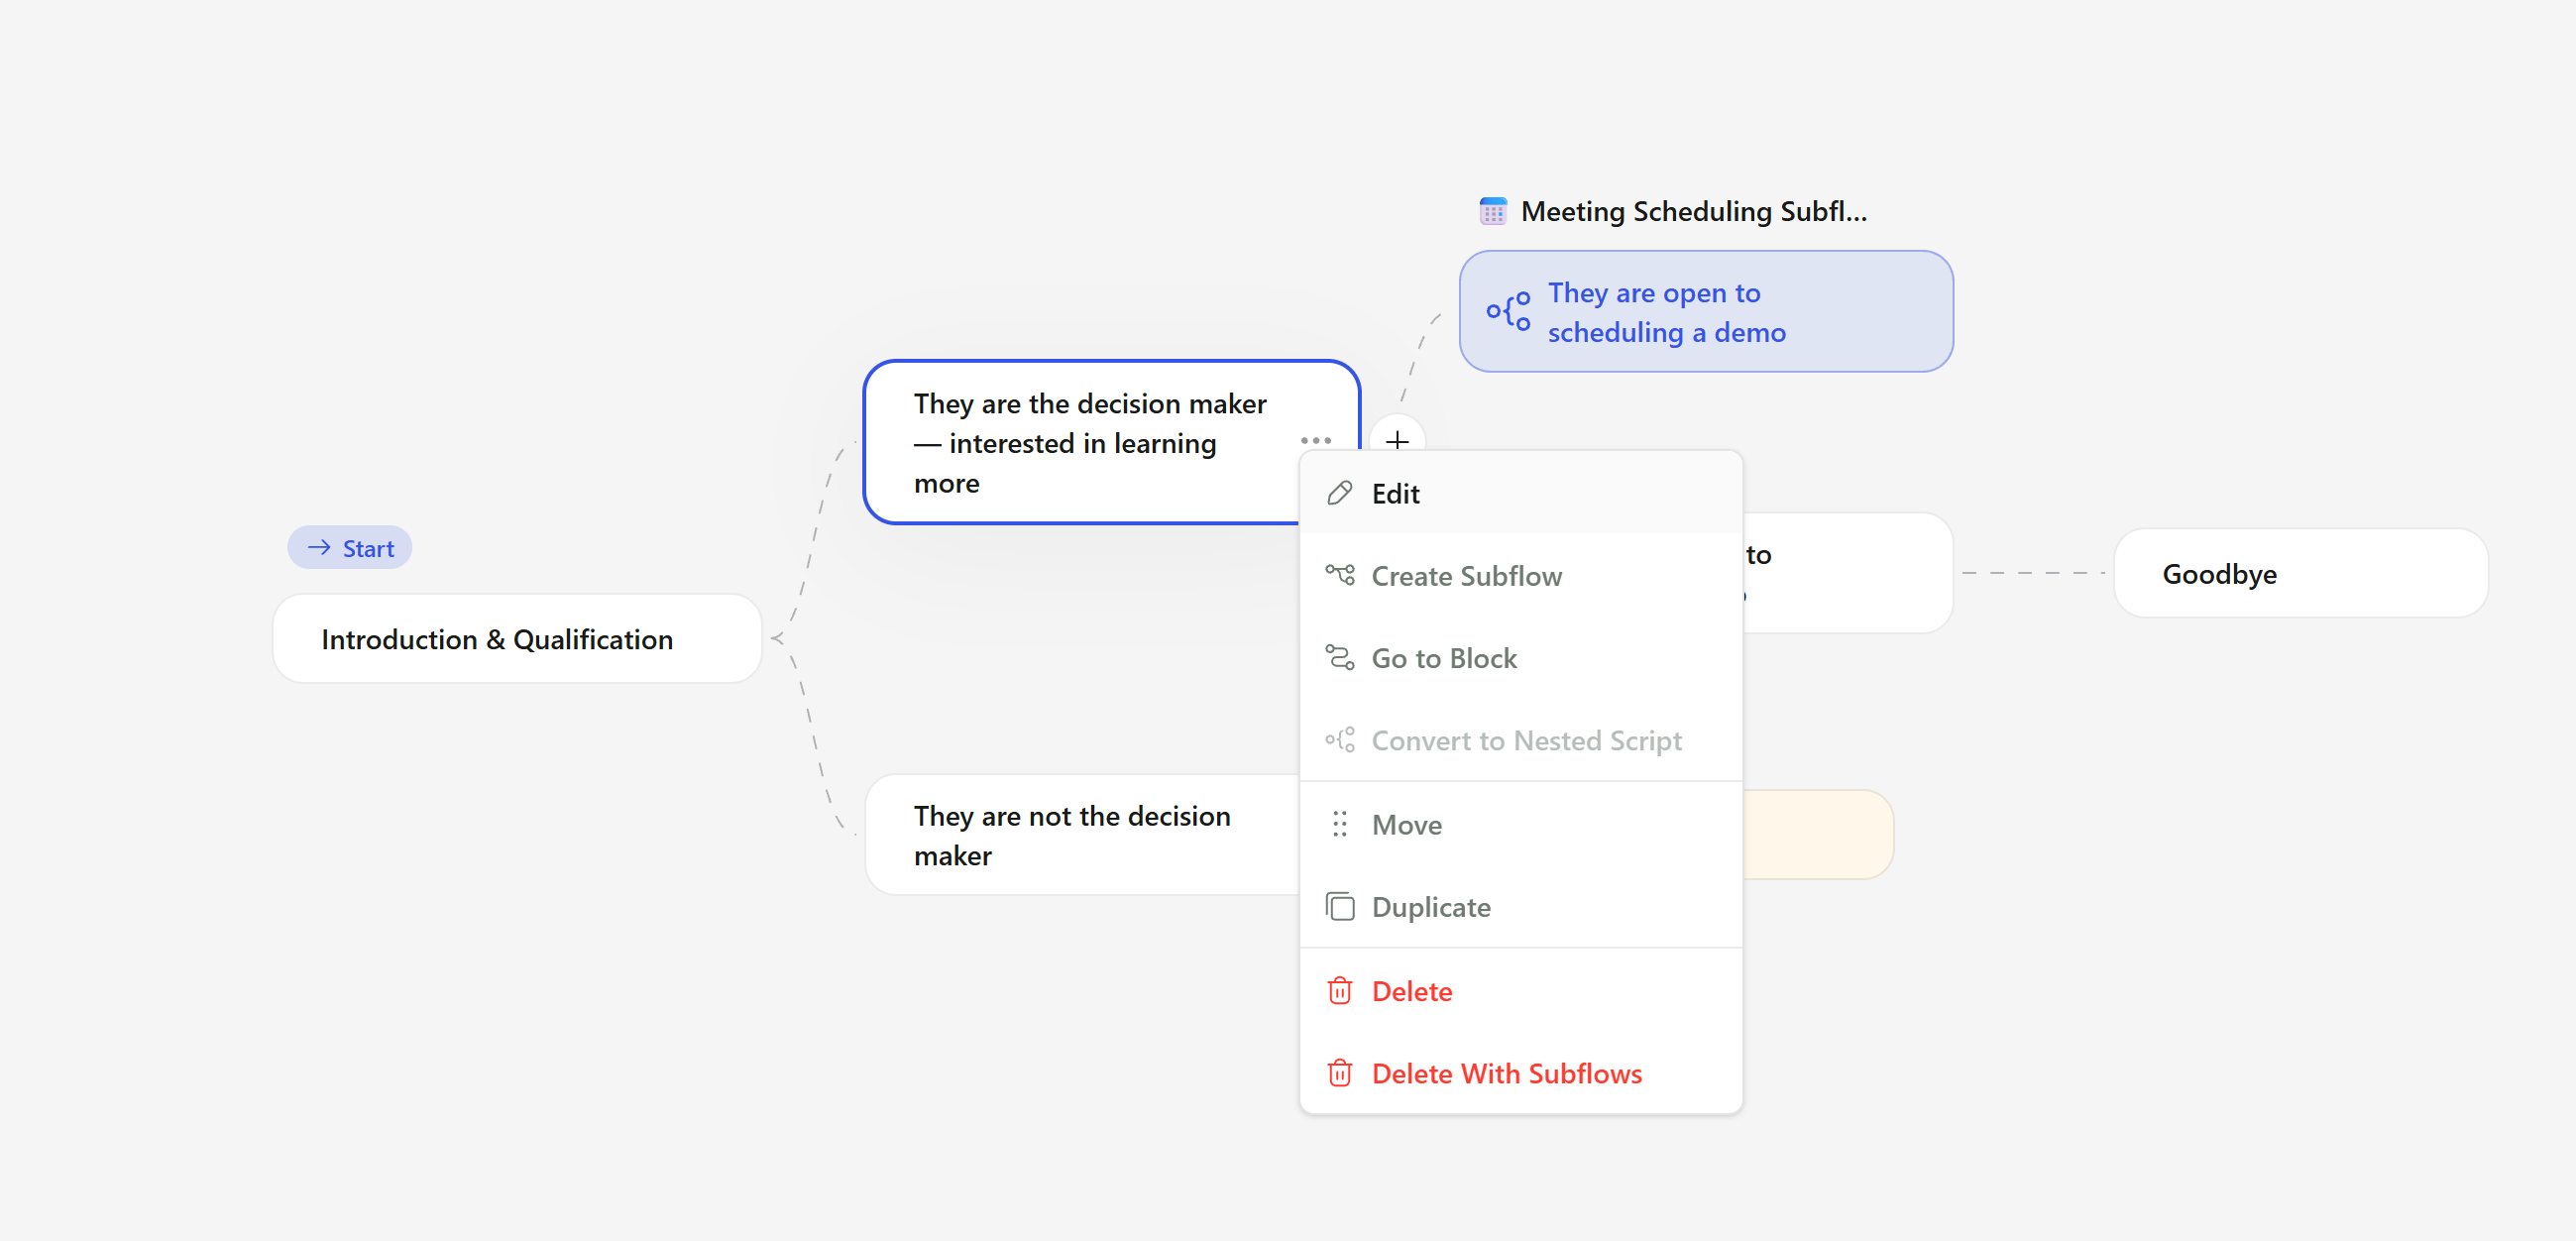
The node menu: edit, branch, convert, move, duplicate, or delete
- To move a step, press
Move. The canvas switches into placement mode - pick the+button where the block should land, or pressCancelto back out.
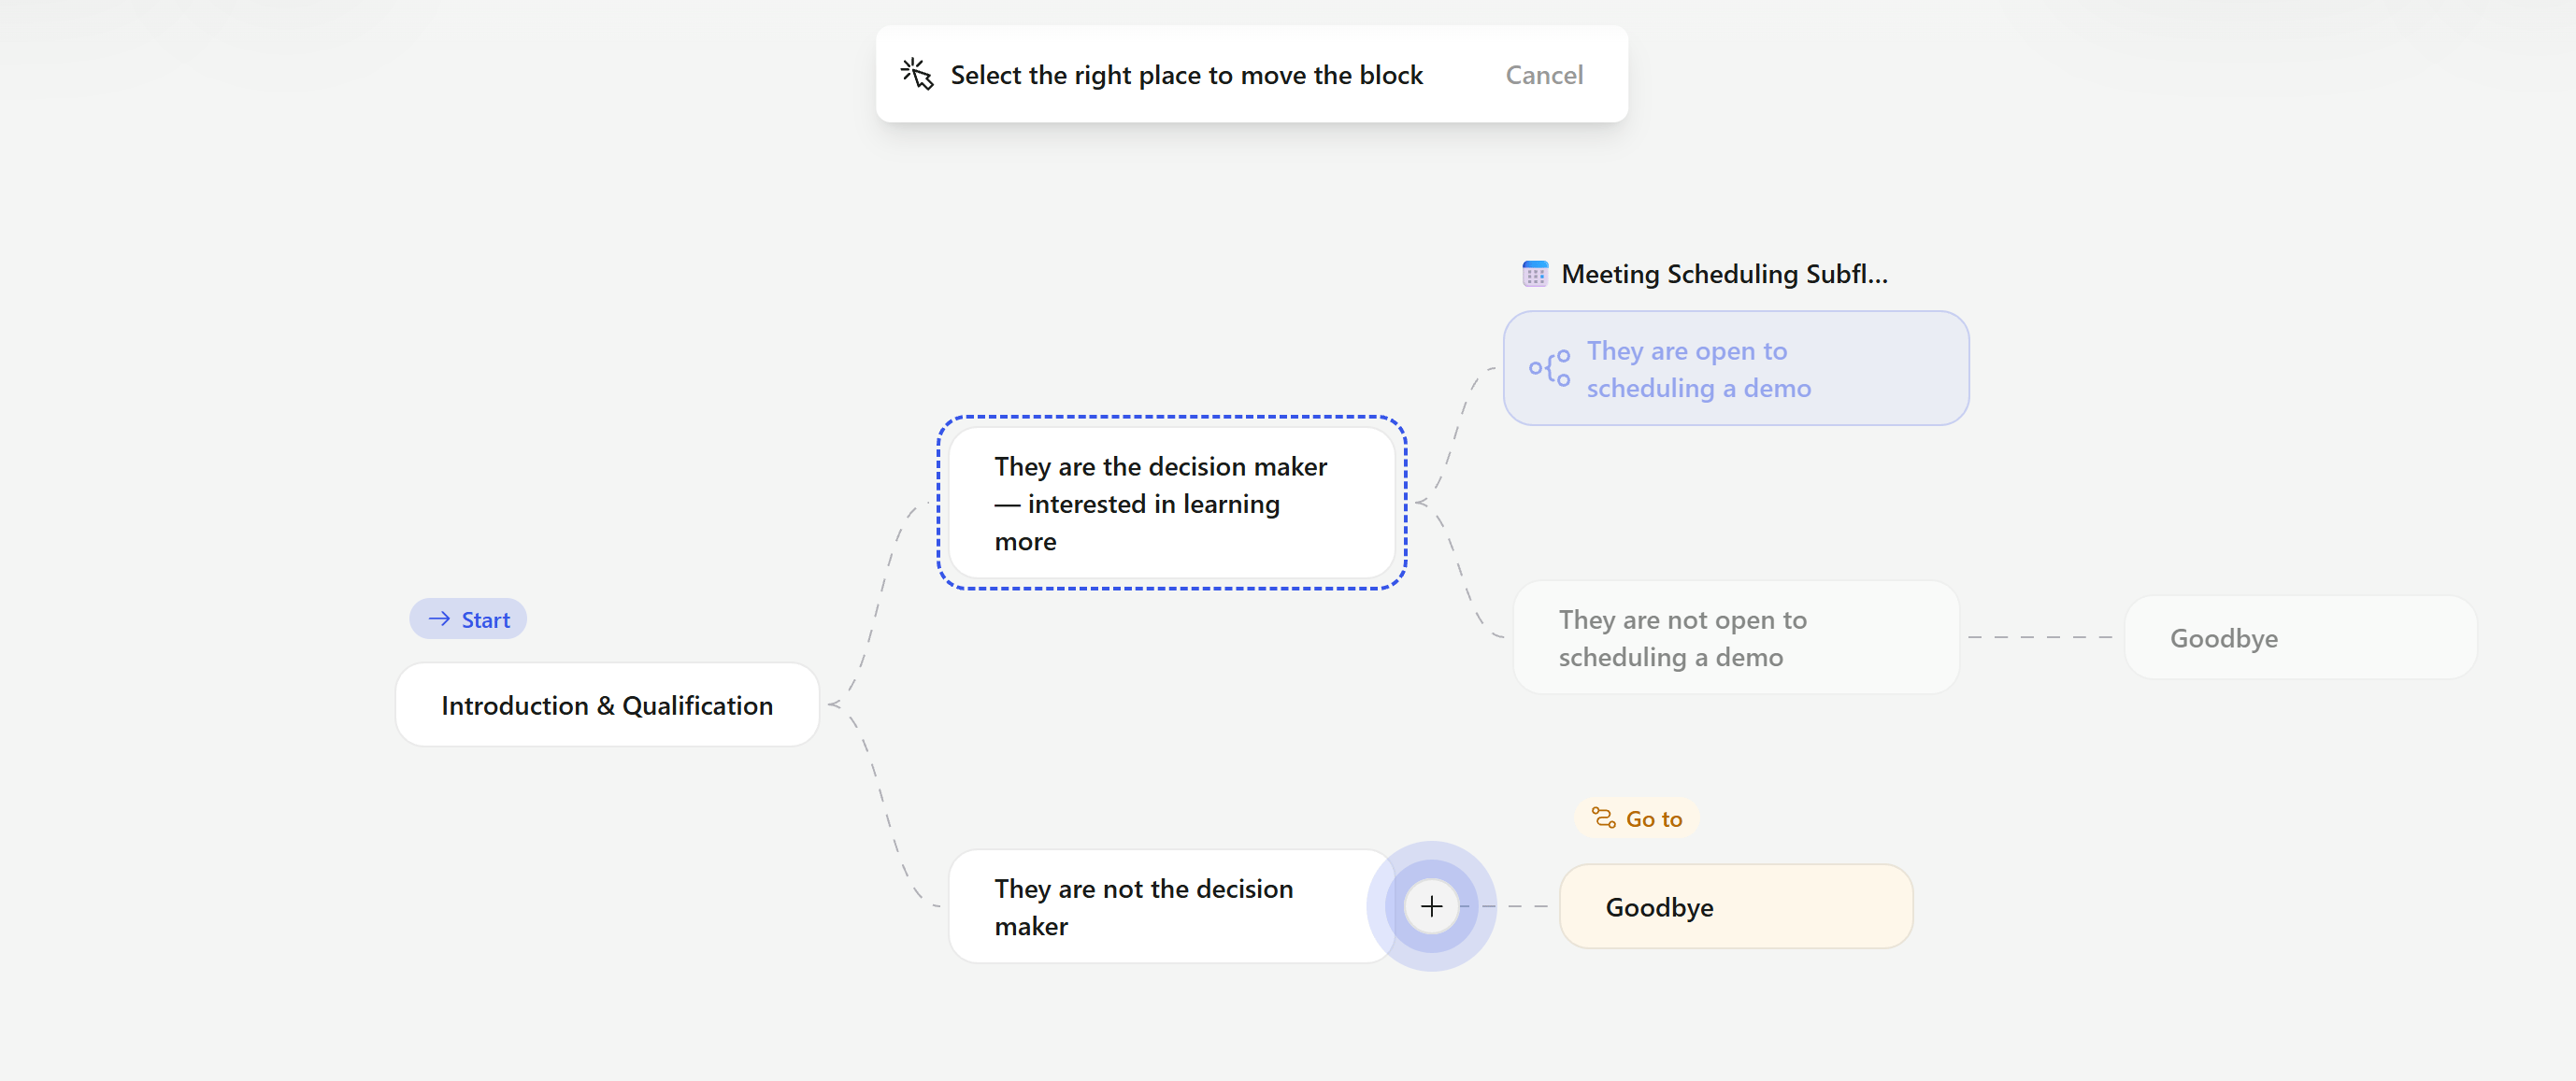
Moving a Step will also move the subflows associated
Customize Node Content
- Customize the dialogue and the questions in each node according to the agent goals. Refer to the Customize Steps page for more details.
Directing Flow Between Nodes
- To lead the script from a subflow back to a specific node or to continue the script from a particular point:
- Click the
+button next to the node from which you want to continue. - Select
Go to Block. - Pick the destination from the Target Block dropdown, or click it directly on the canvas. Optionally, give the block a name to describe the client response that leads here.
- Click the
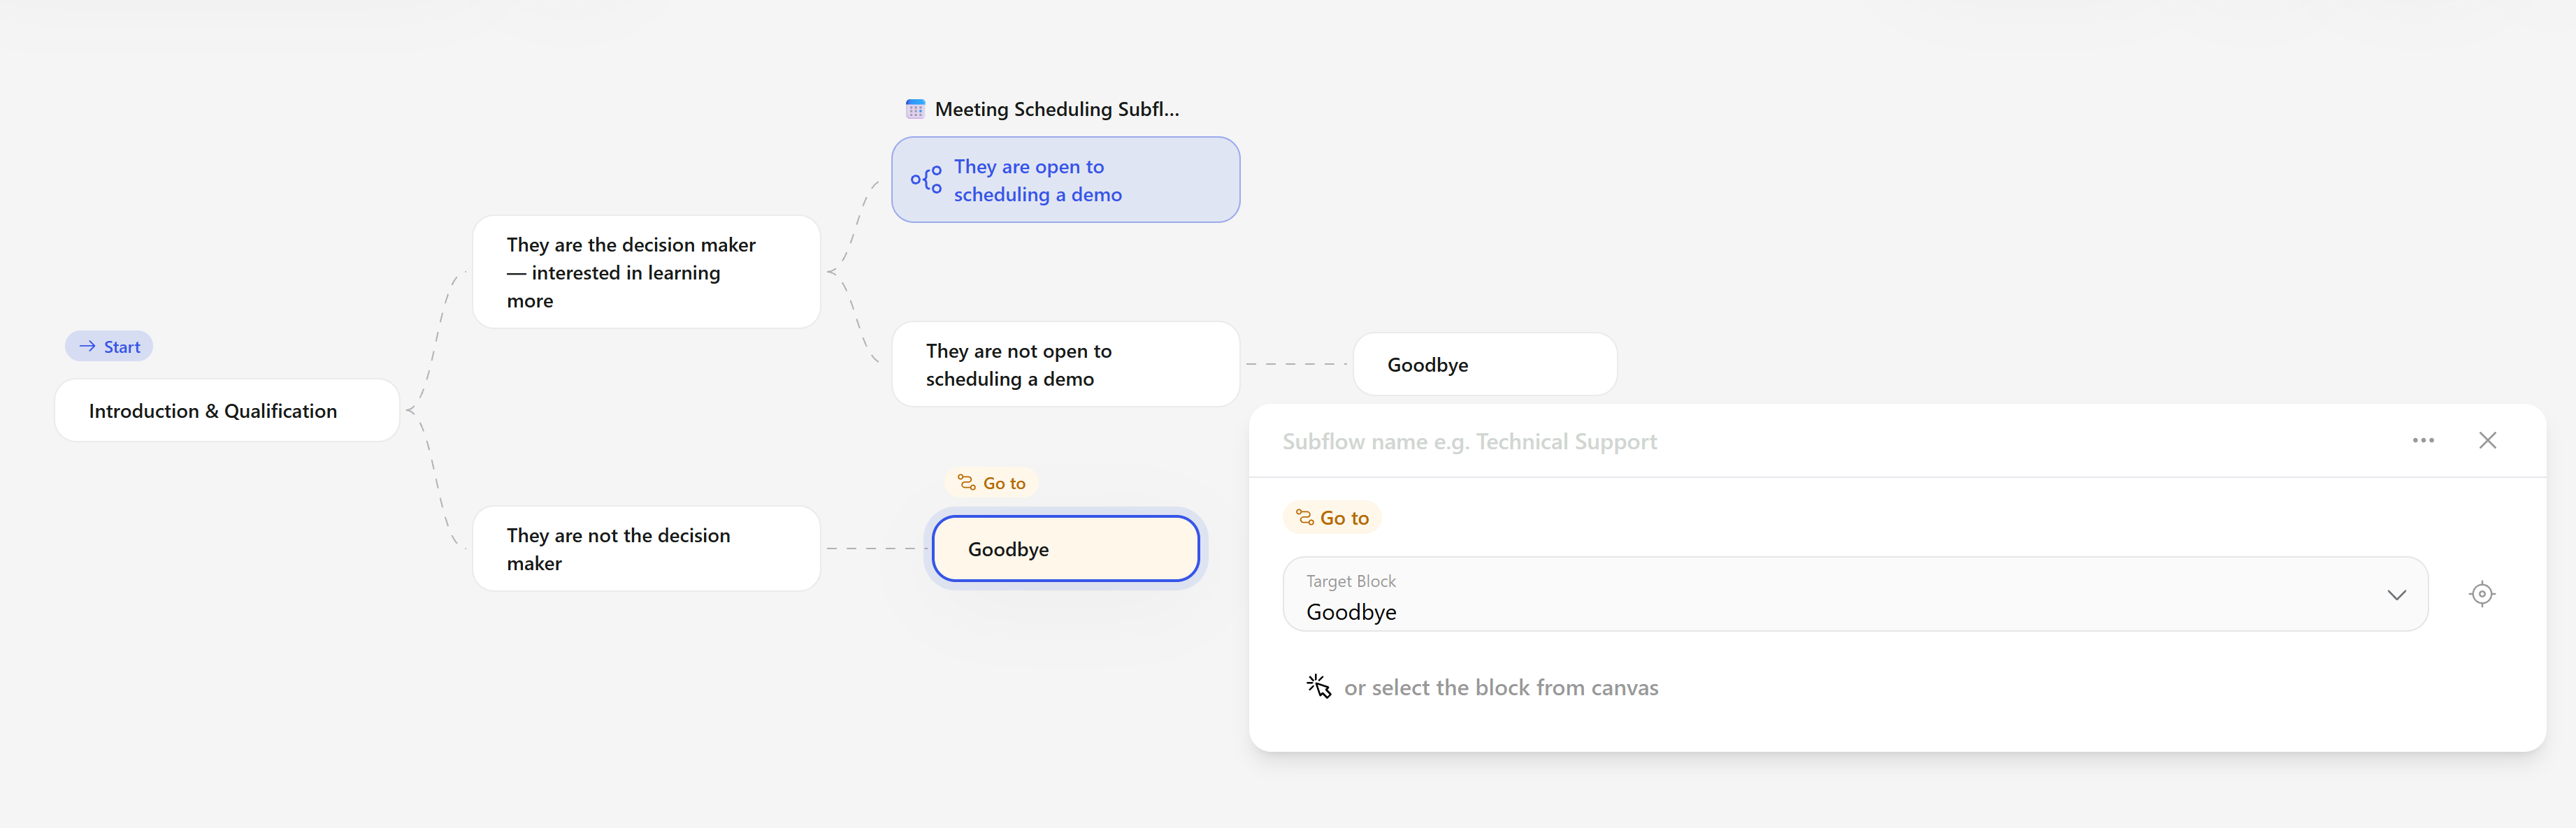
Pick the destination from the dropdown or straight from the canvas
The Workflow Tab
The script covers what the agent says. Everything around it - what starts the conversation, what counts as a good outcome, and what happens afterwards - lives on the Workflow tab at the top of the screen.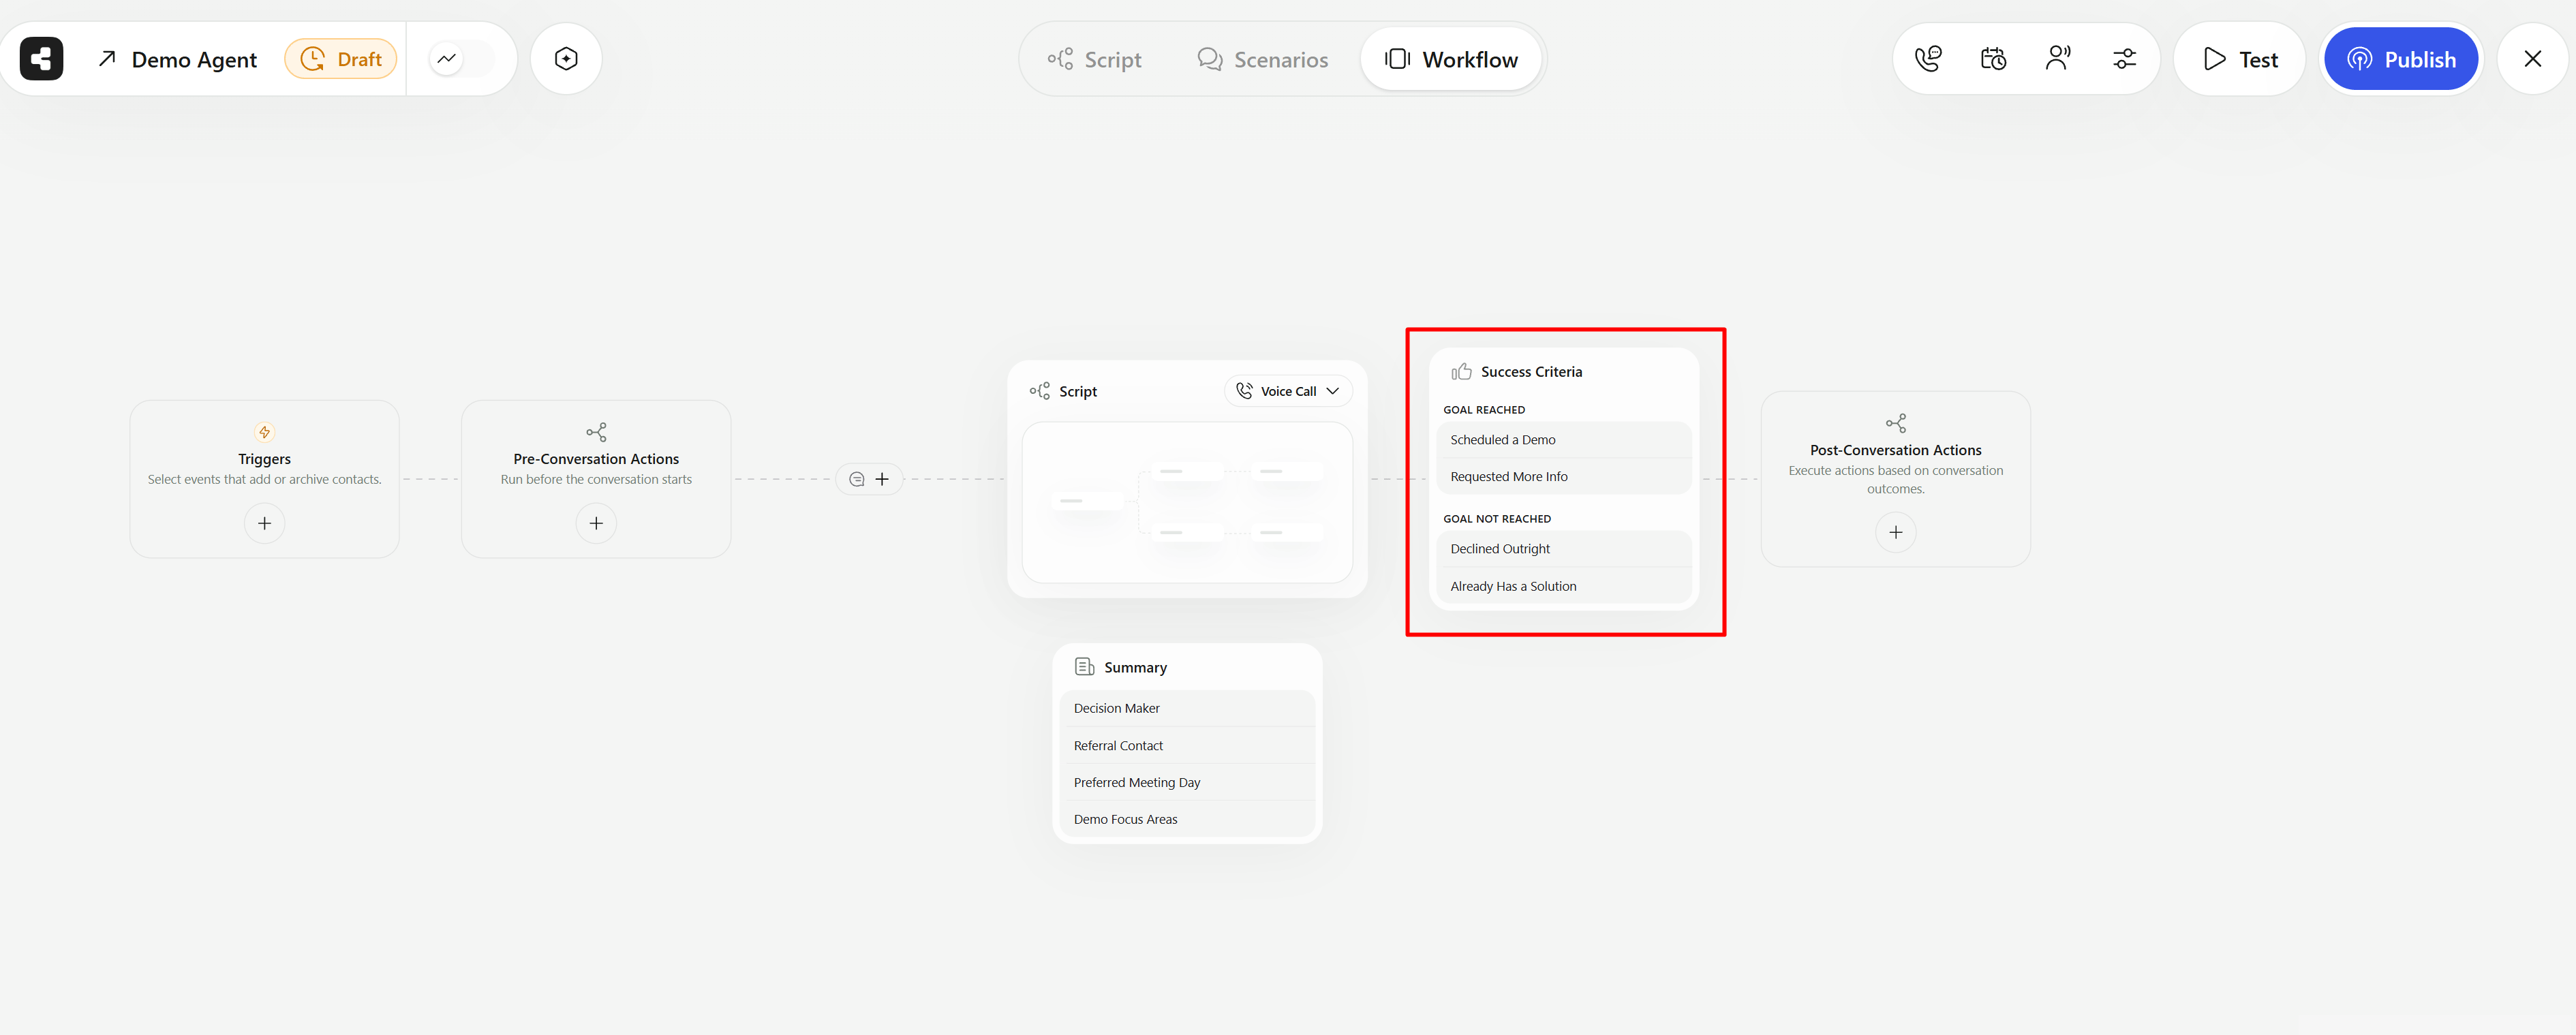
The Workflow tab: triggers, pre-conversation actions, the script, success criteria, summary, and post-conversation actions
Success Criteria
Success Criteria define the possible outcomes of a conversation, split into Goal Reached and Goal Not Reached. Click the card on the Workflow tab to open it. You can have Callers draft the criteria from your script with Regenerate, or write your own with + Add. Each outcome carries a short description that tells the agent when it applies. When the list looks right, click Mark as Reviewed.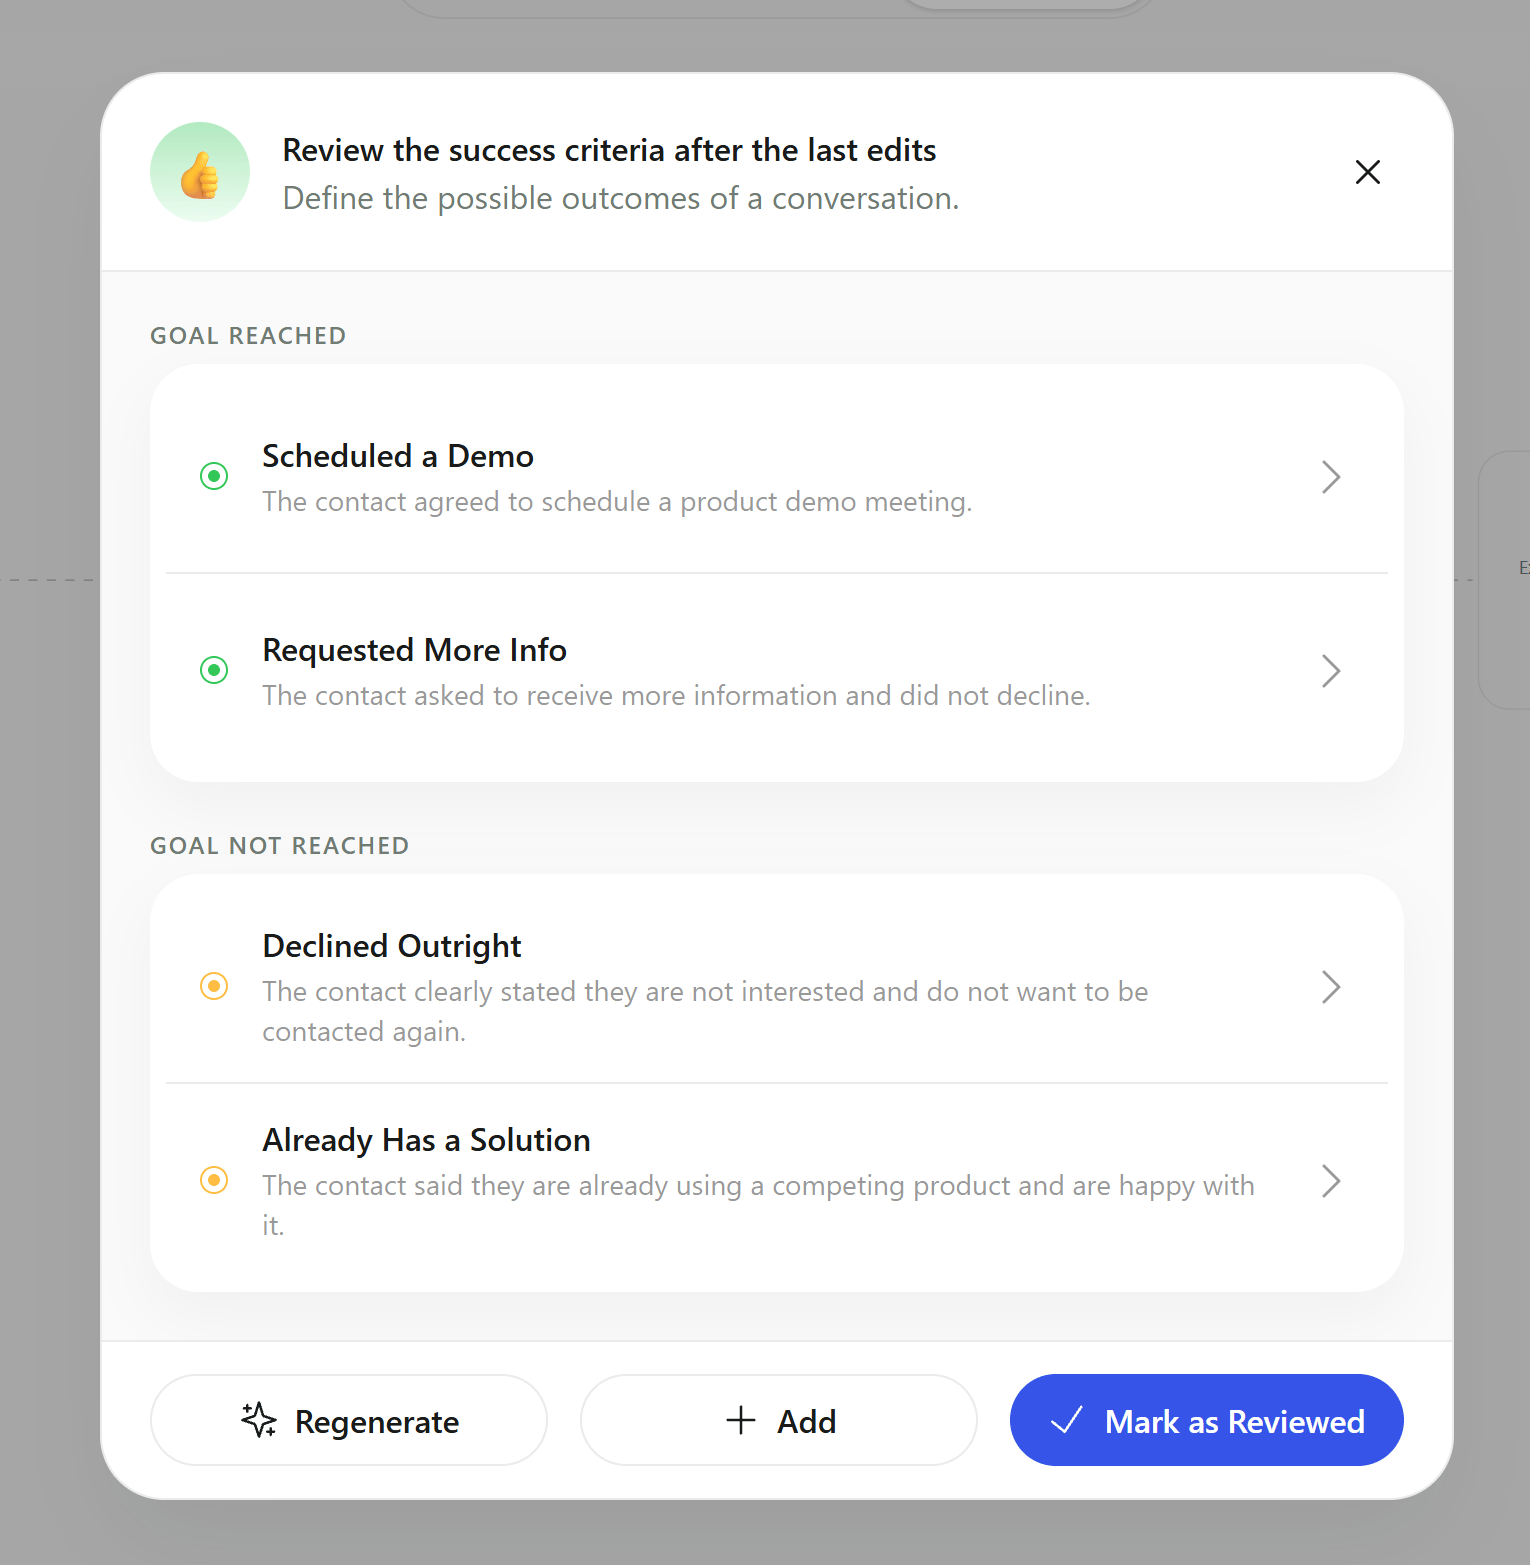
Success Criteria, split into Goal Reached and Goal Not Reached
Summary
Summary is the information the agent collects from each conversation. Click the card on the Workflow tab to see the list; every entry pairs a name with the question it answers, and clicking one opens it for editing. Use + Add to collect something extra. Whatever you define here shows up in the call summary, alongside your Key Questions.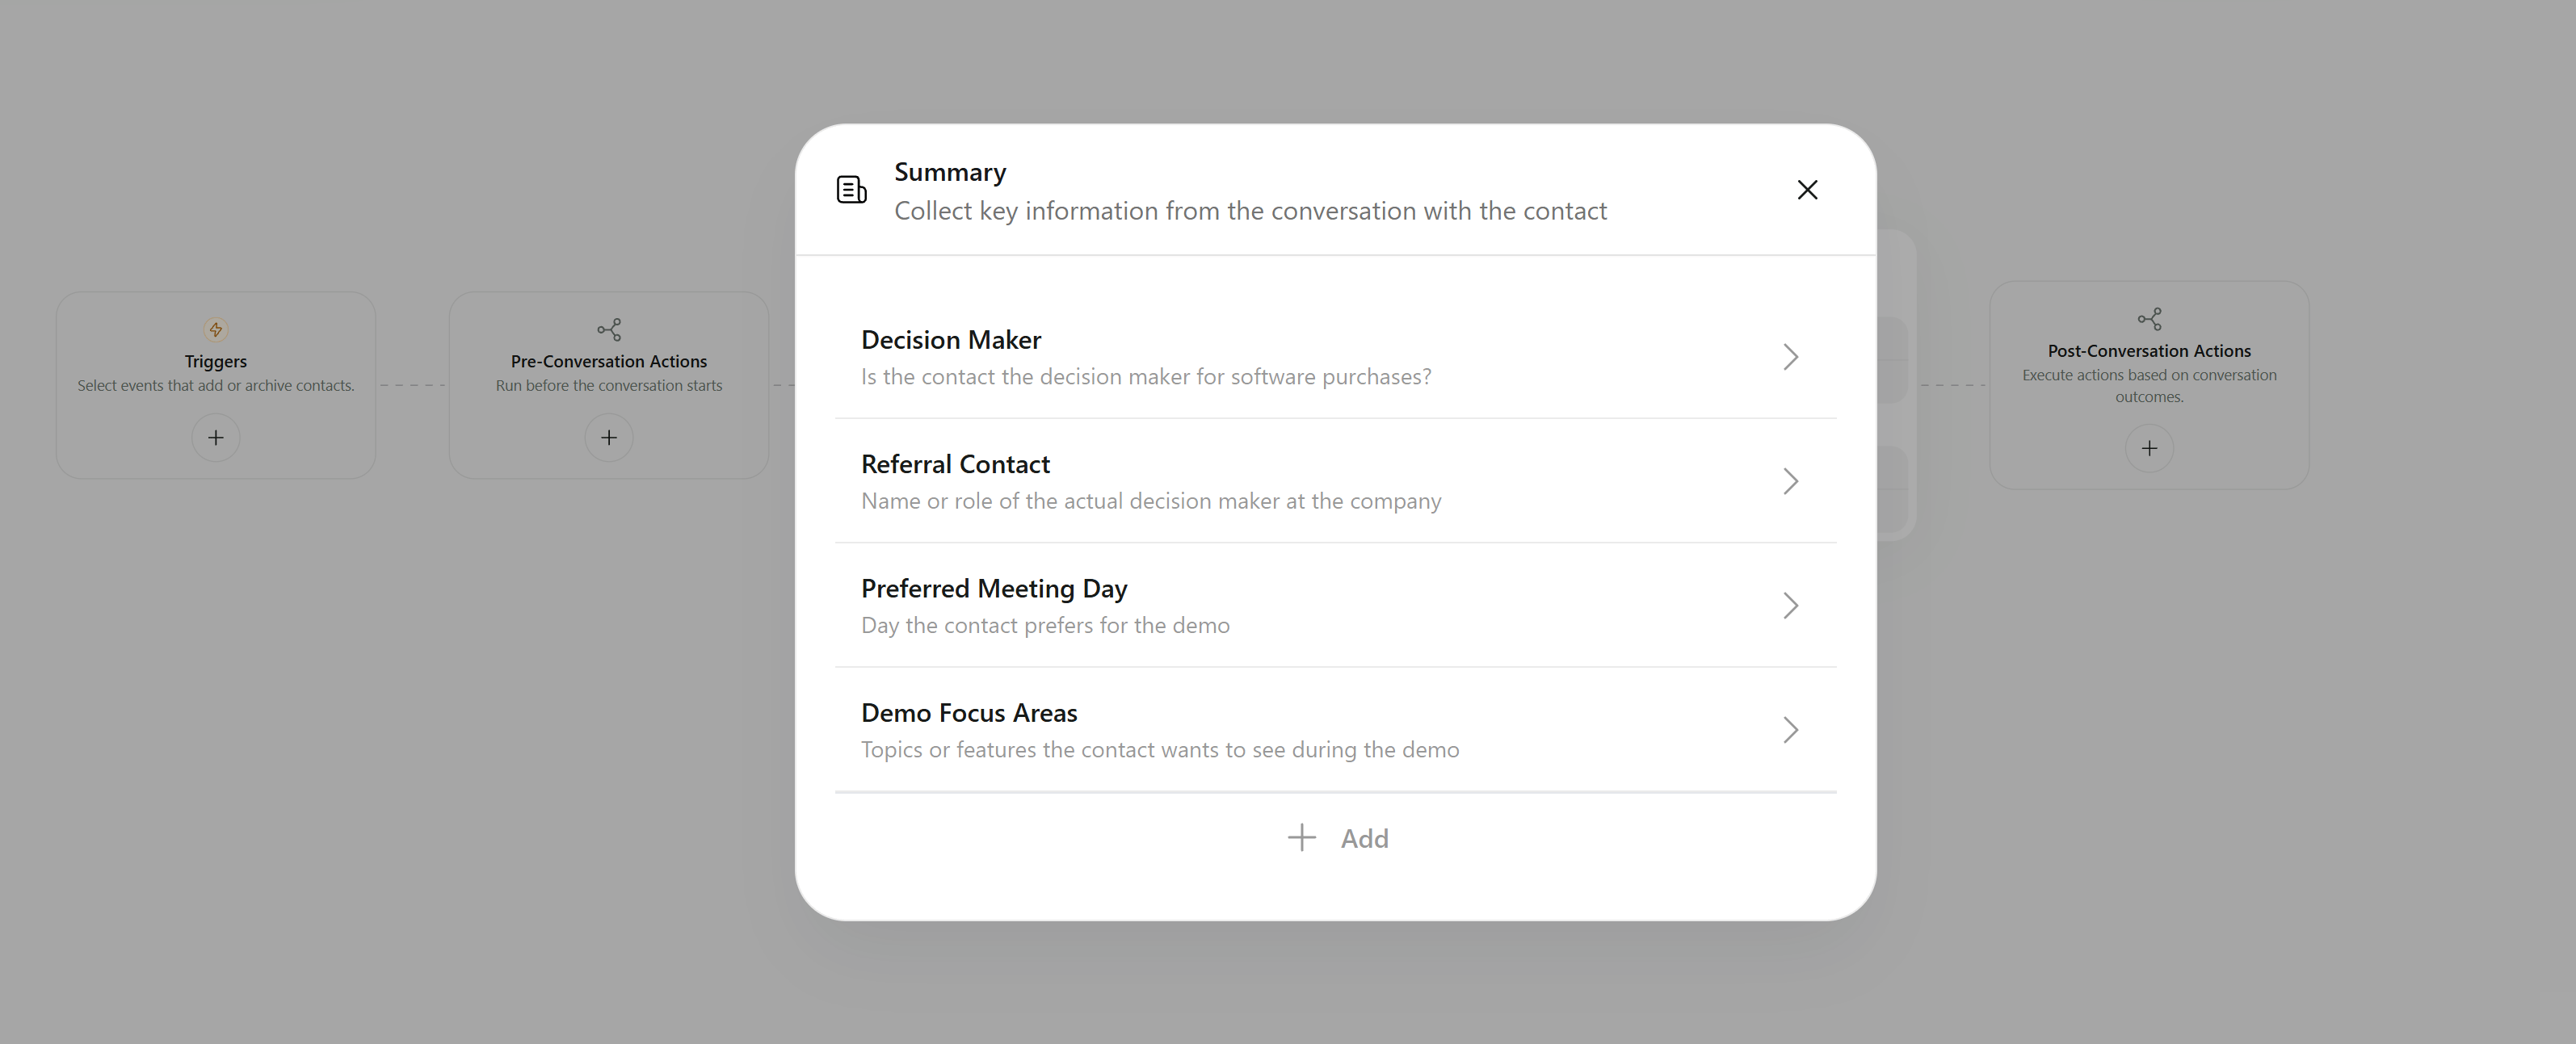
Summary - the key information collected from each conversation
Validating the Flow
- Ensure all node links are correctly made to prevent any dead ends or loops in the conversation.
- Preview and test the agent. Conduct test calls to check the flow and make necessary adjustments.
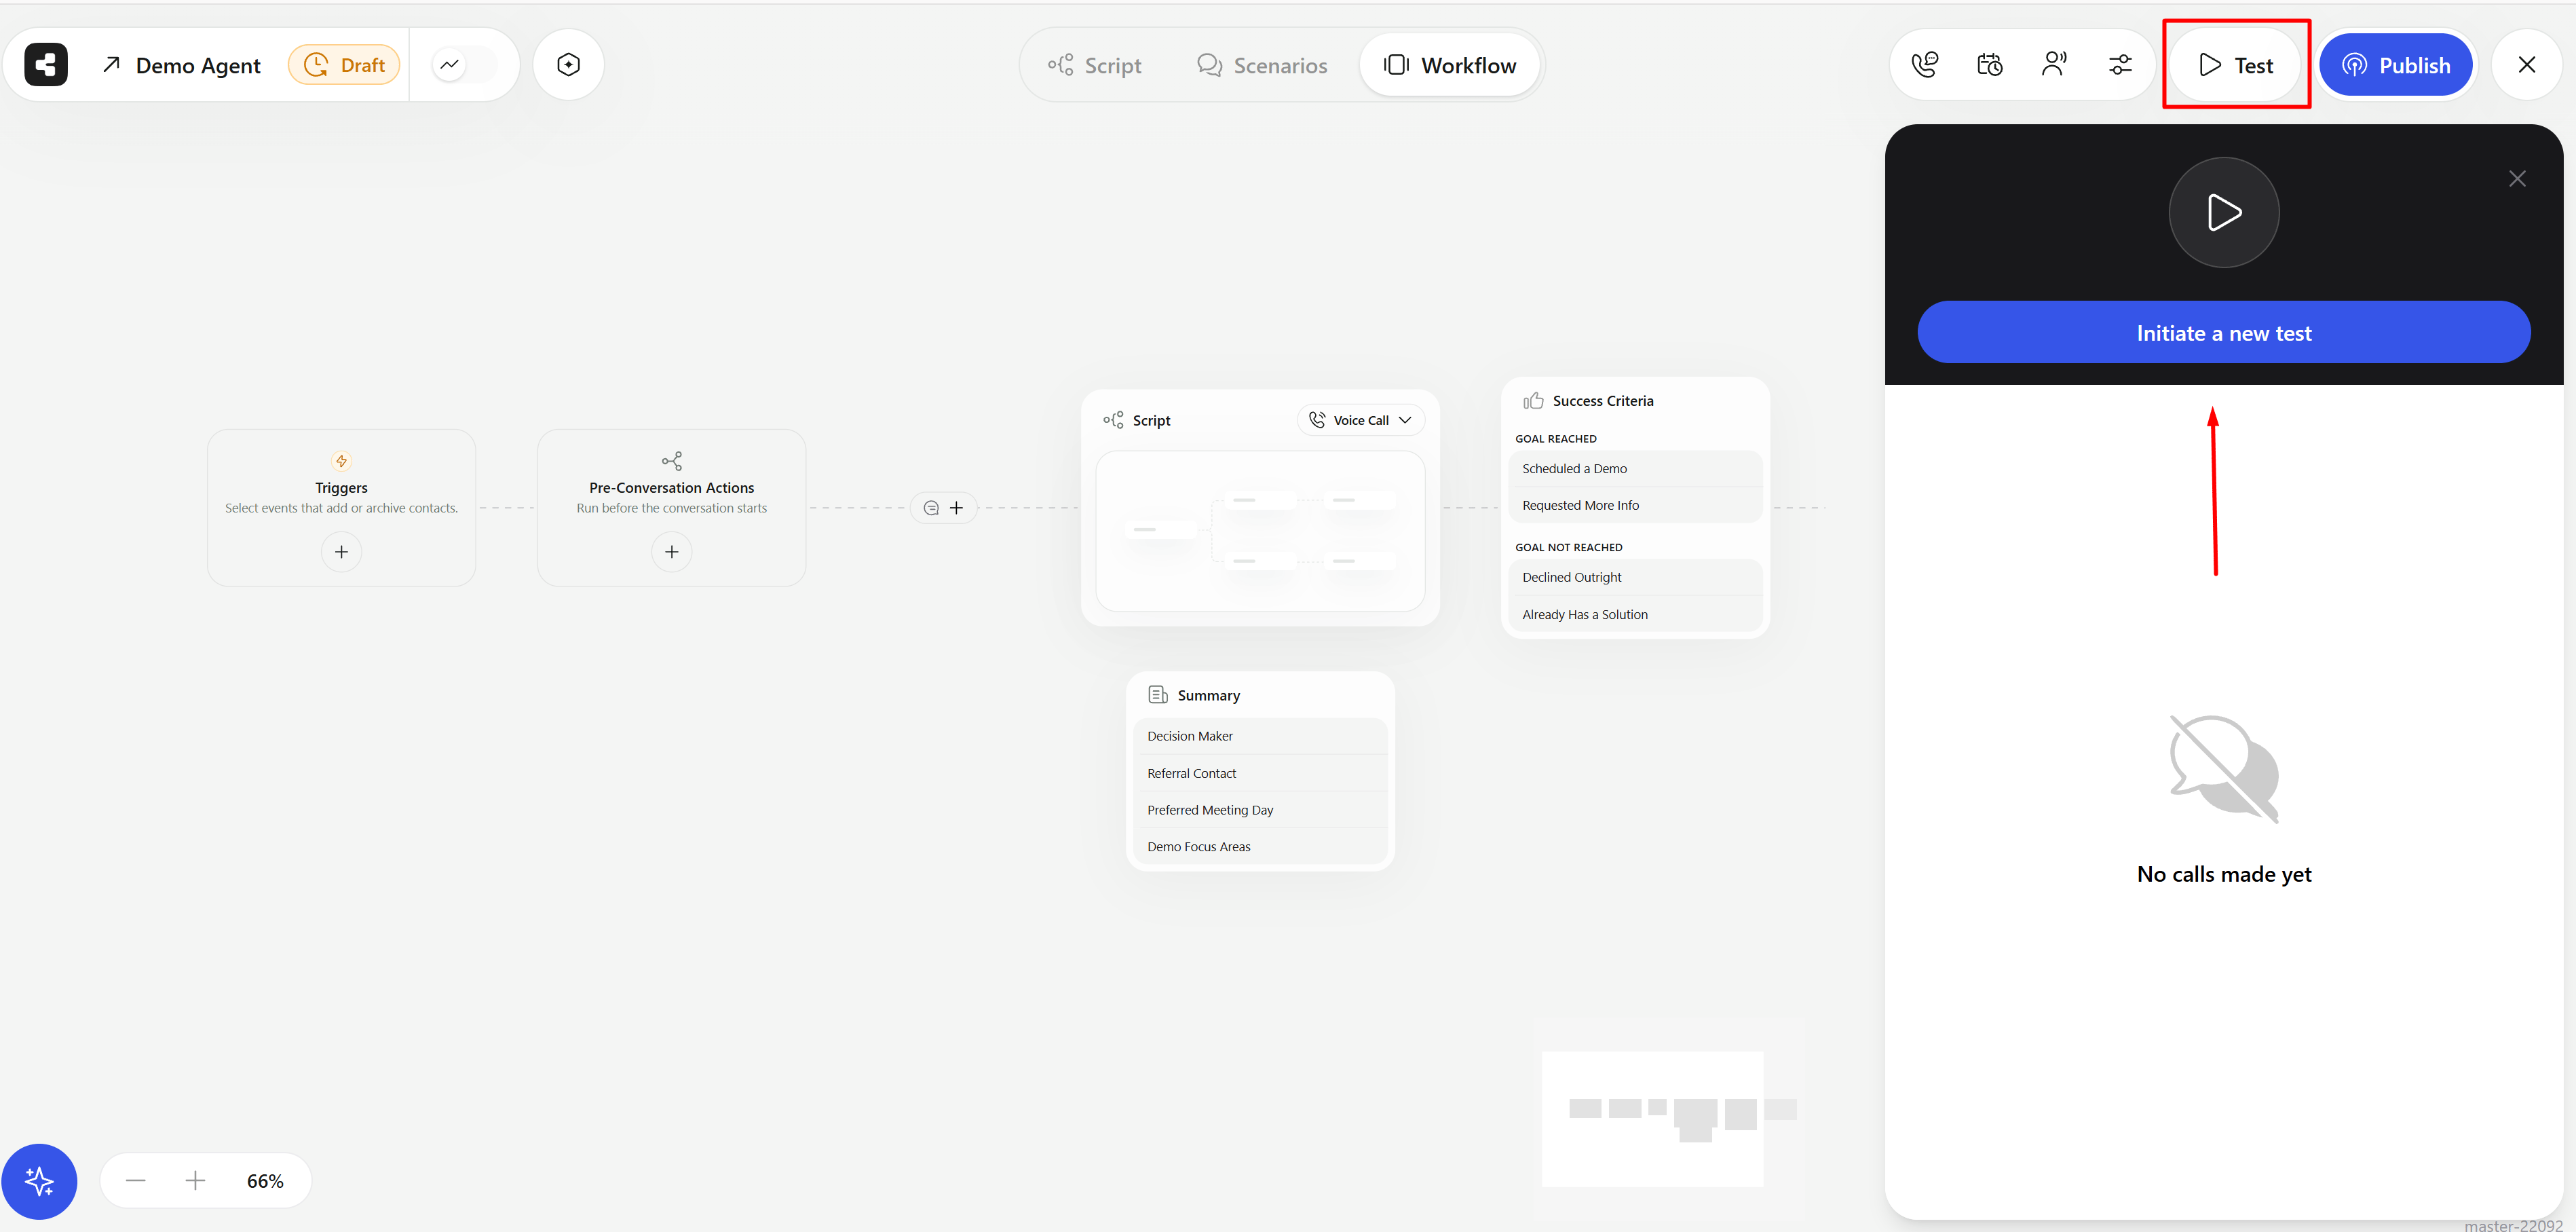
The Test panel keeps a history of your test calls
- Phone Call - The test call goes out over one of your own phone numbers, so you need one connected through SIP or Twilio first. Enter the number that should receive the call.
- Web Call - Talk to the agent straight from your browser. Nothing to connect and no phone number involved, which makes it the quicker way to try a script.
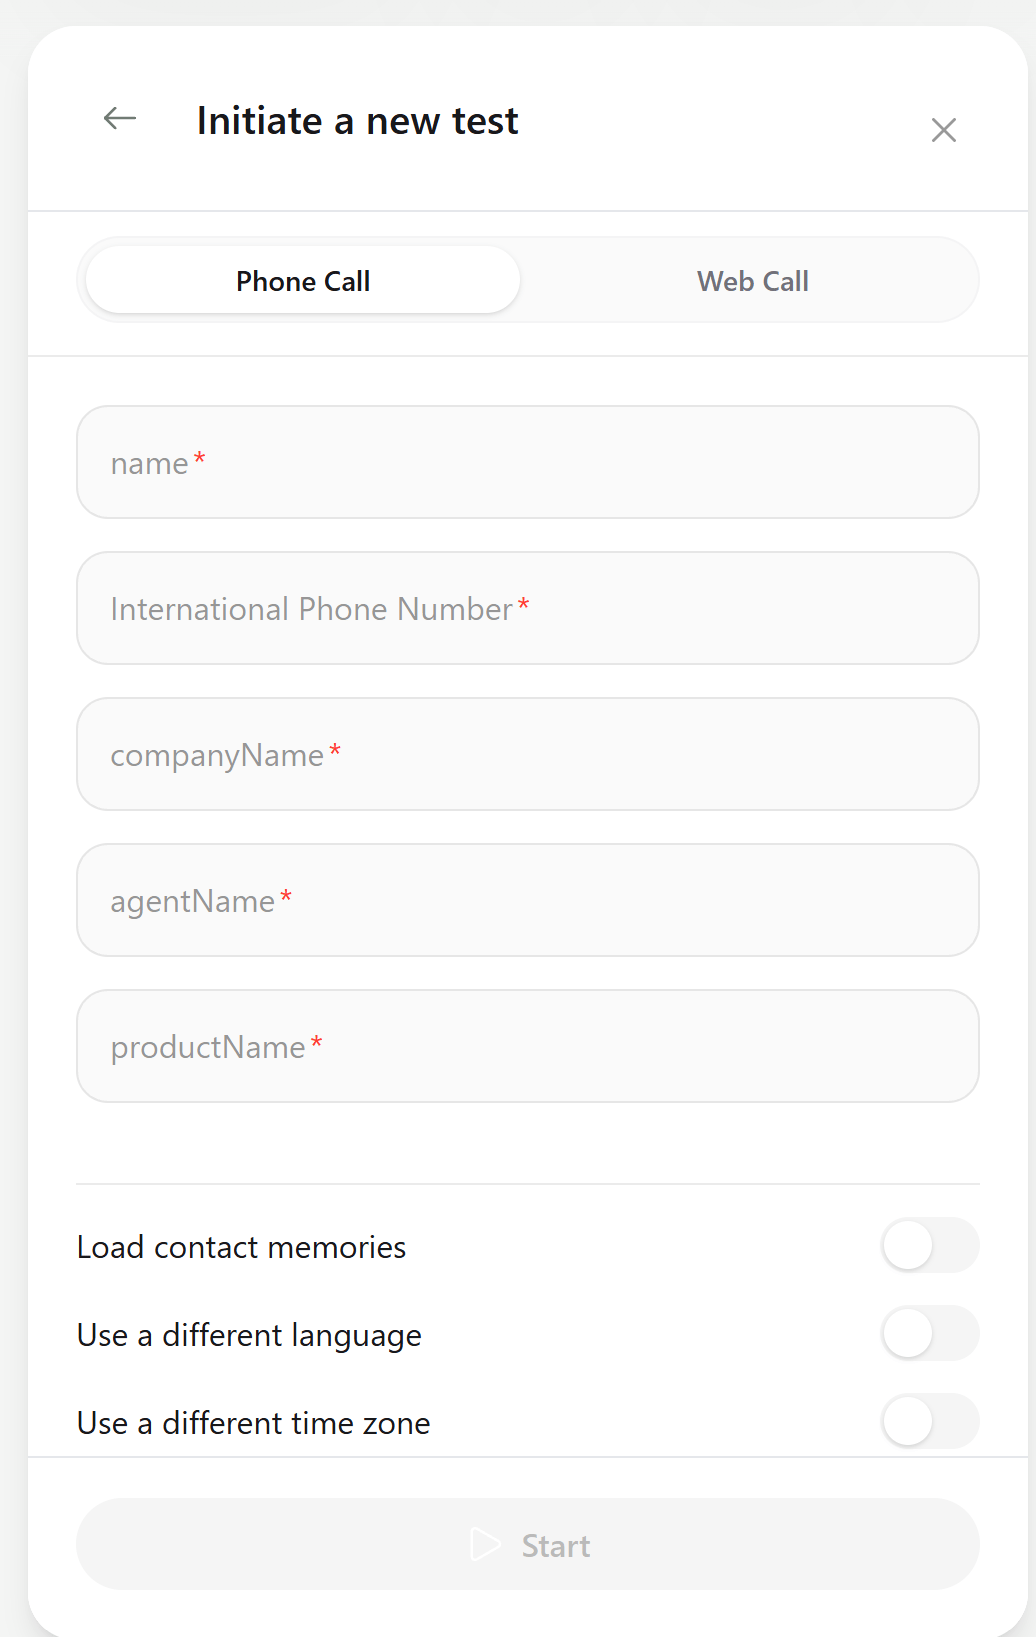
Test over the phone or straight from the browser