Creating a Subaccount
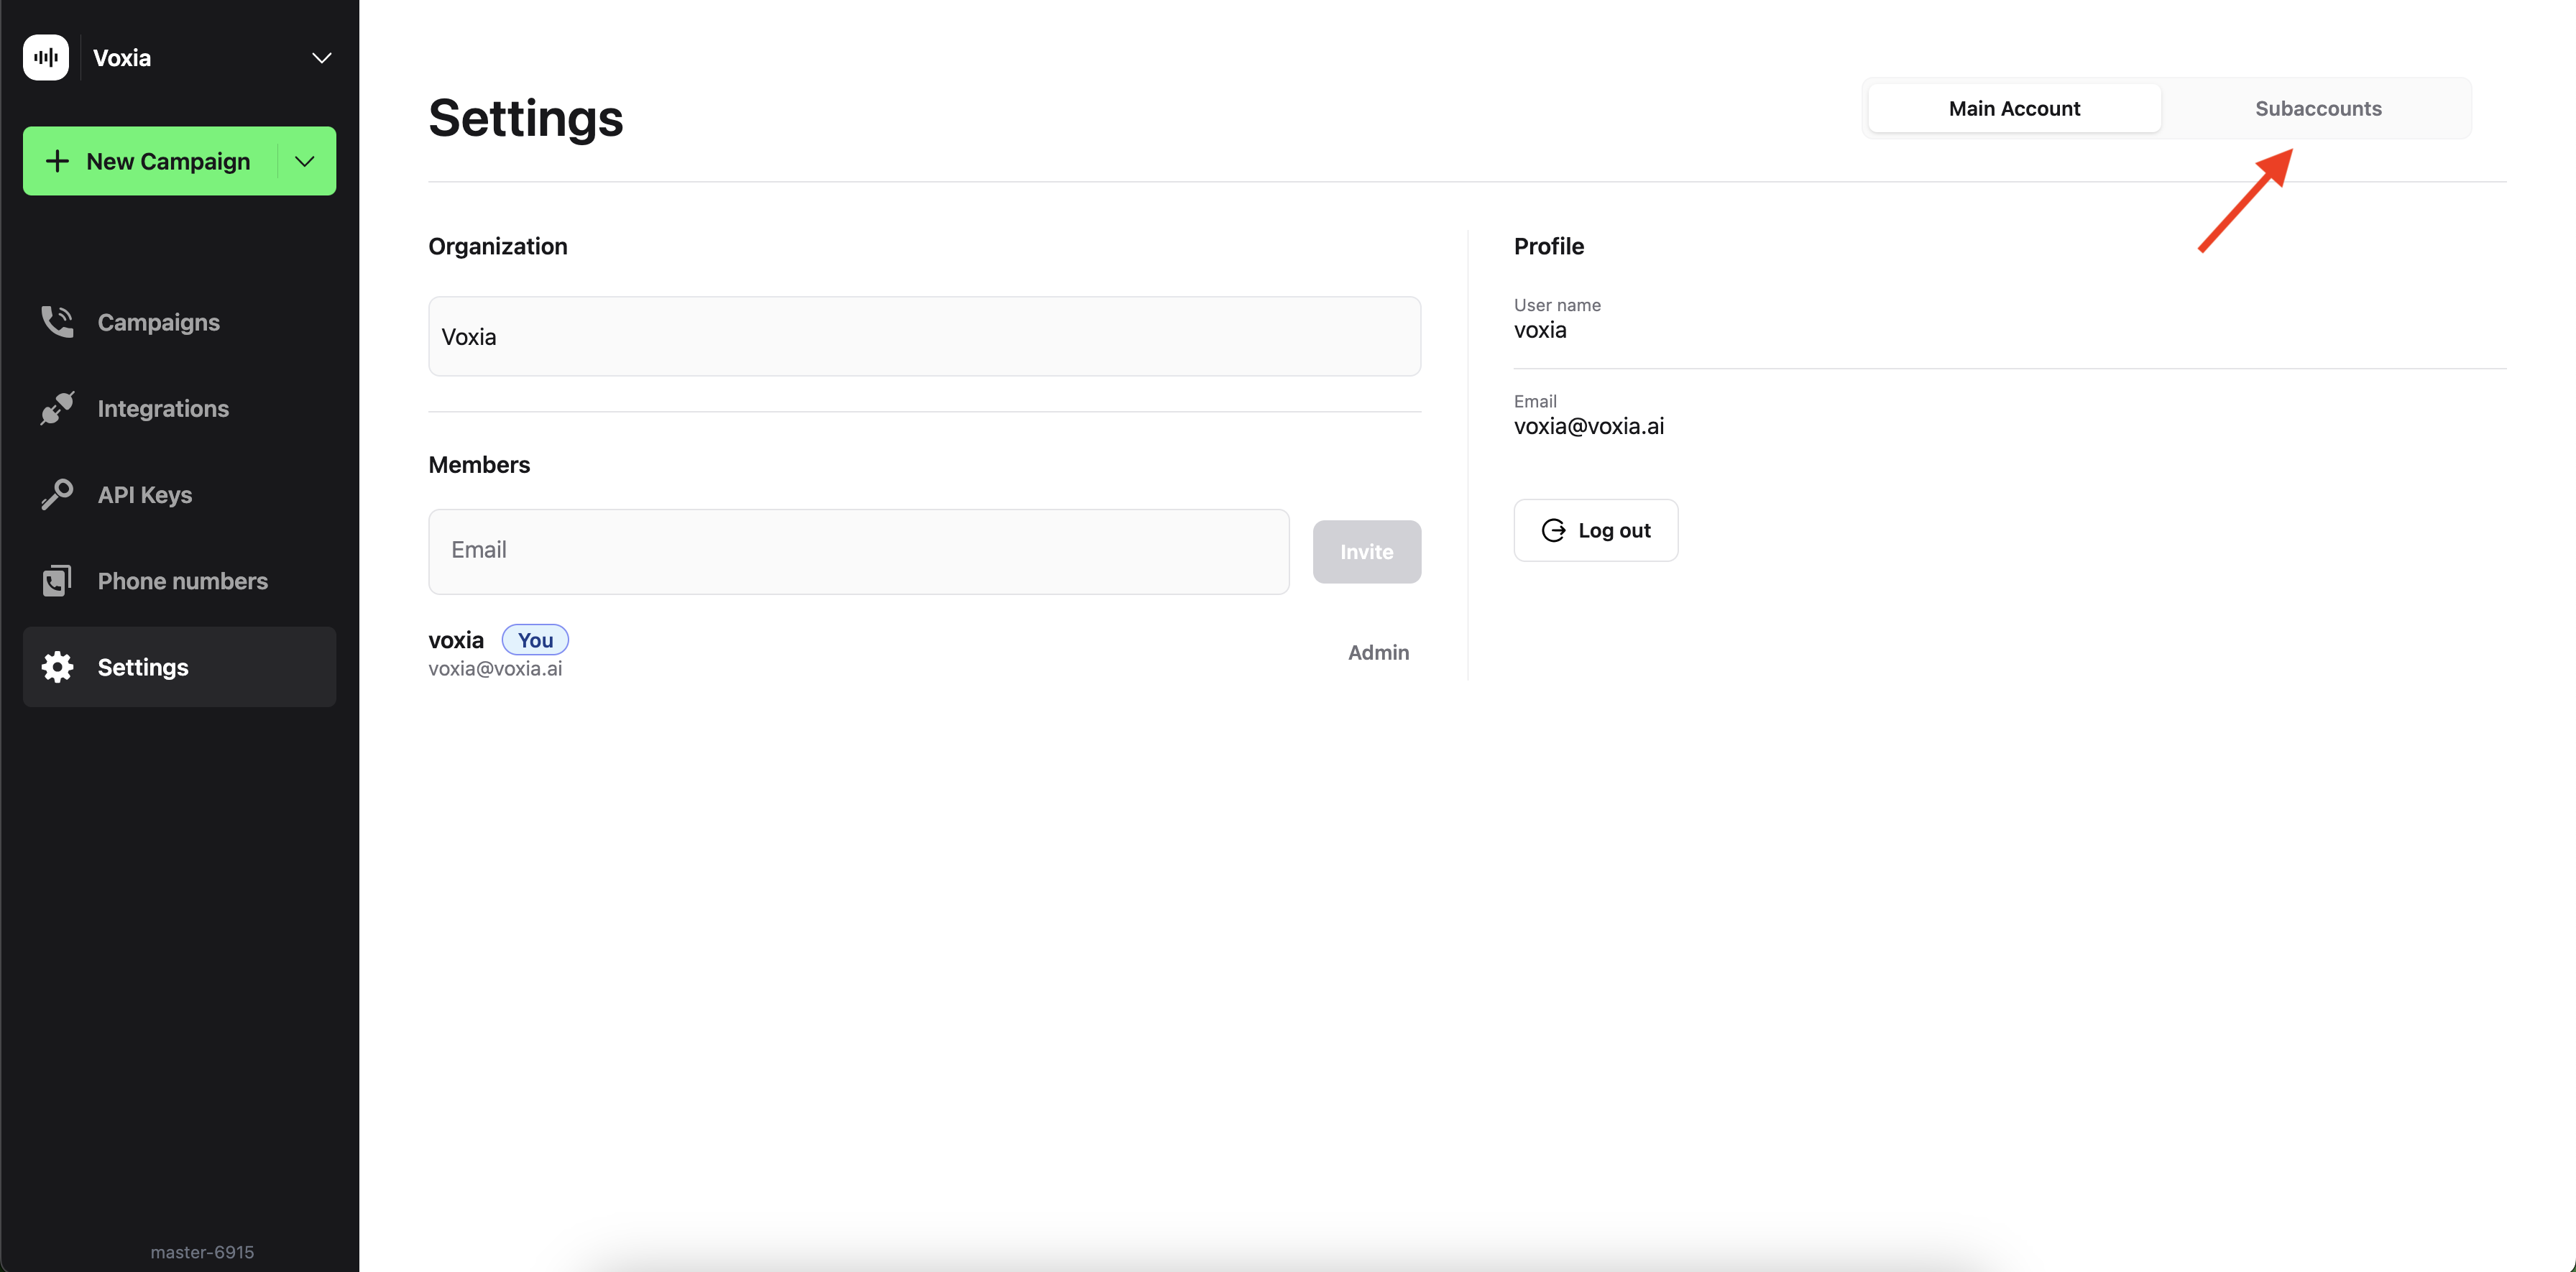
- Access Settings: Navigate to the left sidebar and click on Settings.
- Enable Subaccounts: At the top right, press on the
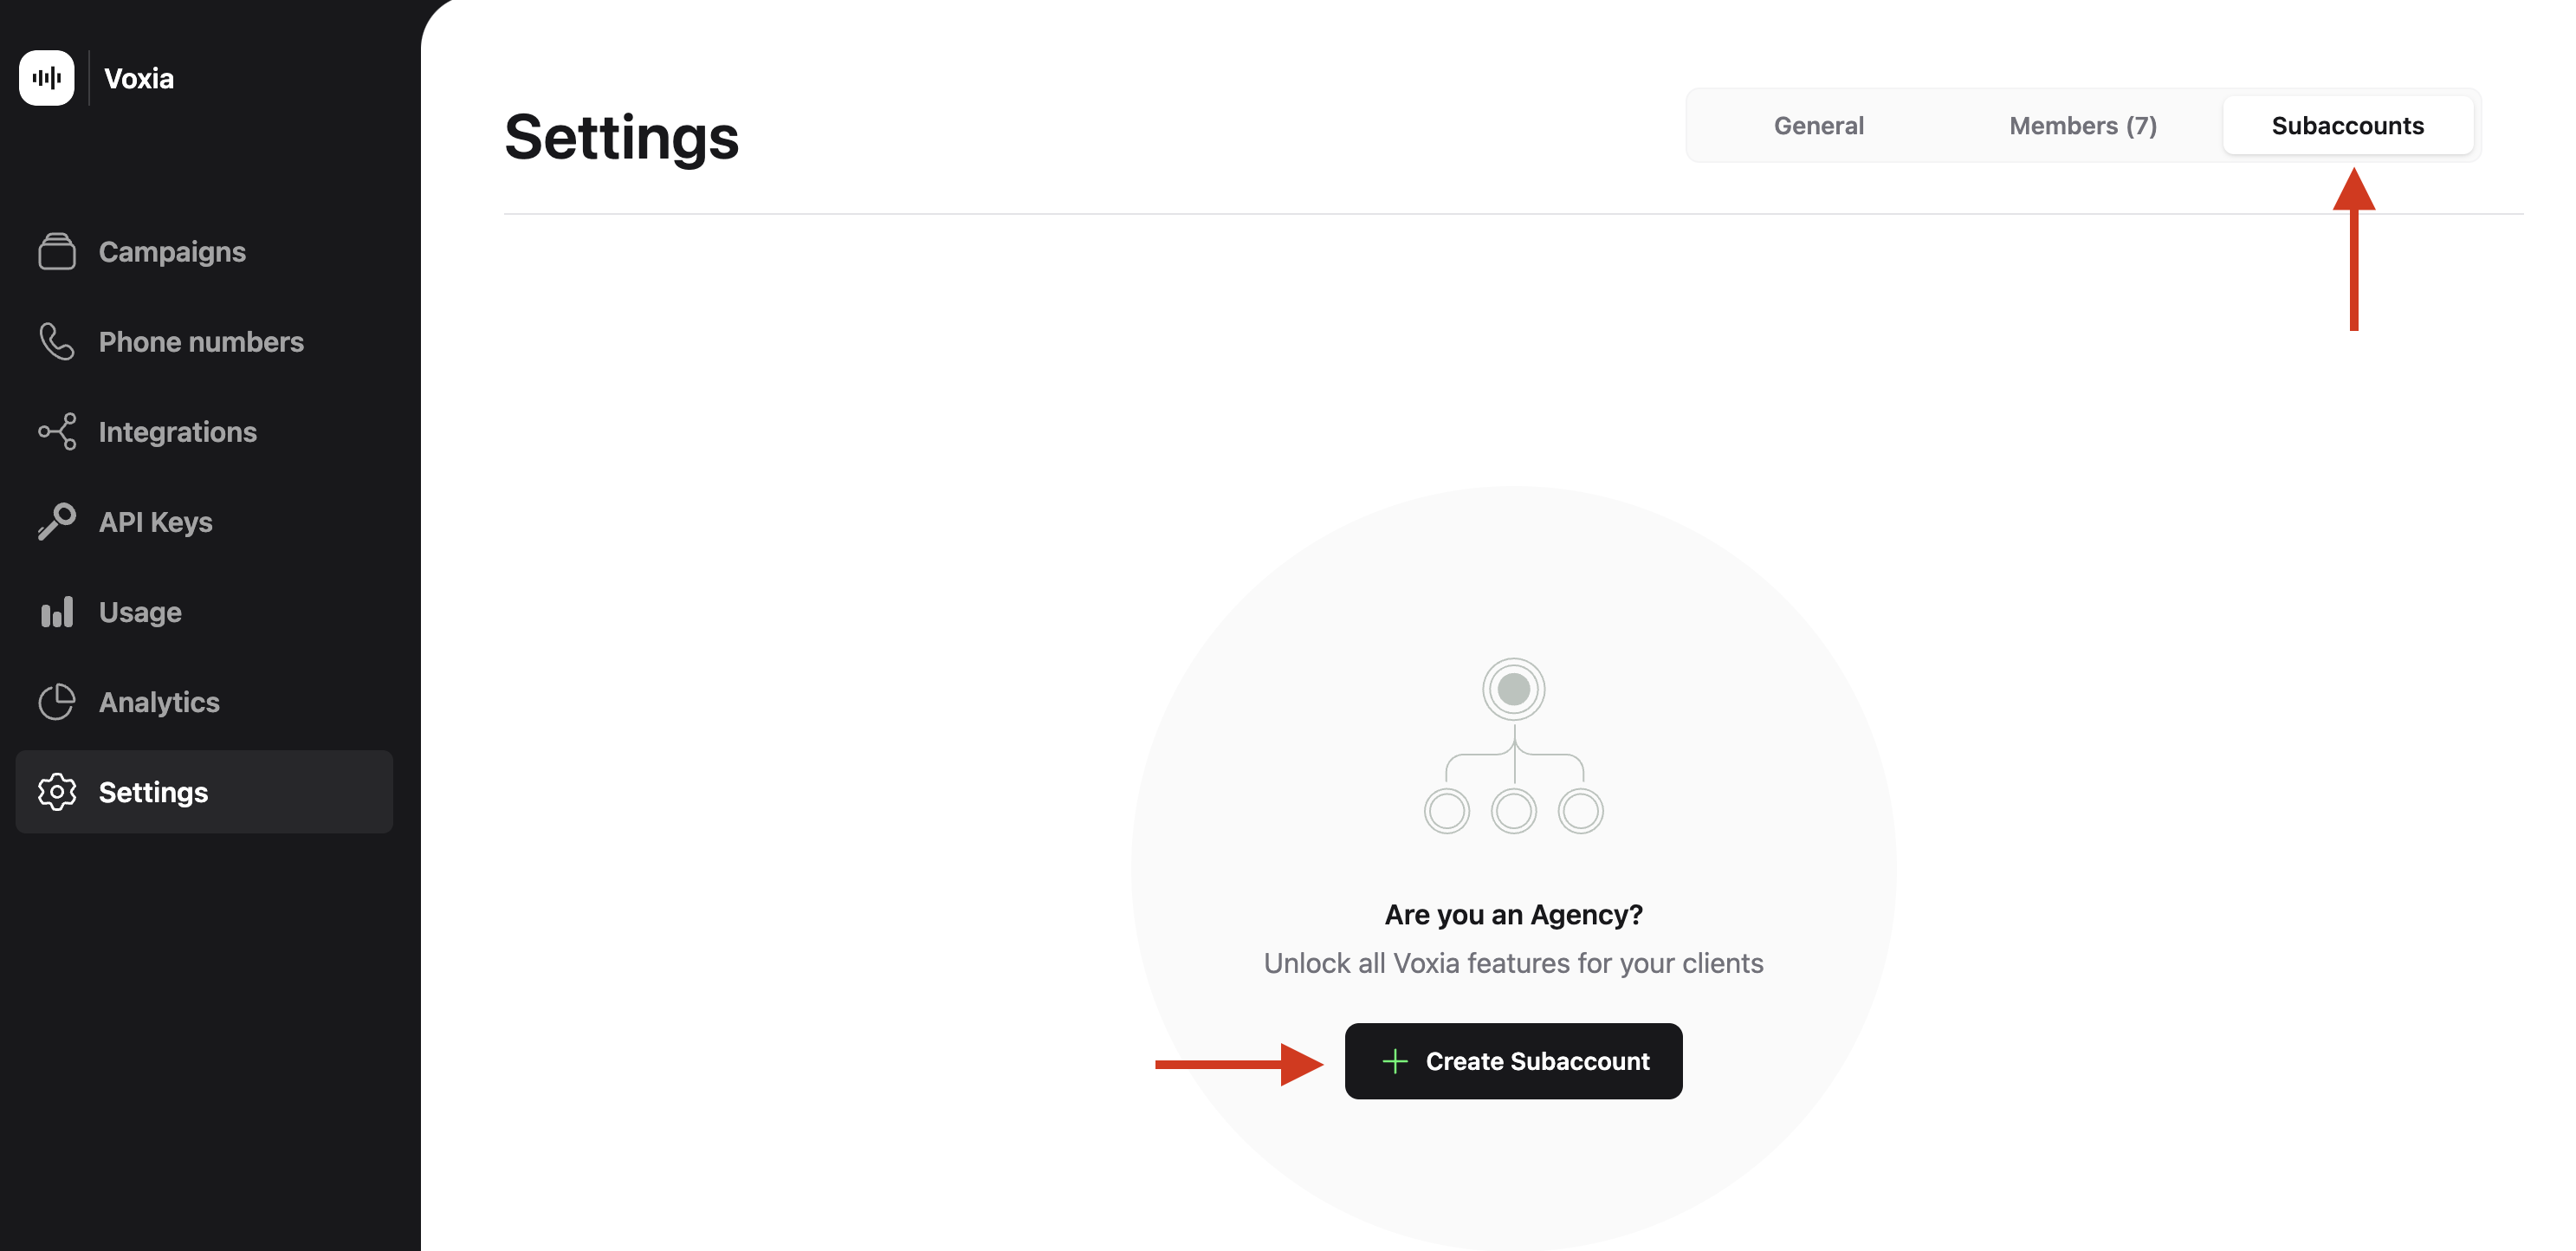
Subaccountsoption. - Create Subaccount: Click on
Create subaccount, and enter a name for the subaccount and click onCreate.
Switching Between Subaccounts
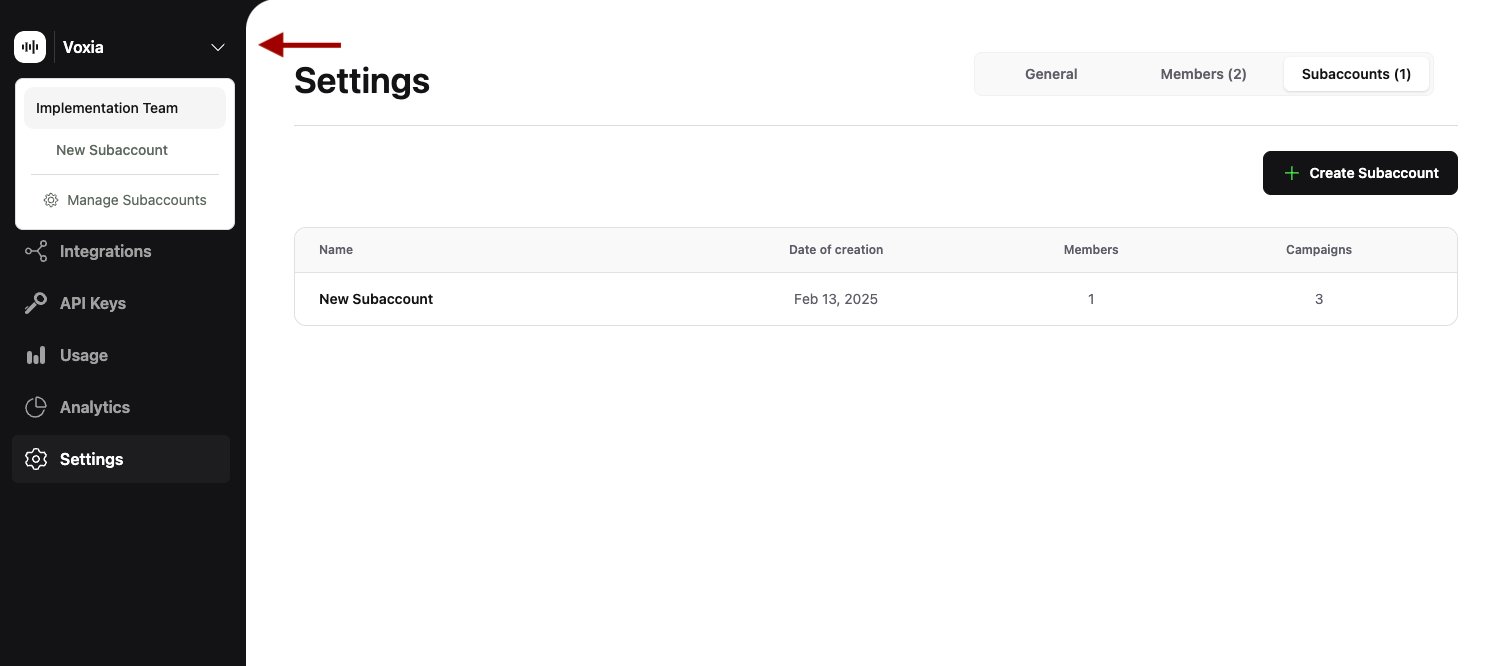
Once you have created your subaccount, you can switch between your main account and any subaccount easily:- Through Settings: Go to Settings and press the
Subaccountsoption. - Using the Organization Dropdown:
- Click the arrow down next to your organization’s name at the top left.
- Select the subaccount you wish to access from the dropdown menu.
Inviting Members to a Subaccount
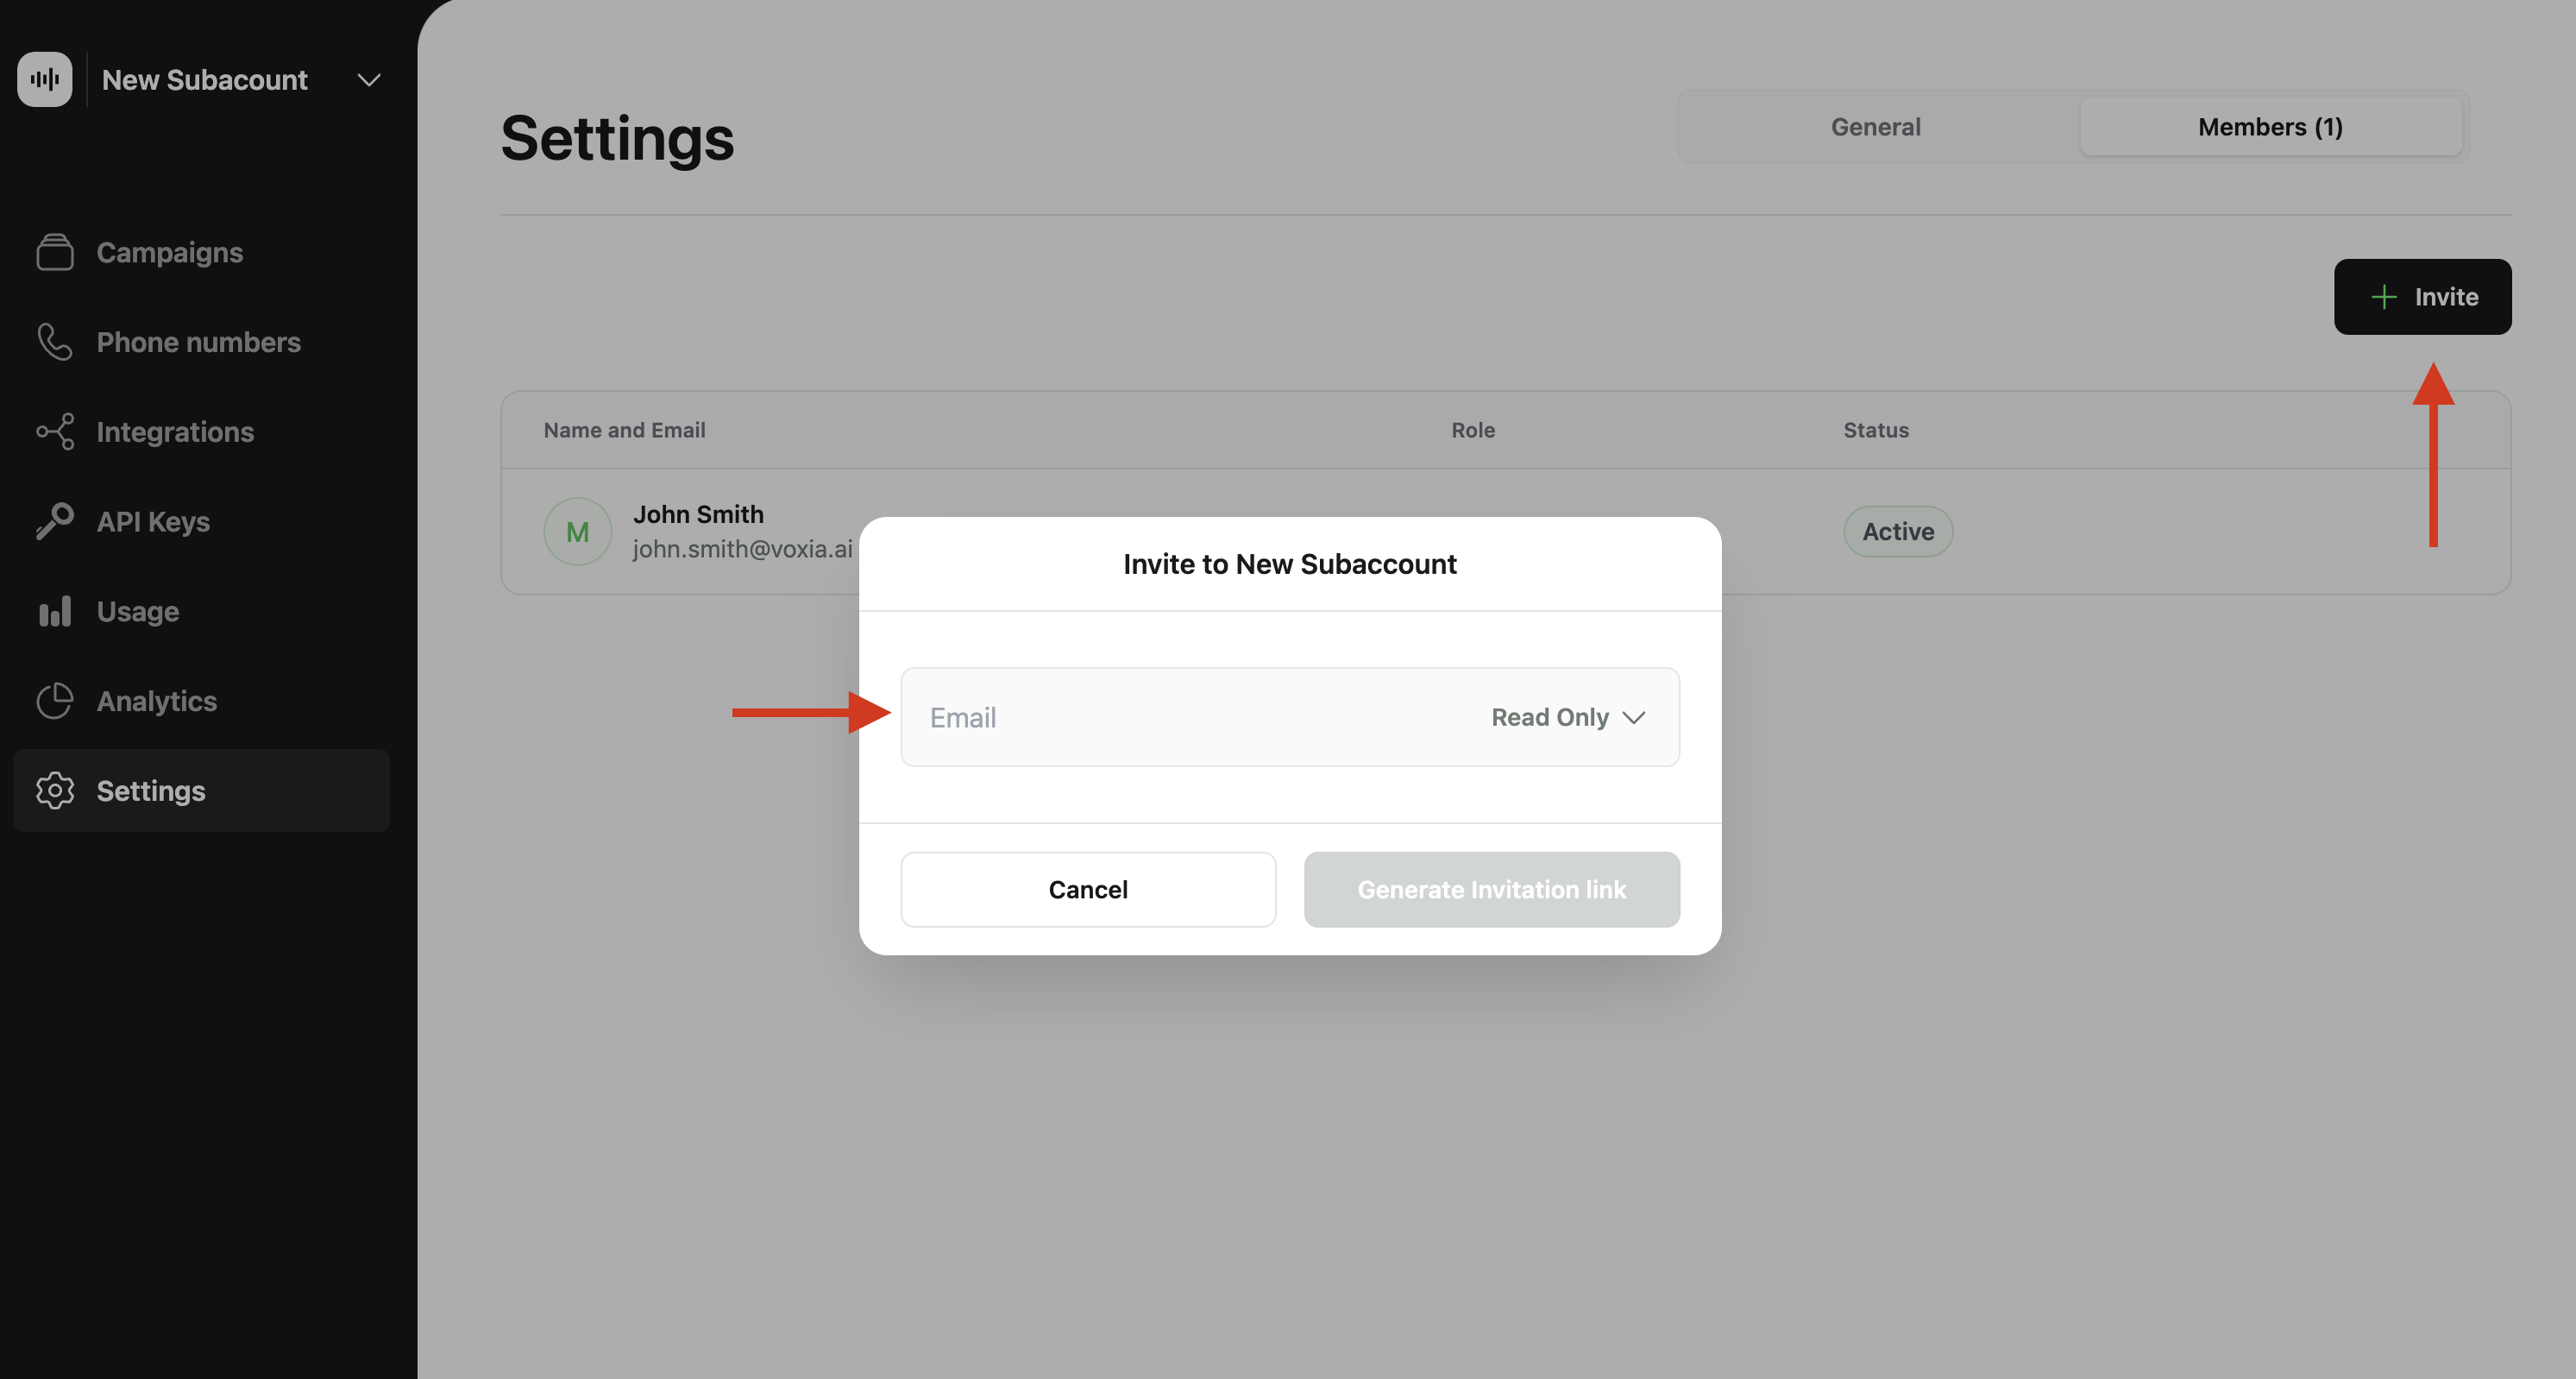
After entering your subaccount:- Navigate to Members: Go to Settings and locate the Members section.
- Send Invitations:
- Enter the email addresses of the individuals you want to invite.
- Click on
Invite. An invitation will be sent to them to join the new subaccount. - Select the desired permission level for the member.
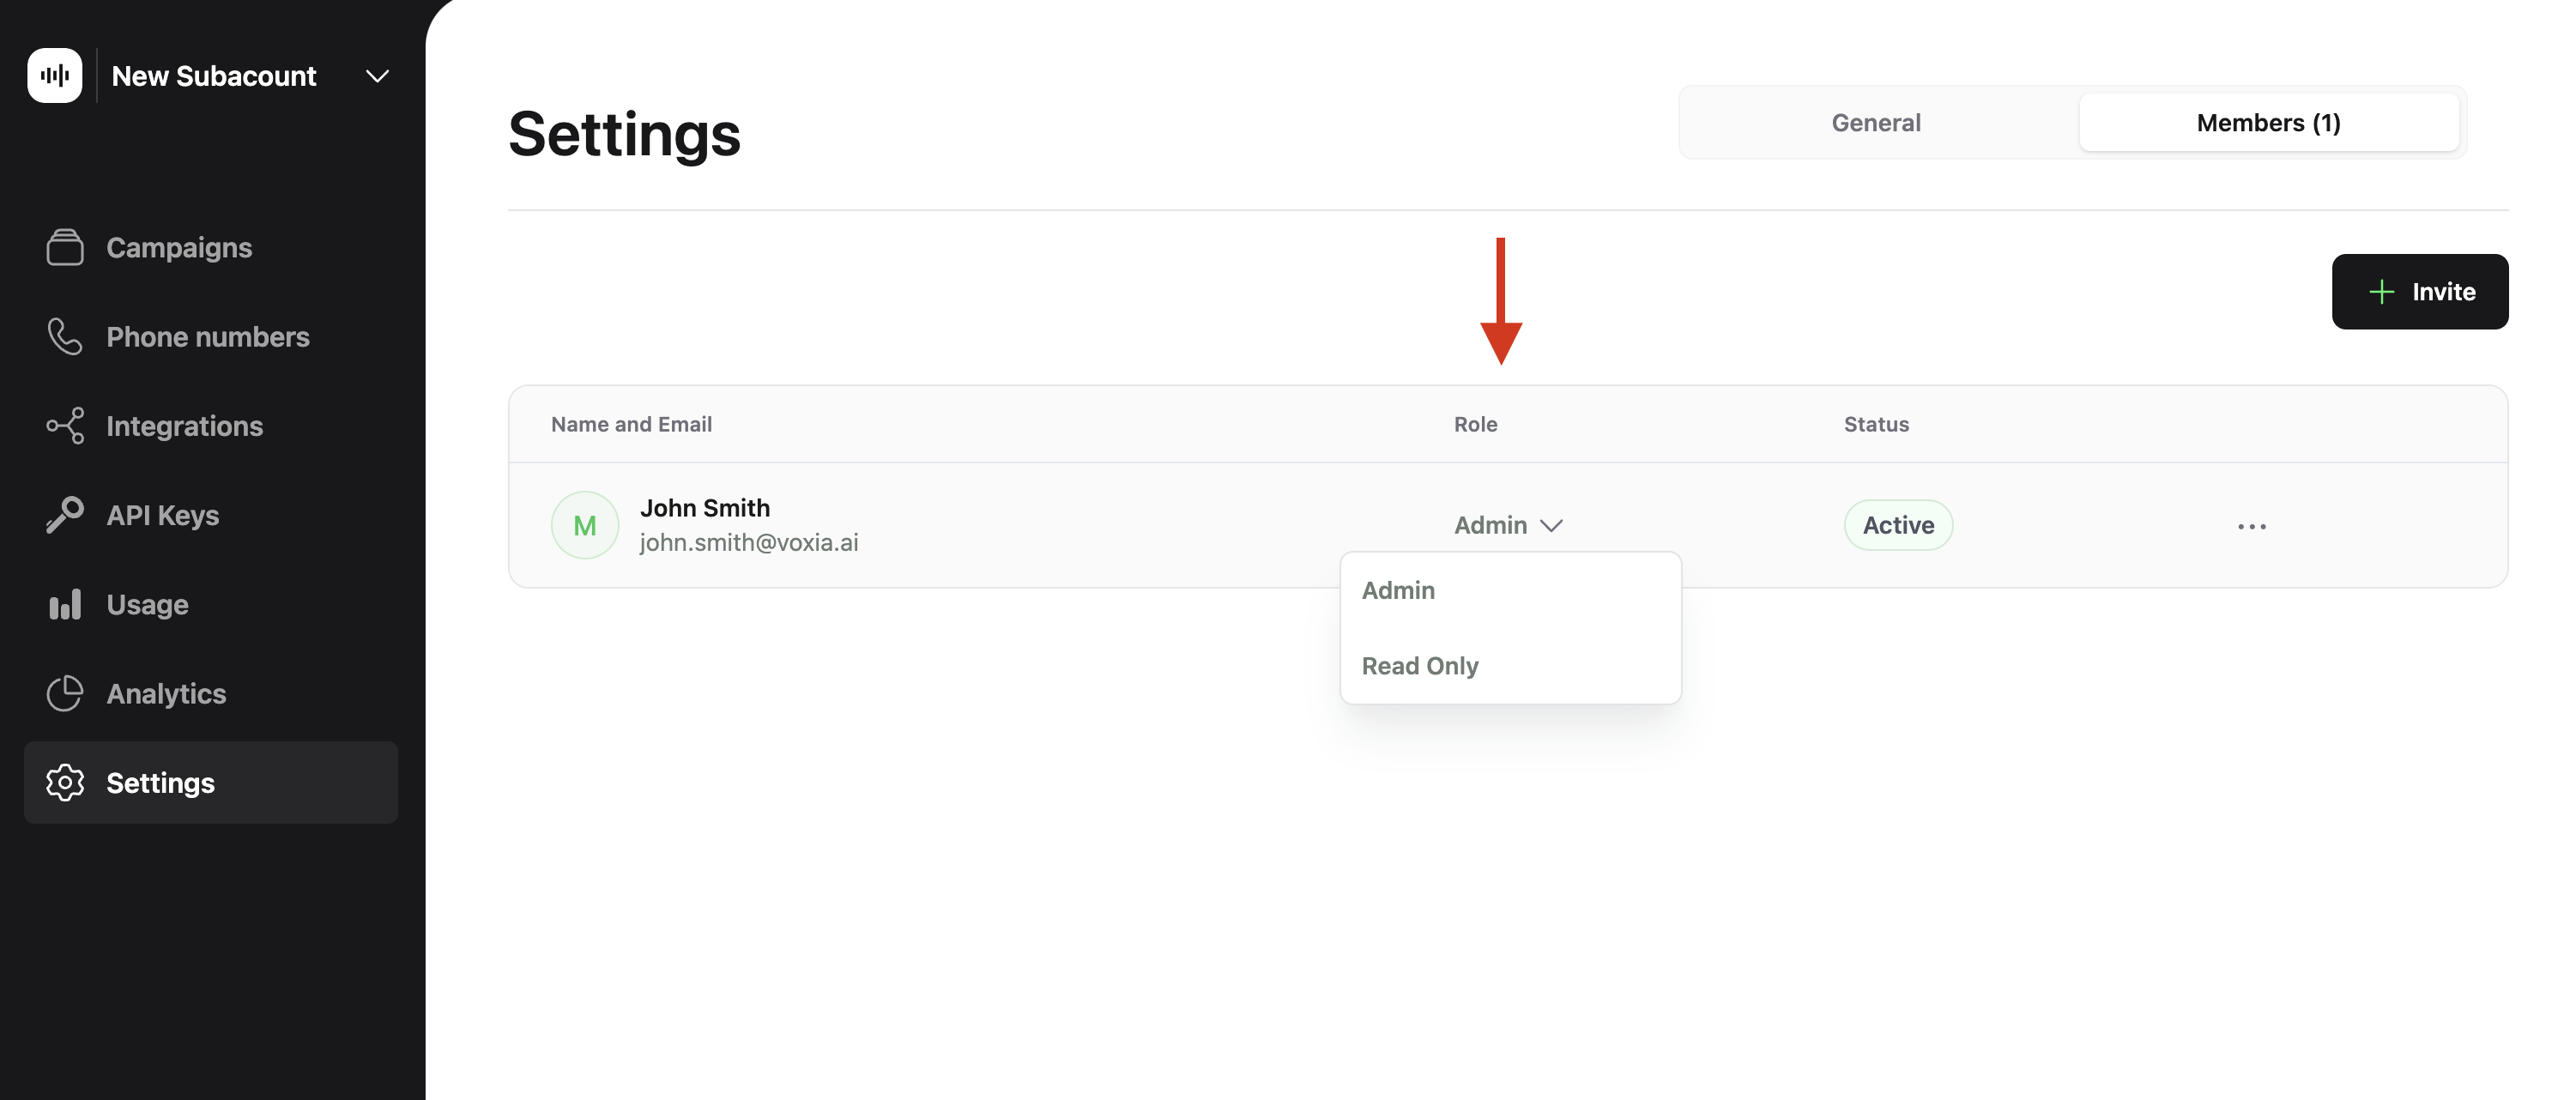
Managing Member Permissions
To adjust permissions for any member within the subaccount:- Click on the arrow down next to the member’s email in the Members section.
- Select the desired permission level:
AdminorReadOnly.