Adding a Webhook to Your Campaign
To add a webhook to your campaign, navigate to your campaign settings → Workflow tab → Post-Call Actions → Add.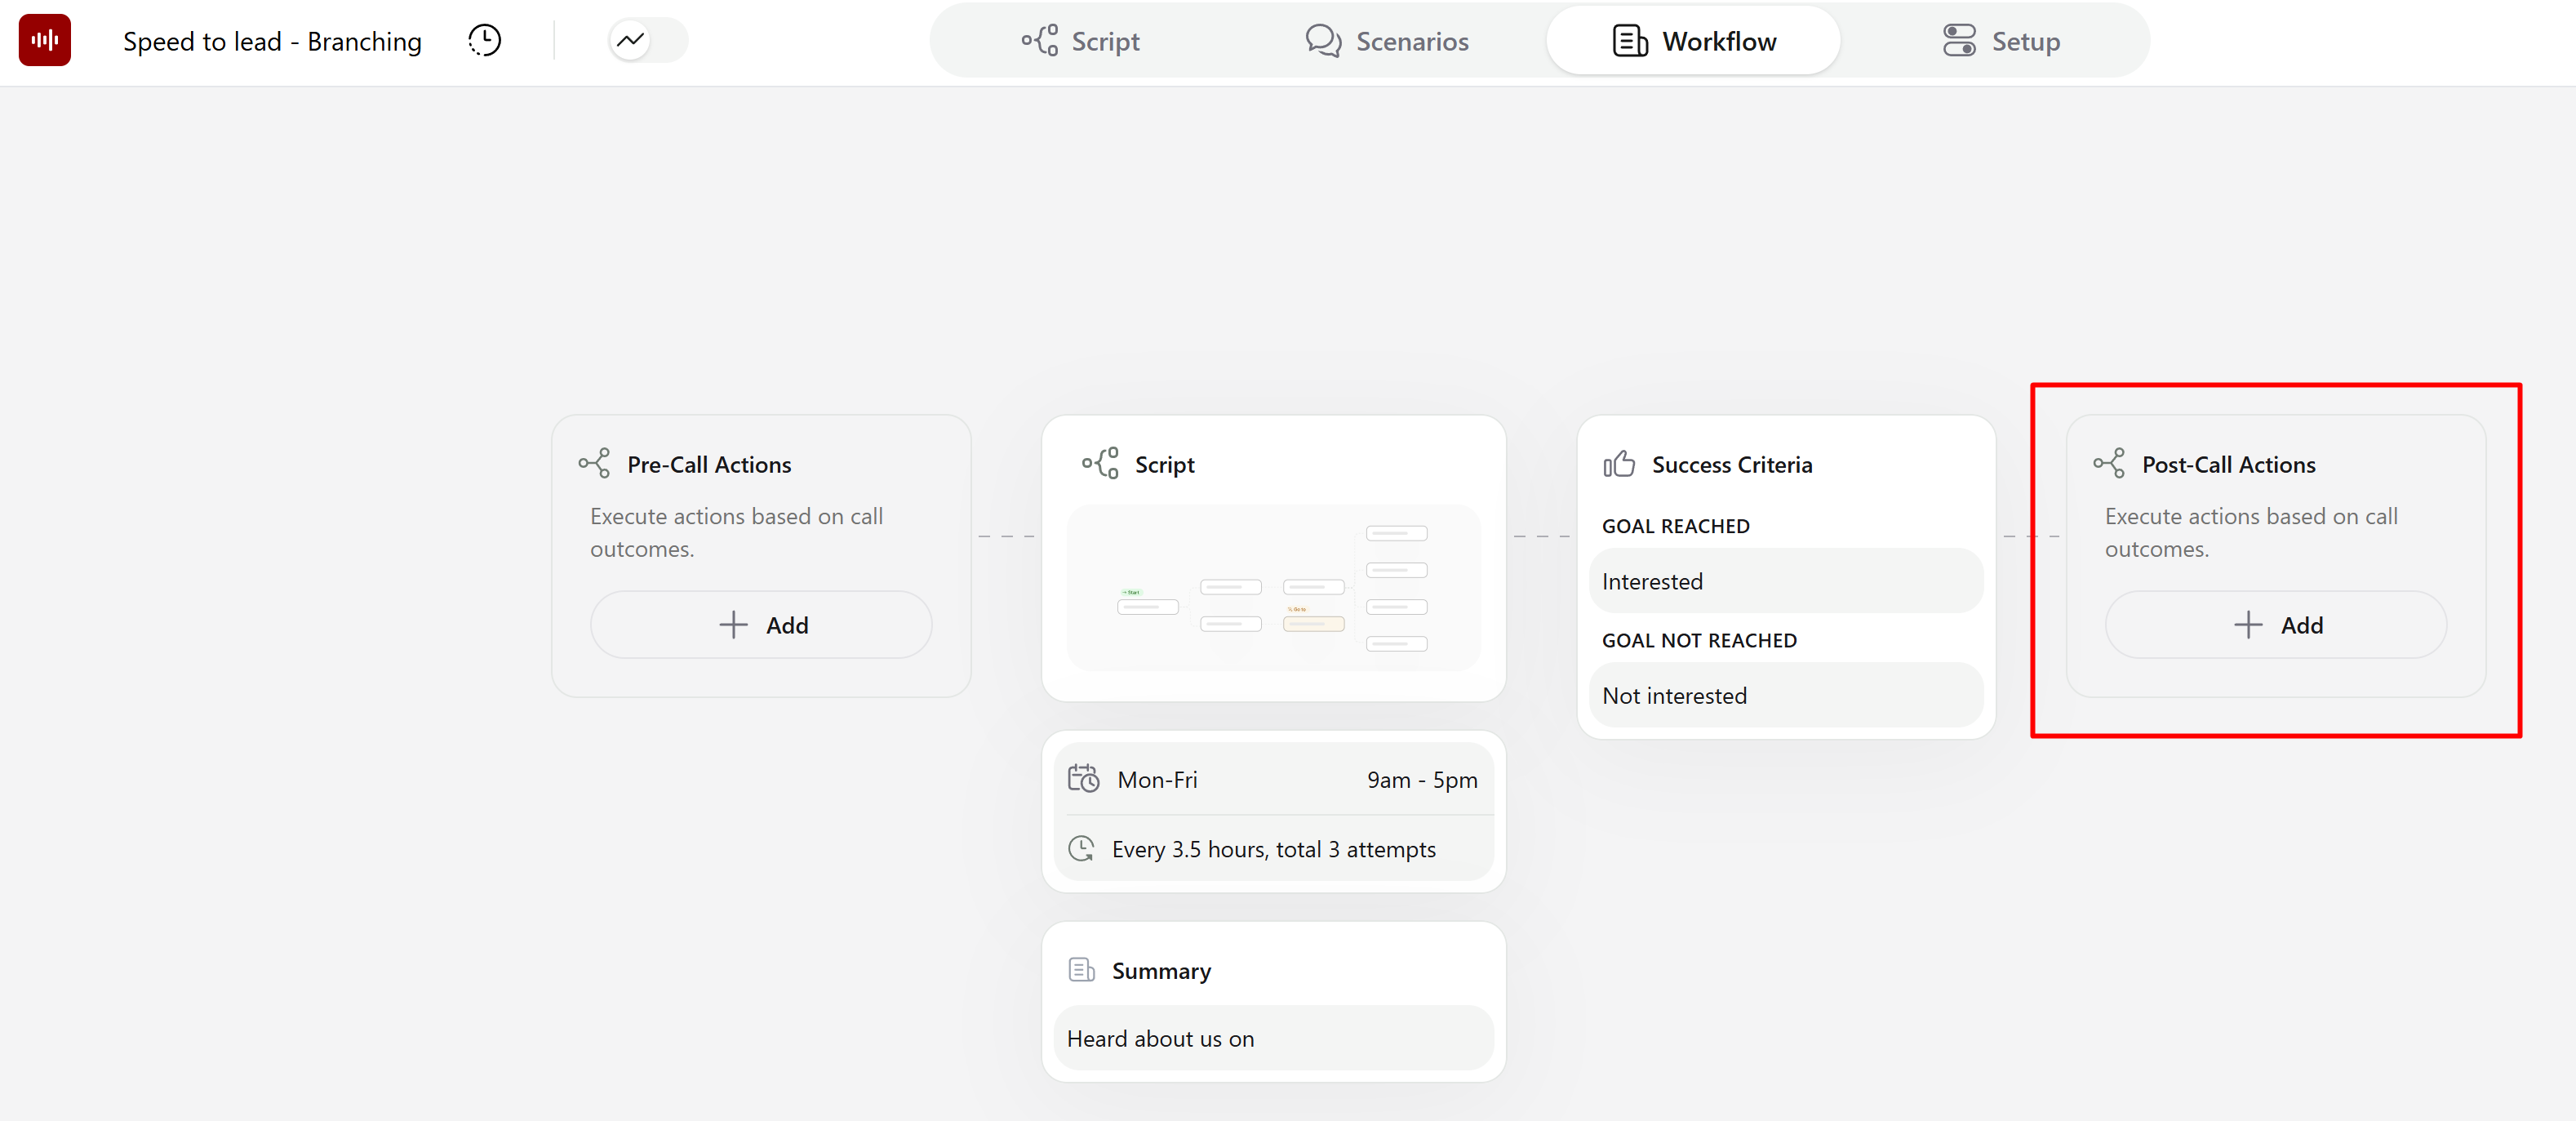
Configure an Advanced Webhook
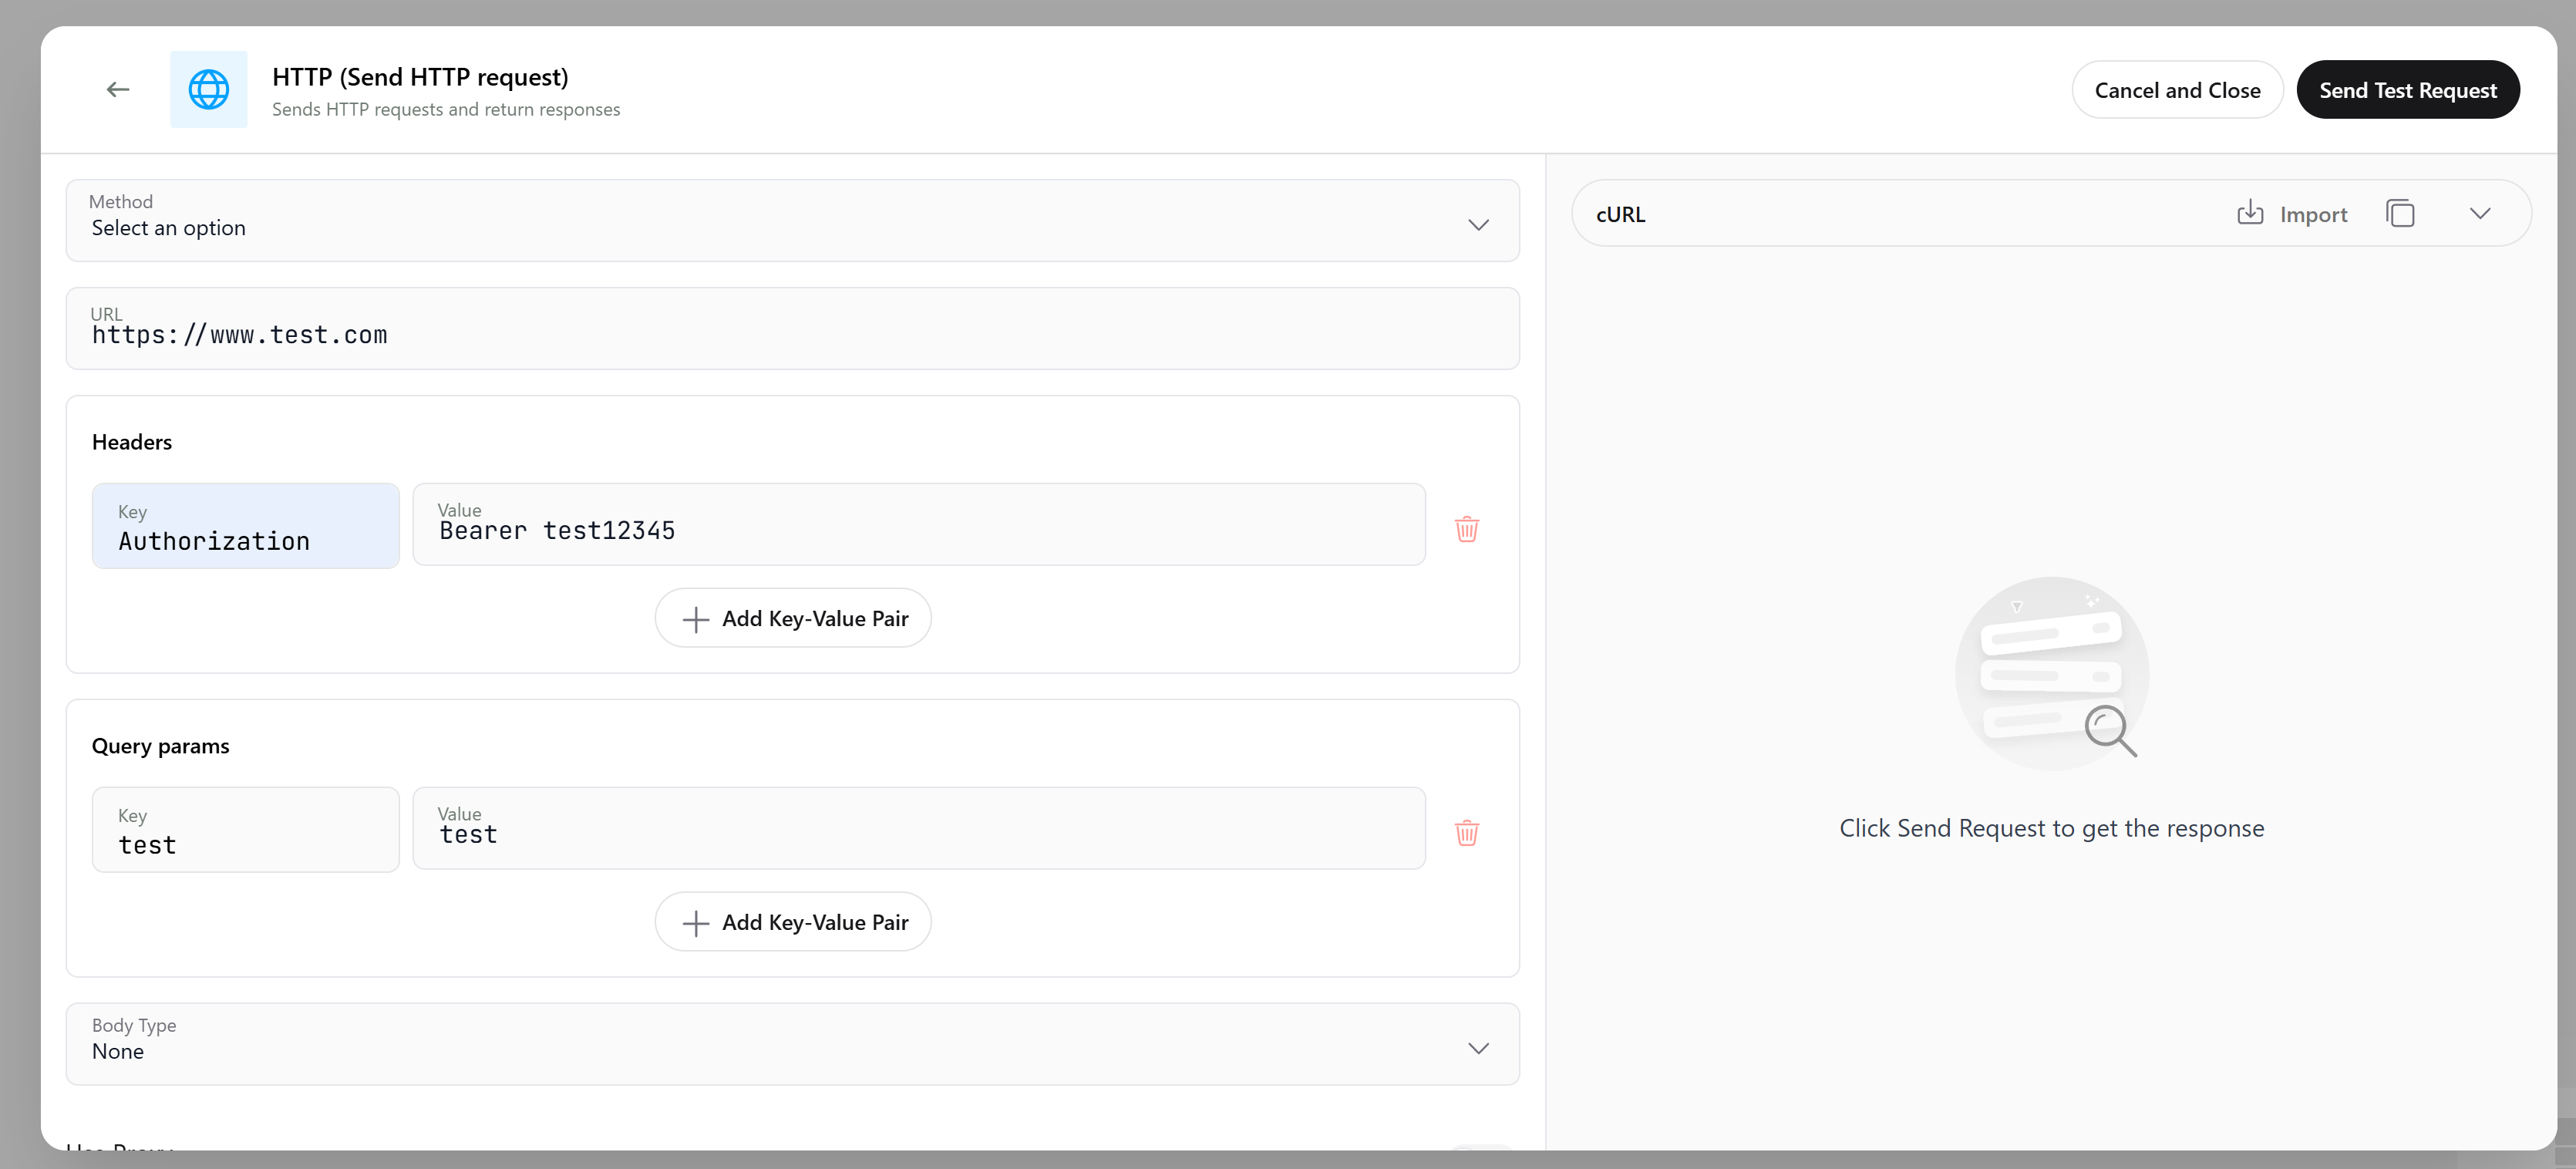
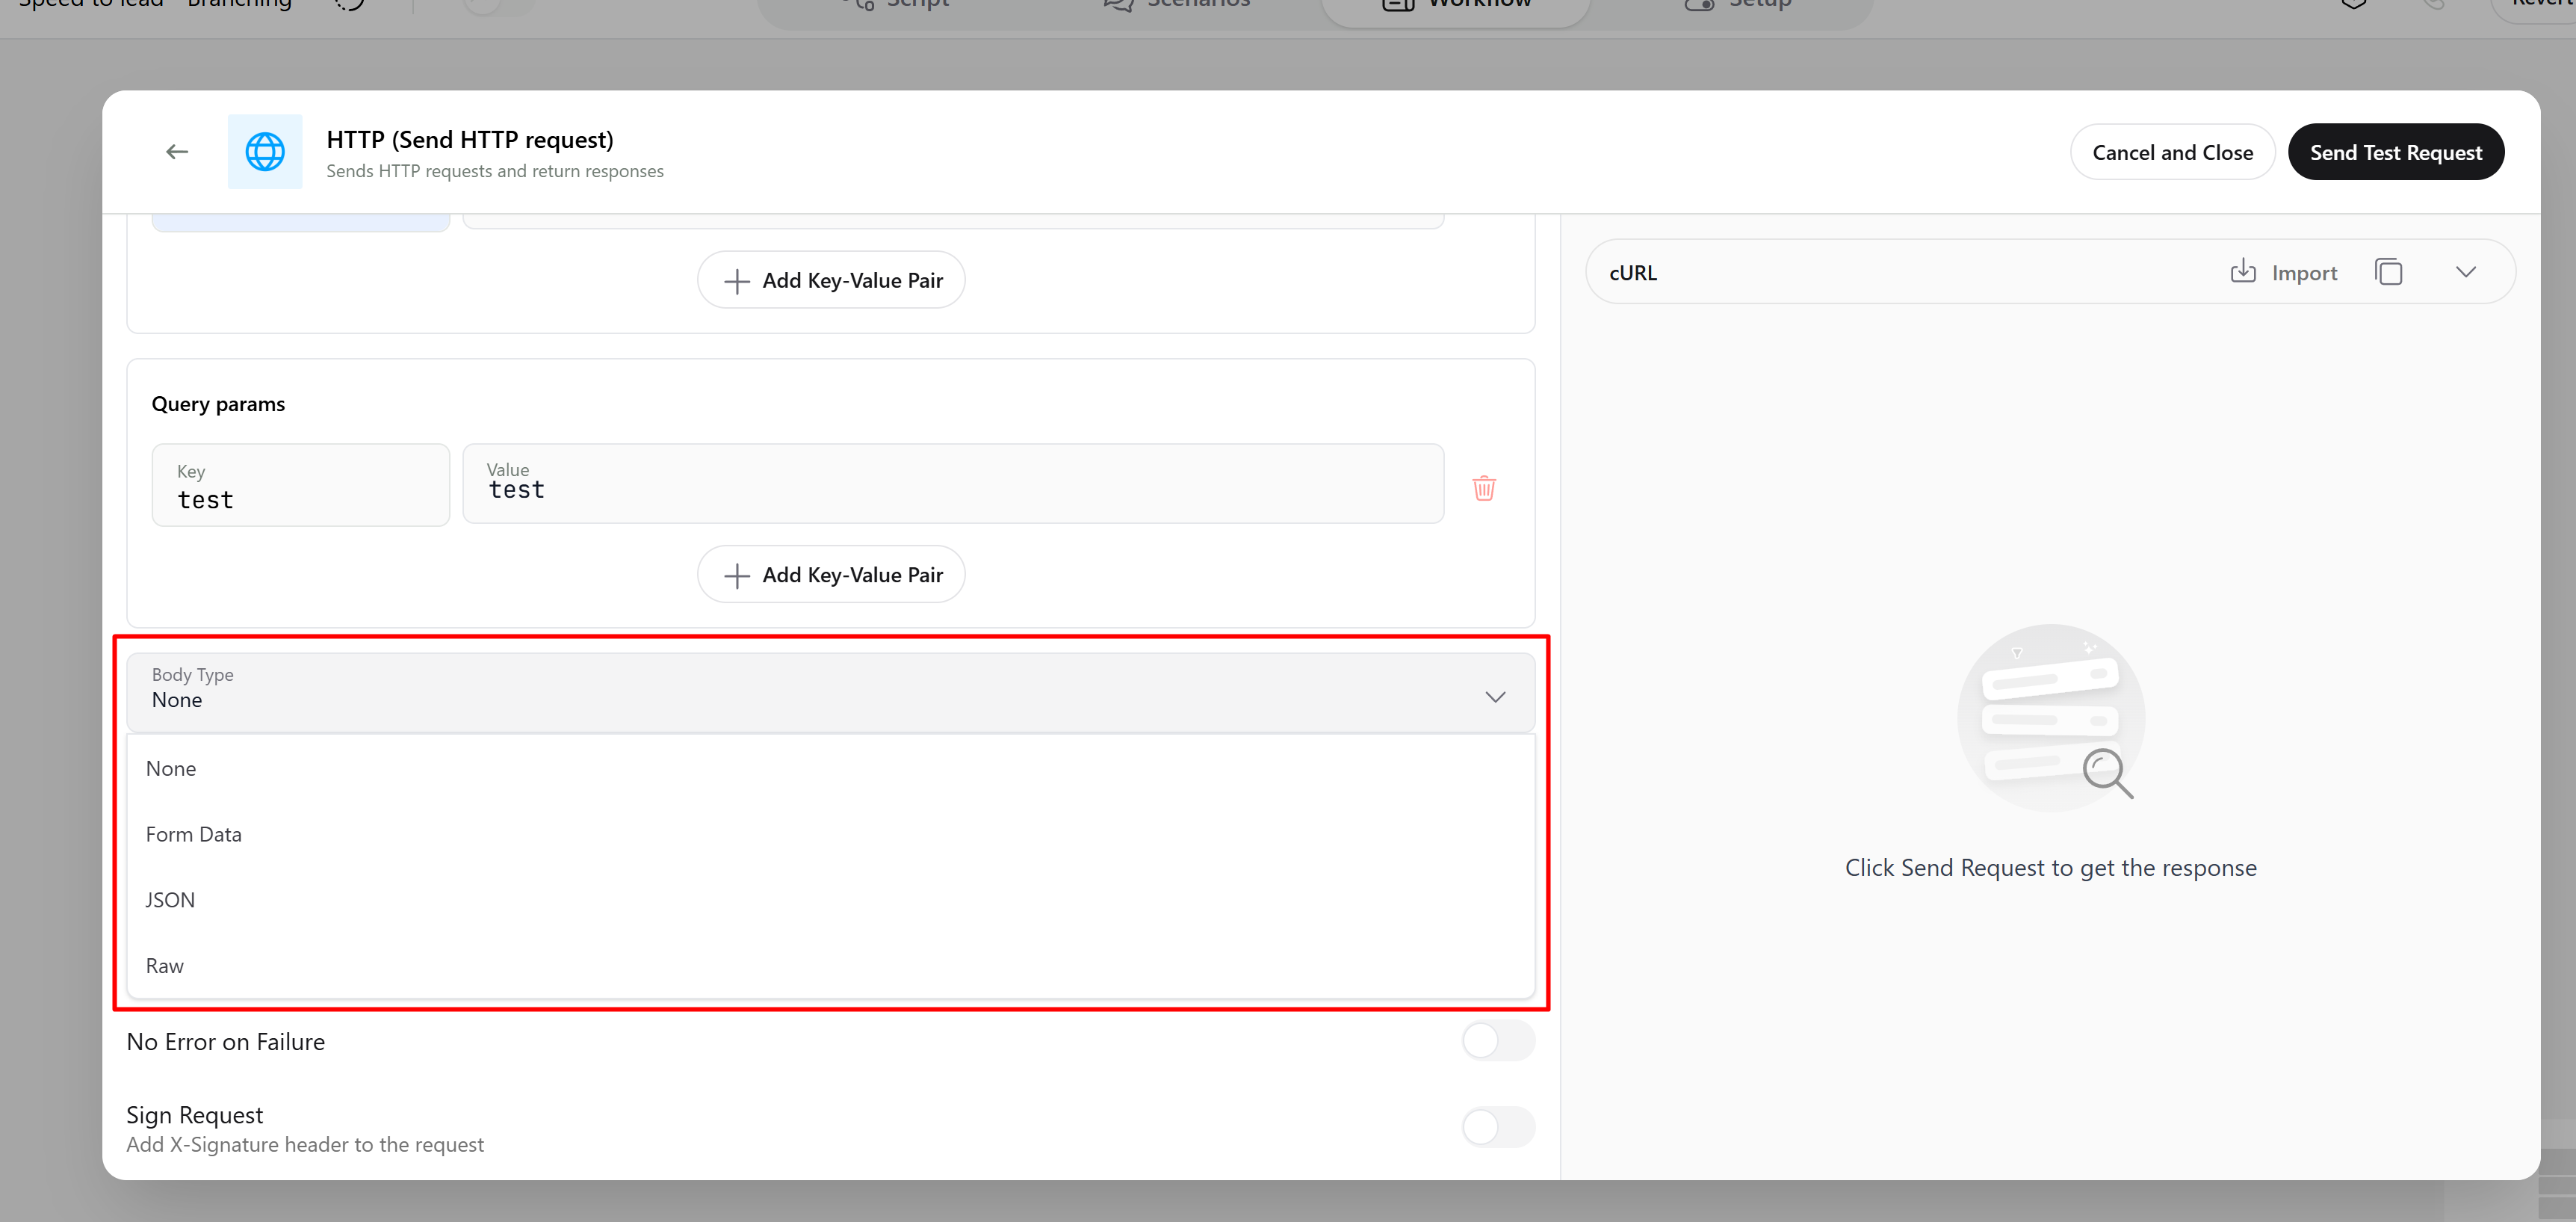
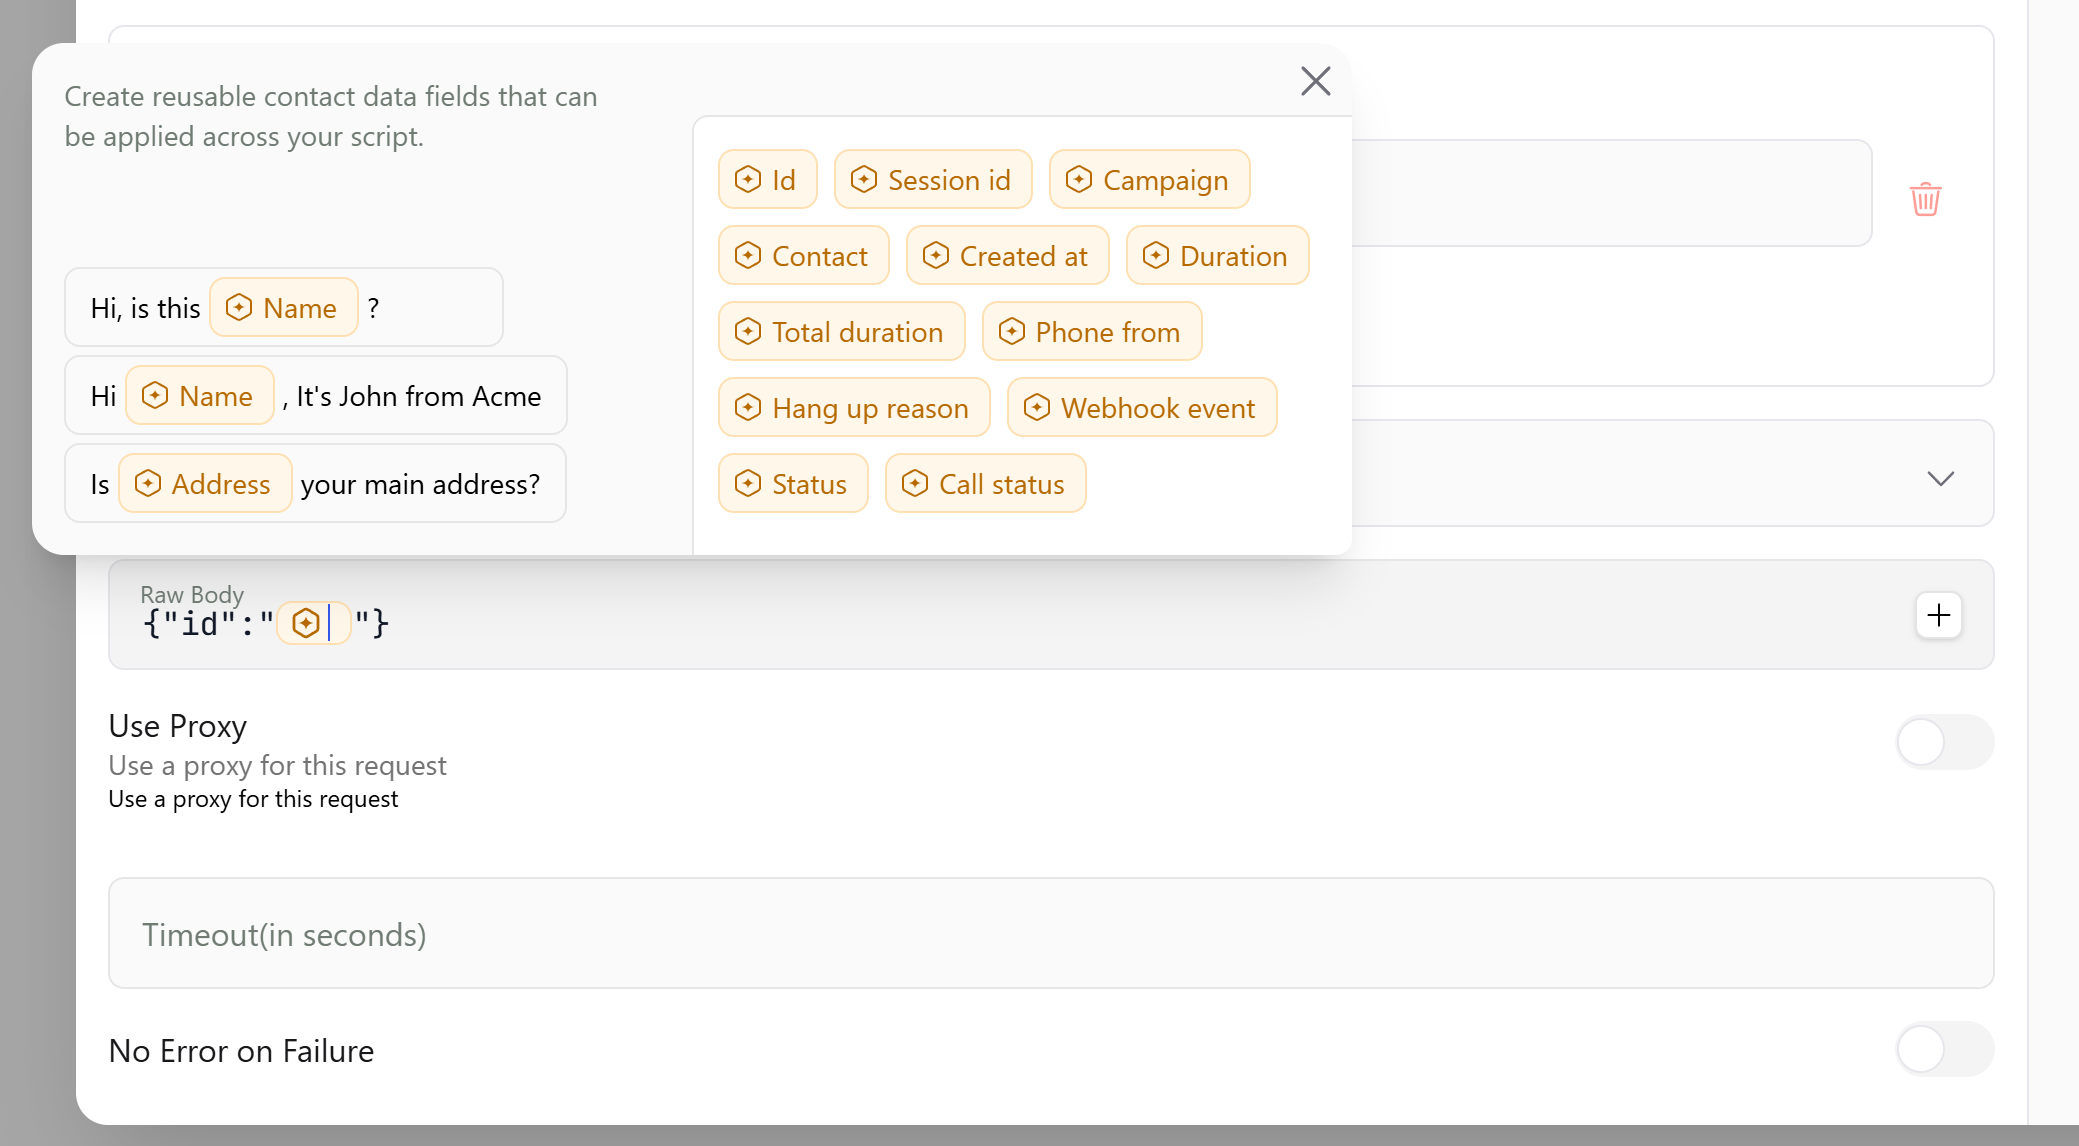
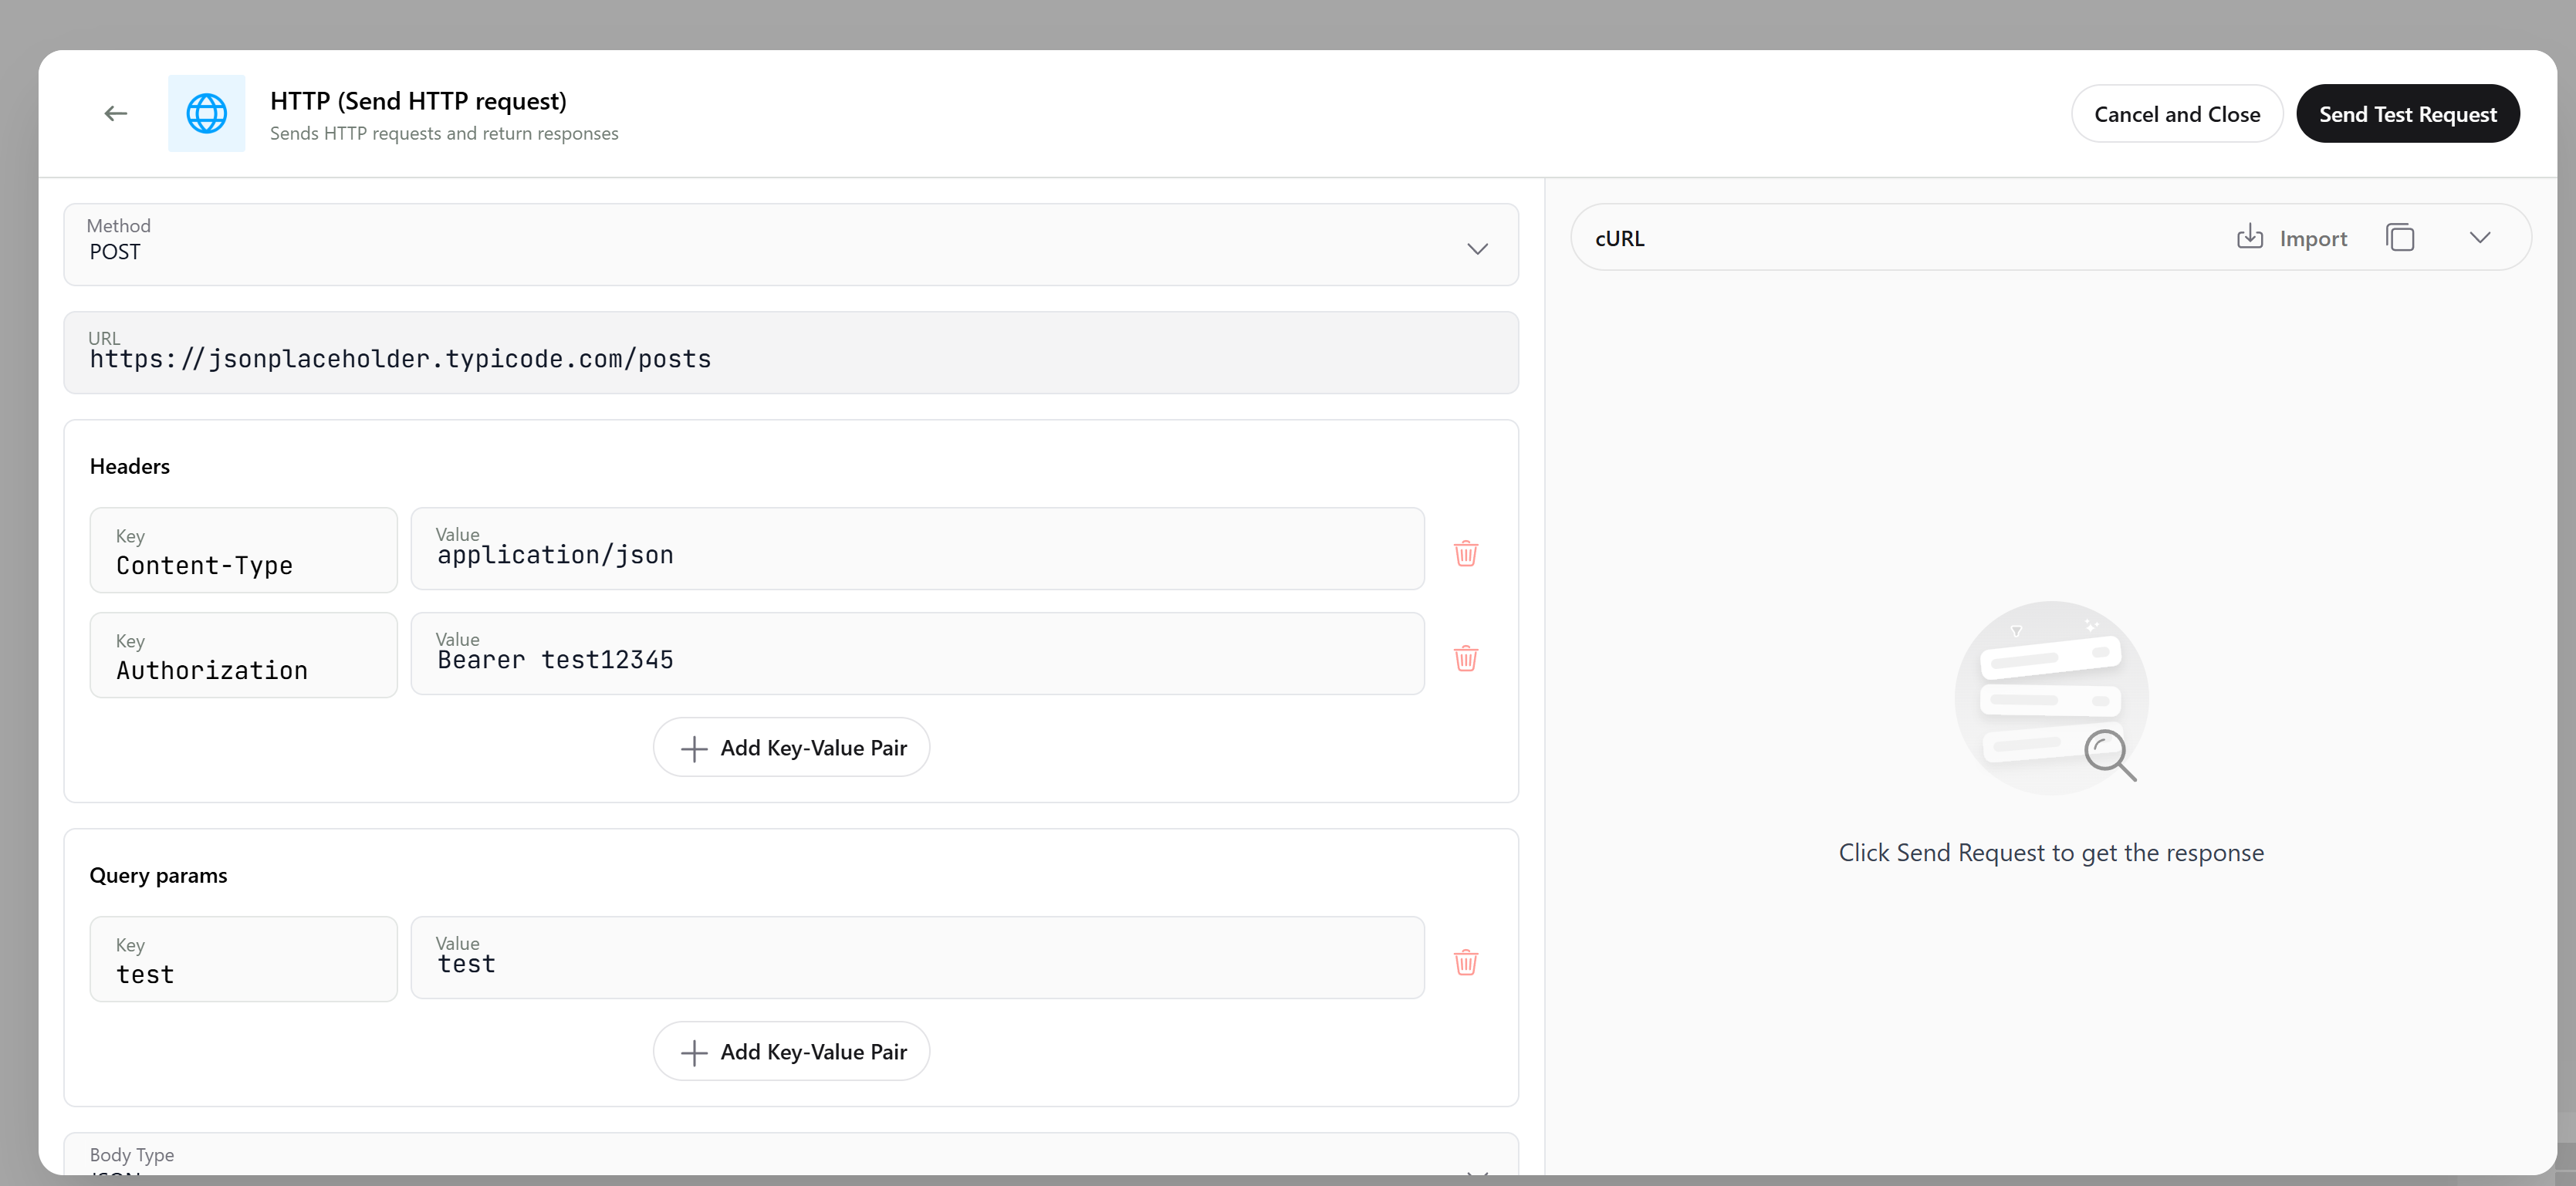
In the webhook editor, you can flexibly configure your HTTP request. First, you need to enter the URL where you will send the request and select the HTTP Method (GET, POST, PUT, PATCH, or DELETE). Then configure Headers for authorization (if needed) and add Query Parameters (if needed) that will be prepended to the URL.
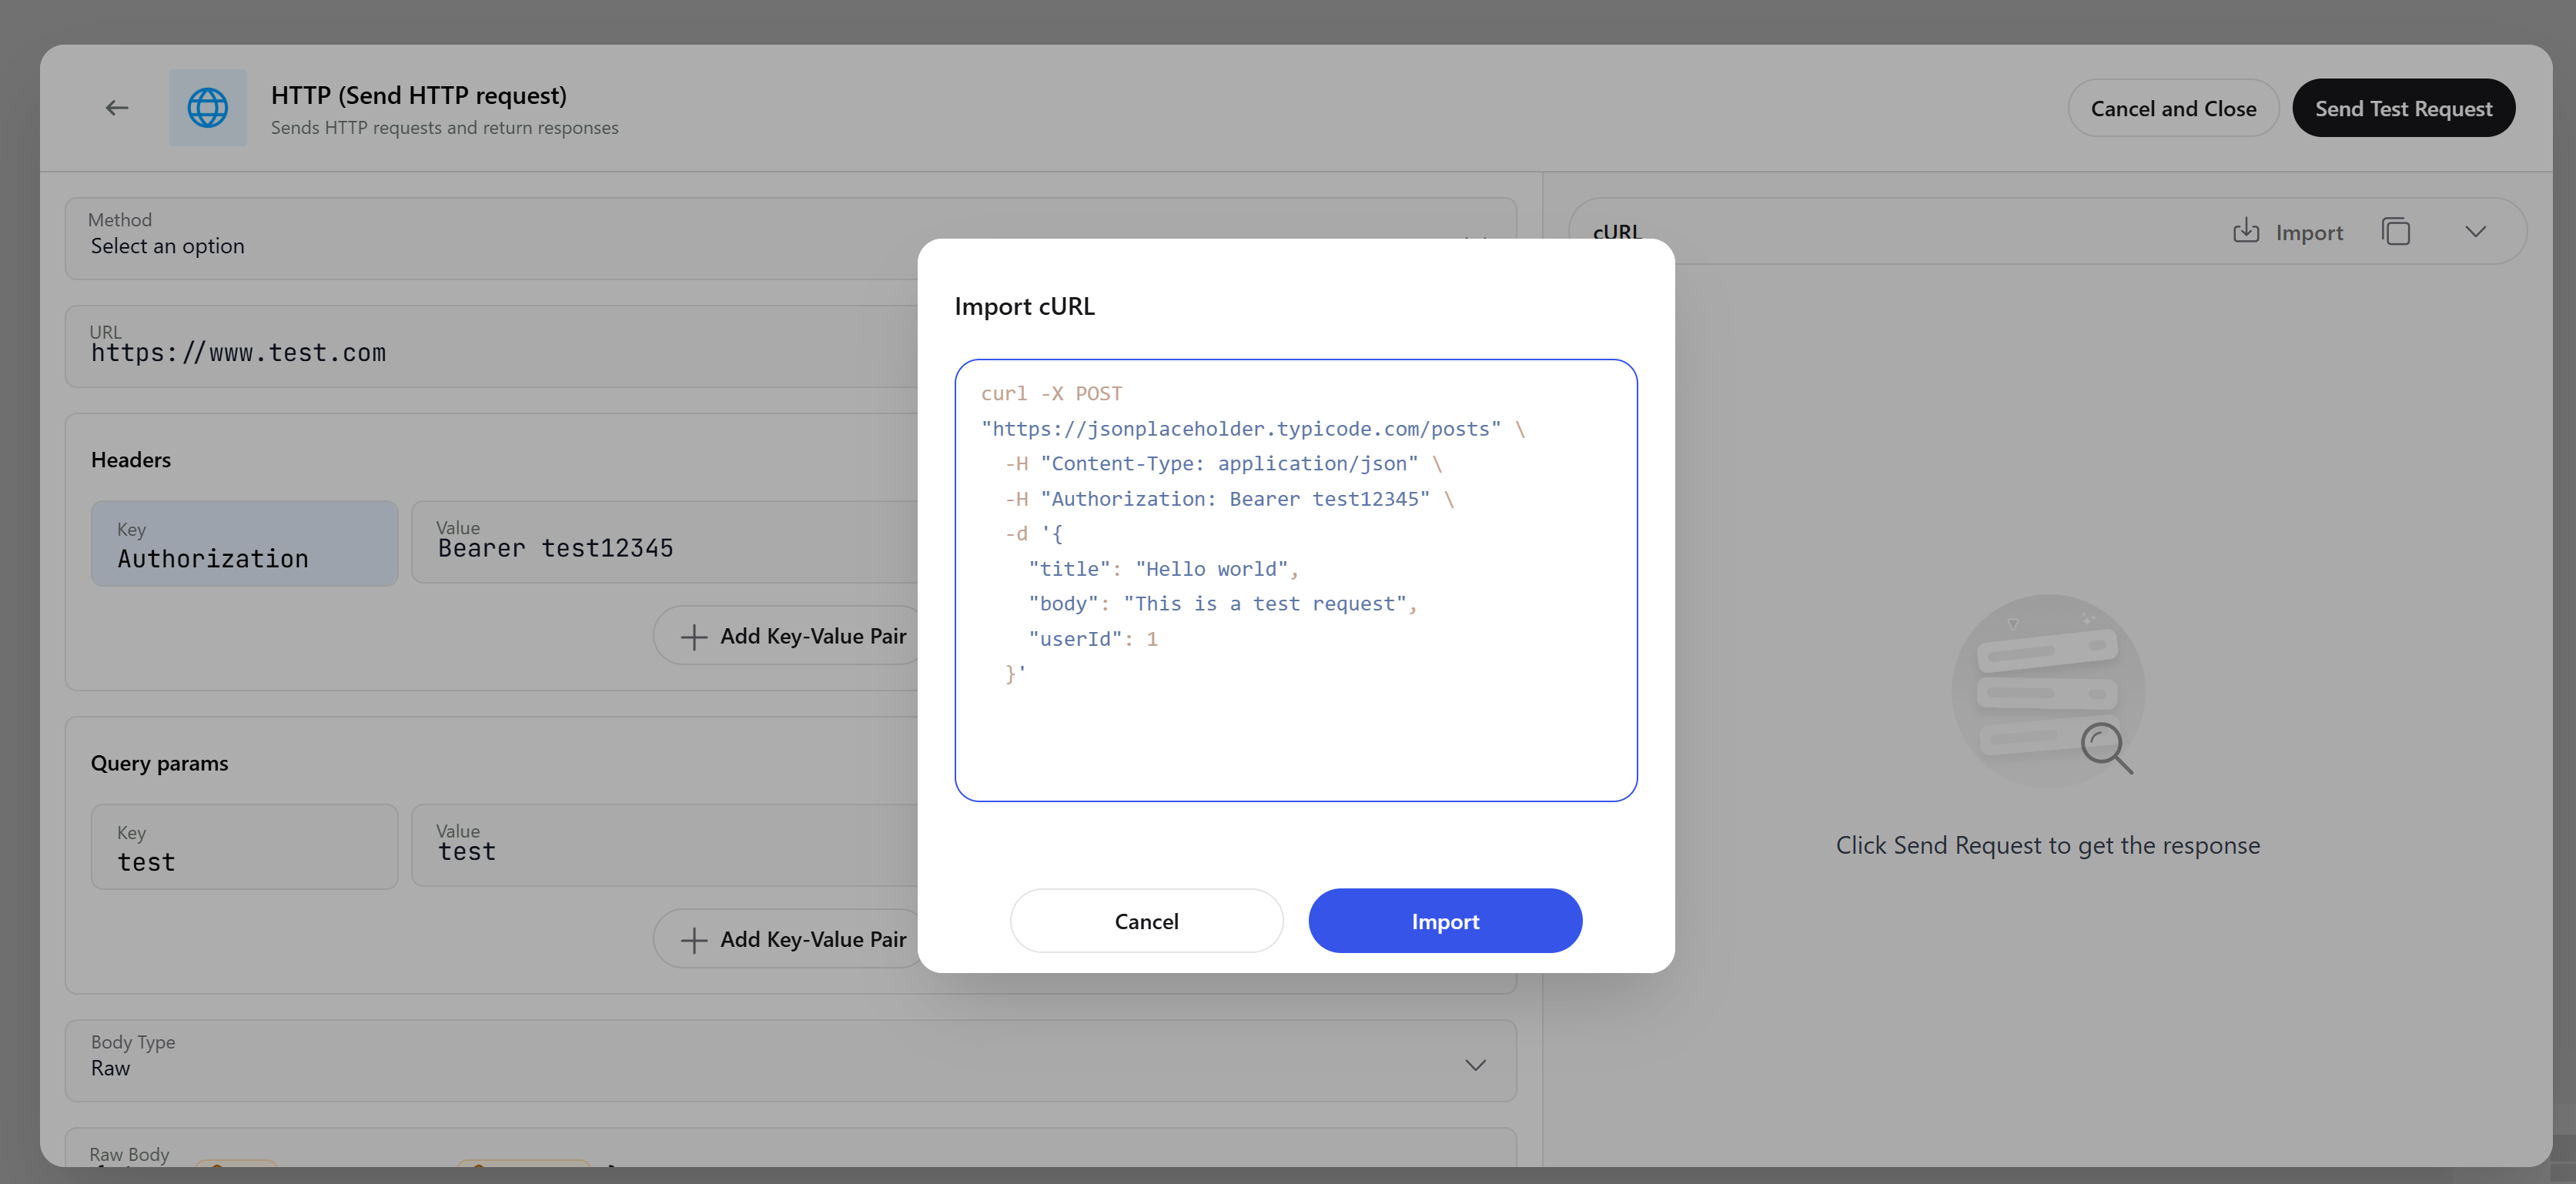
Import cURL Configuration
In addition to manual configuration, you can set up the entire request by importing a cURL command.
Testing Your Webhook
After configuring the request, you can test it by clicking the Send Test Request button in the upper-right corner. In the space on the right below this button, you’ll see a detailed response with the status code and body.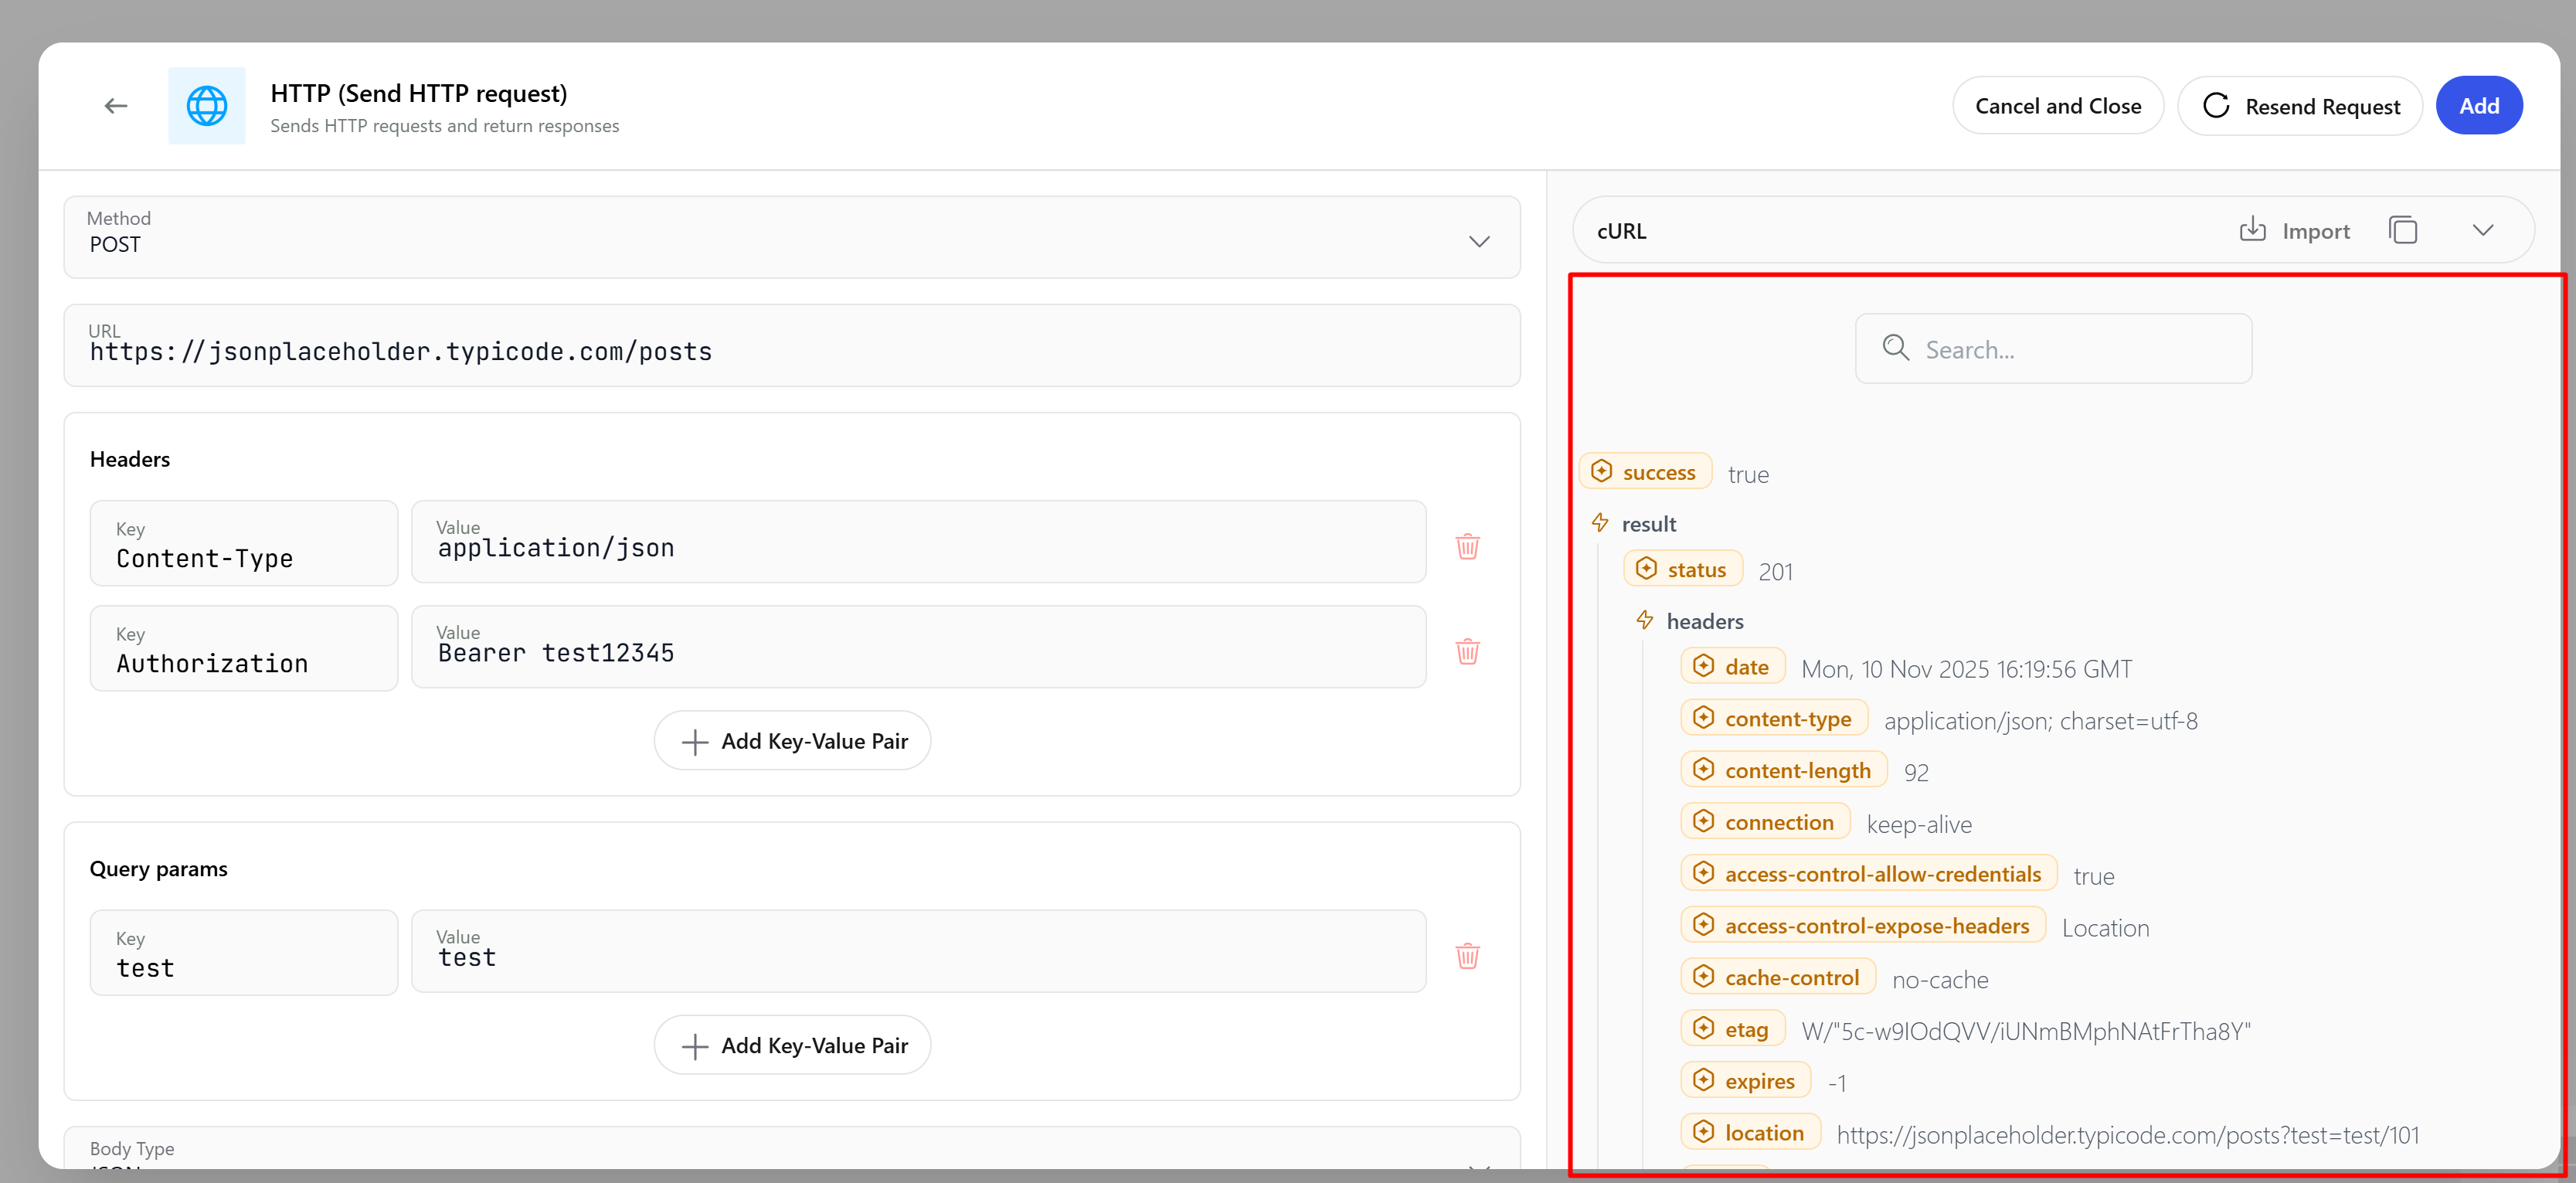
Configuring Webhook Triggers
Finally, you need to define when the webhook will be sent. You can configure the webhook to trigger based on specific call statuses (for example, send the webhook only to interested leads).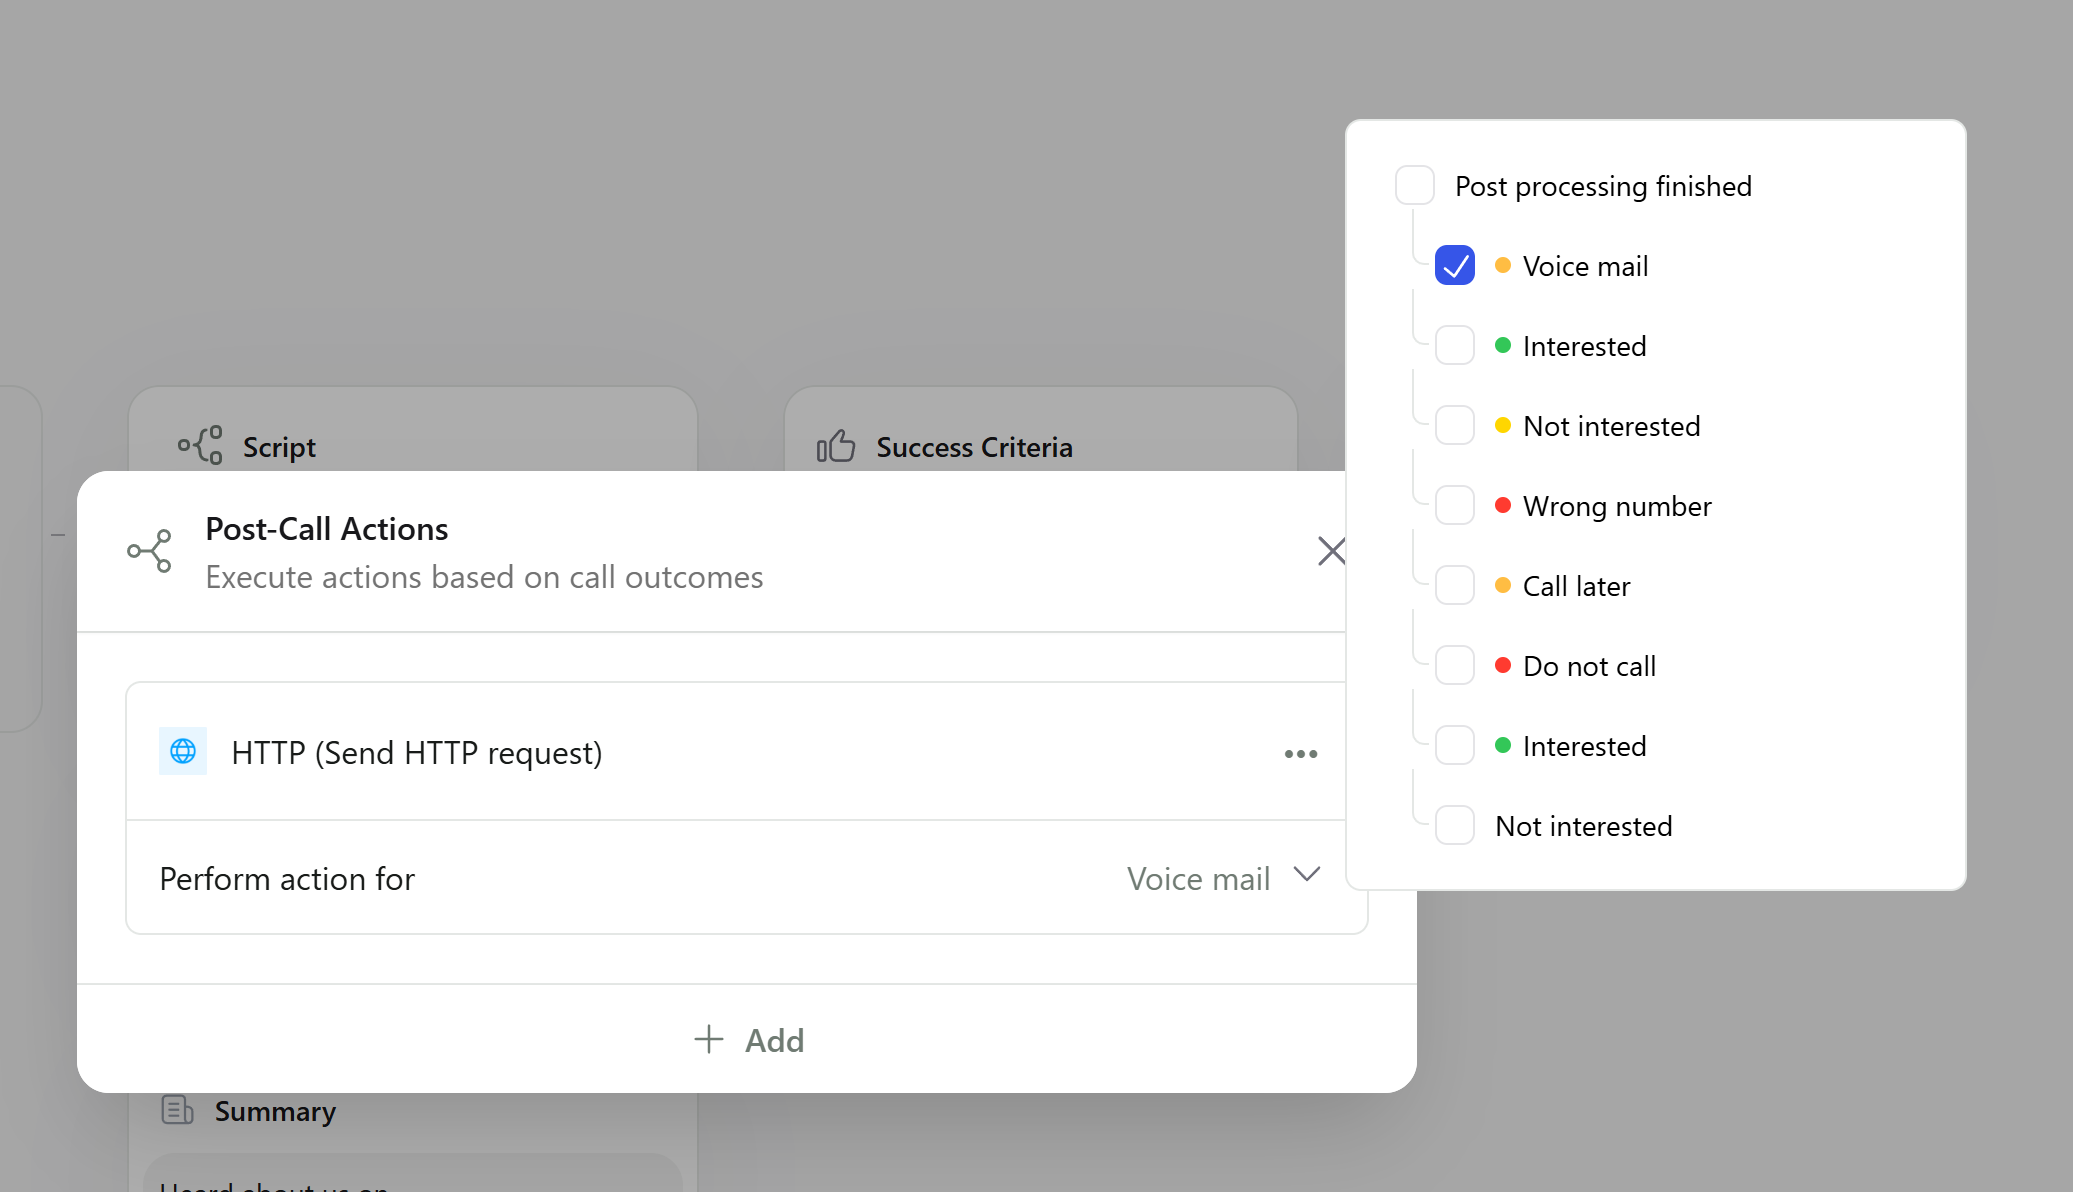
Webhook payload example
Use the example below as a template when mapping fields inside downstream systems:webhook.json
Webhook fields reference
Refer to the table below for every field that can appear in the payload:| Field | Description |
|---|---|
createdAt | Timestamp when the call was initiated in ISO 8601 format. |
phoneFrom | Phone number from which the call originated. |
status | Composite status of a call. It includes the call status, the reason for call hang up, and the candidate status. Call progress status:
Call connection status:
Contact response to call:
|
callStatus | Call status:
|
postProcessStatus | Candidate status for that call:
|
events | Details about specific call events:
|
webhookUrl | URL to which the Webhook data is sent post-call. |
webhookEvent | Event related to the webhook trigger:
|
webhookEvents | List of selected events for triggering the webhook. |
hangUpReason | Reason for the call termination:
|
duration | Duration of the call with Callers’ agent in seconds. |
totalDuration | Total duration of the call including the forwarded call duration in seconds. |
contactStatus | Object indicating the contact’s preferences:
|
summary | Object summarizing the Key Questions made during the call. |
campaign | Information about the campaign associated with the call:
|
id | Unique identifier for the call. |
contact | Details about the person contacted:
|
twilio | Twilio information:
|
organizationId | Unique identifier for the organization. |
transcript | Array of dialogue exchanges during the call, with each entry detailing the content spoken and the role of the speaker. |
interested | Object detailing whether the caller expressed interest in the services:
|
successCriteria | Object detailing the success criteria evaluation for the call:
|
isTestCall | Boolean indicating if the call was a test call. |
slackUrl | Webhook Url if the account is integrated with Slack. |
Network Requirements
Callers sends webhooks from the following IP addresses:If your systems are behind a firewall, whitelist these IP addresses to ensure webhook delivery: