> ## Documentation Index
> Fetch the complete documentation index at: https://docs.callers.ai/llms.txt
> Use this file to discover all available pages before exploring further.
# Triggers
> Automatically add contacts to your Callers dashboard when actions occur in your connected apps. No manual uploads or complex API setup required — just a few clicks.
Triggers automatically add contacts to your Callers dashboard whenever specific actions occur in apps you've connected through the App Center. Skip manual uploads and complex API configurations — set everything up with just a few clicks.
### Setting Up a Trigger
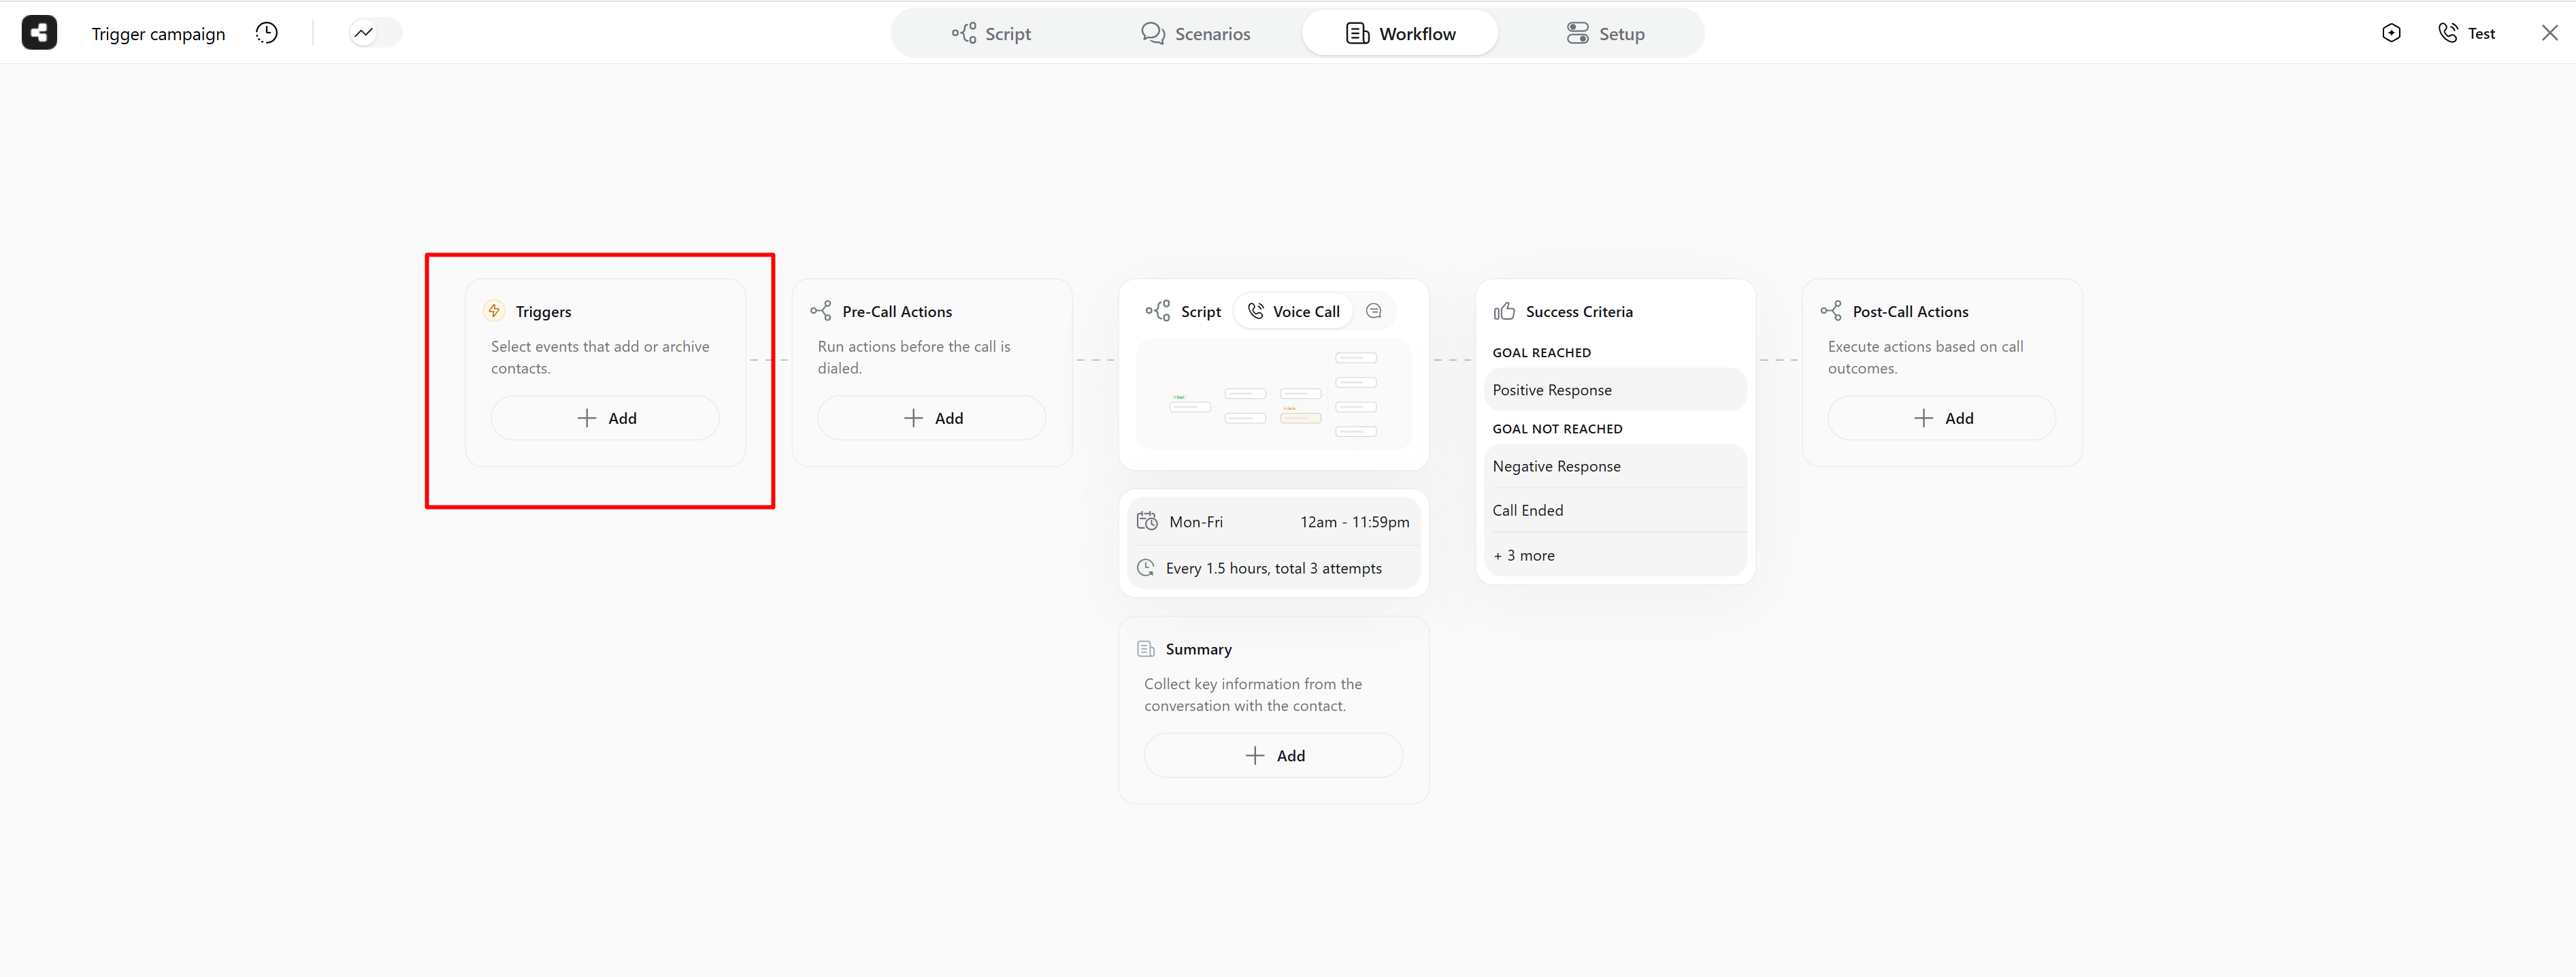
To get started, go to your campaign settings and open the **Workflow** tab. The trigger block appears as the first element in your workflow.
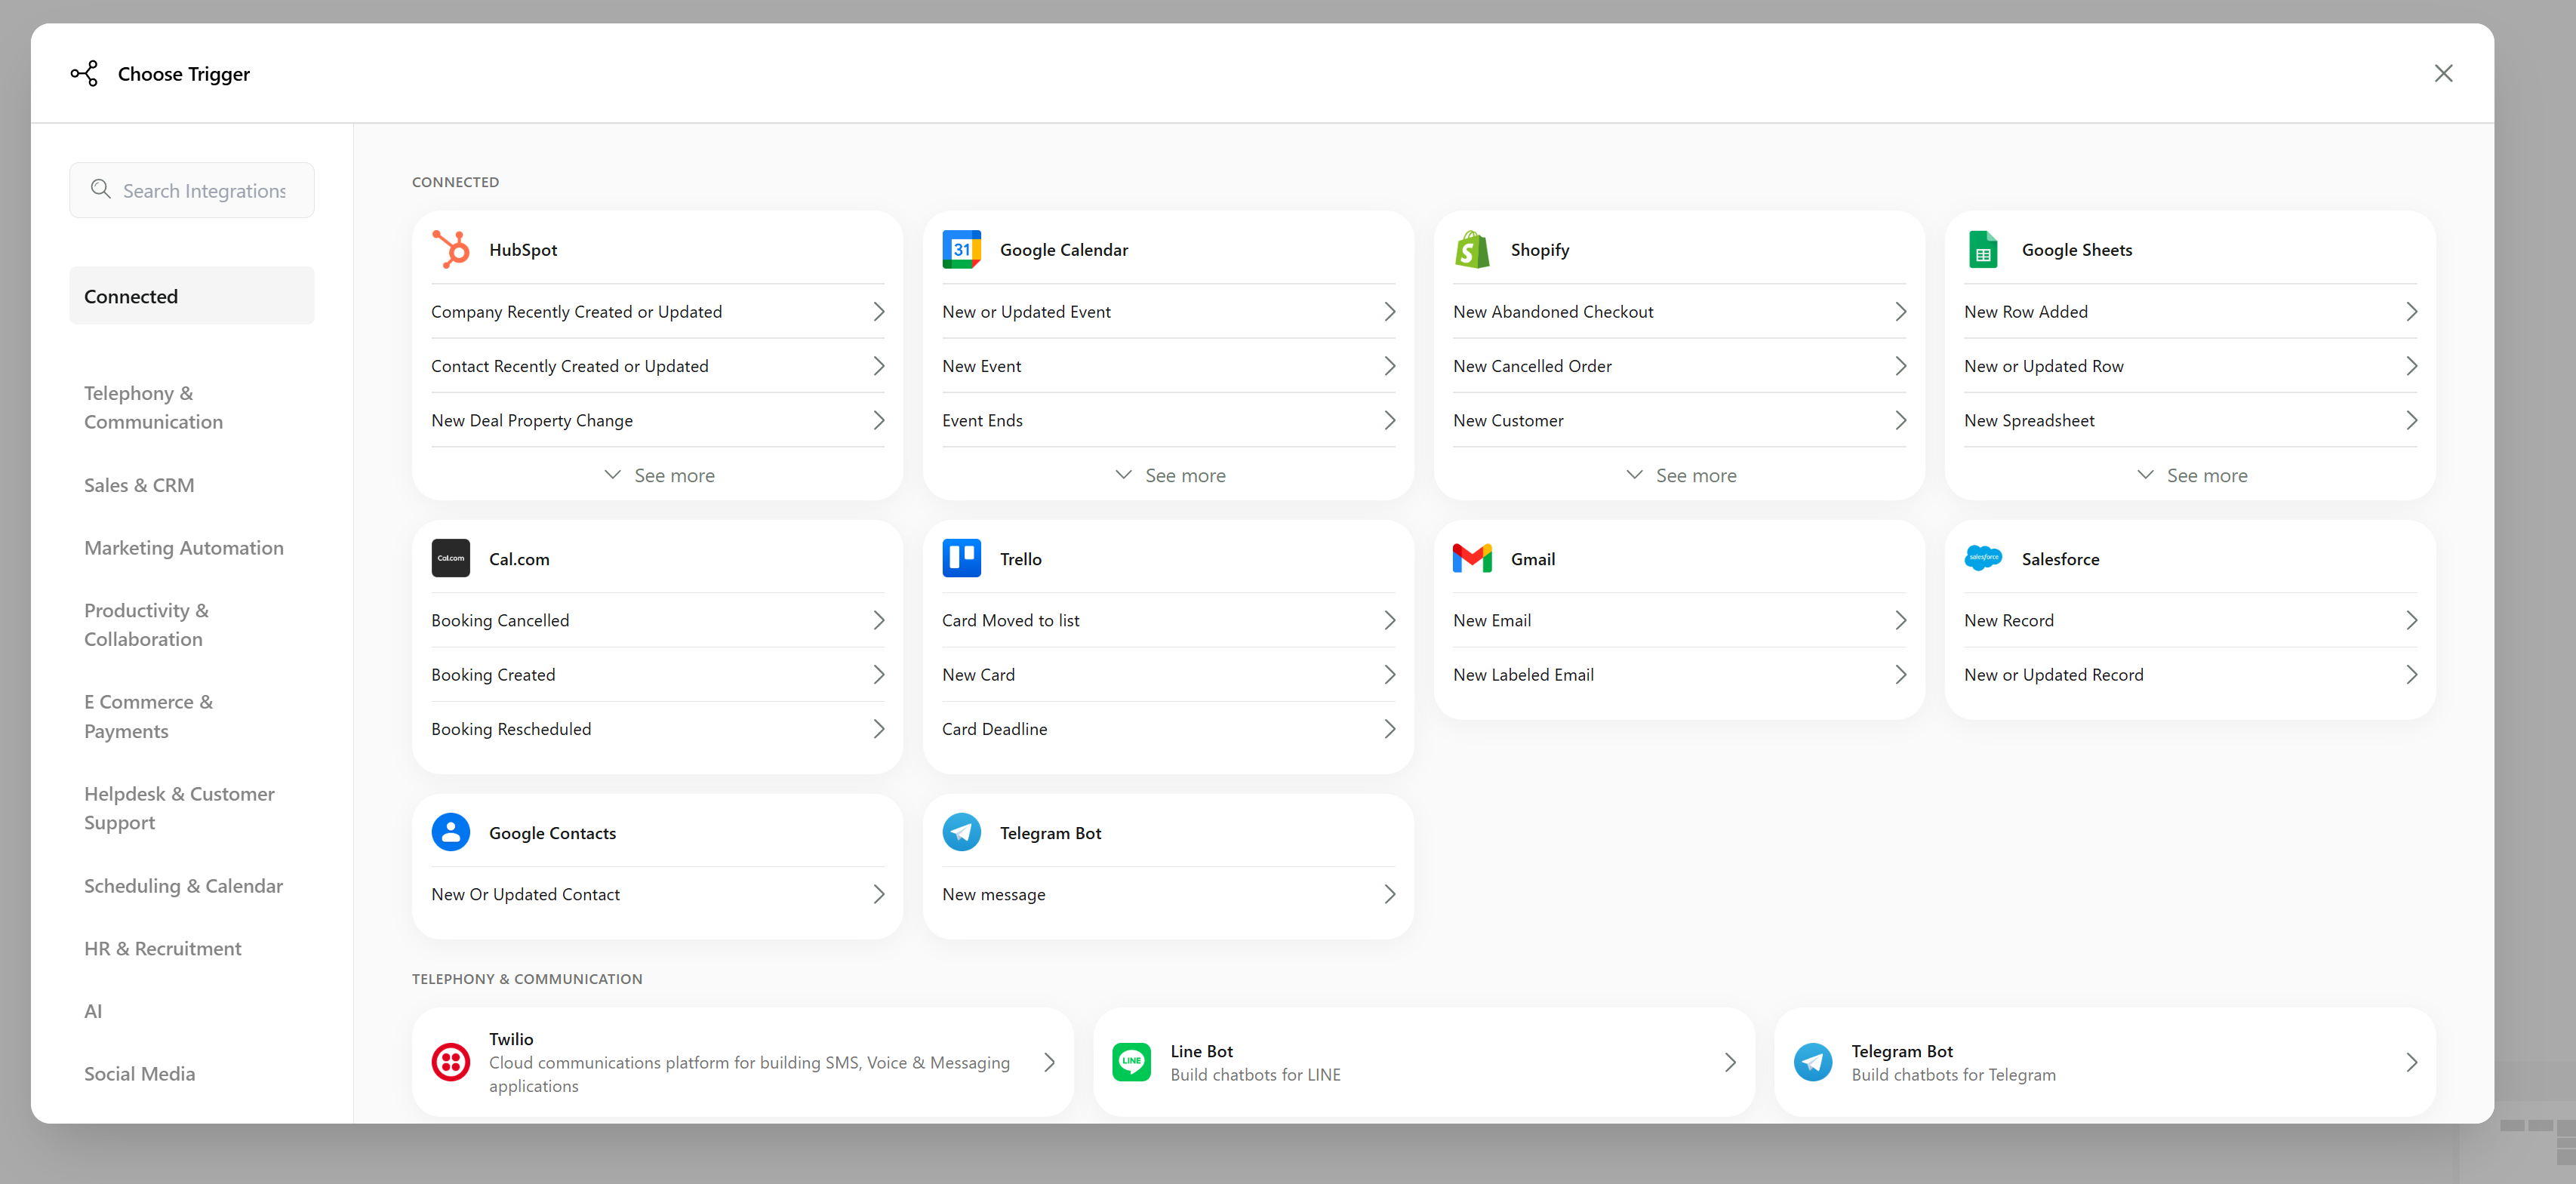
 Click the trigger block to see a menu of all your connected apps with available triggers. Keep in mind that not all apps support triggers.
 ### Trigger Types
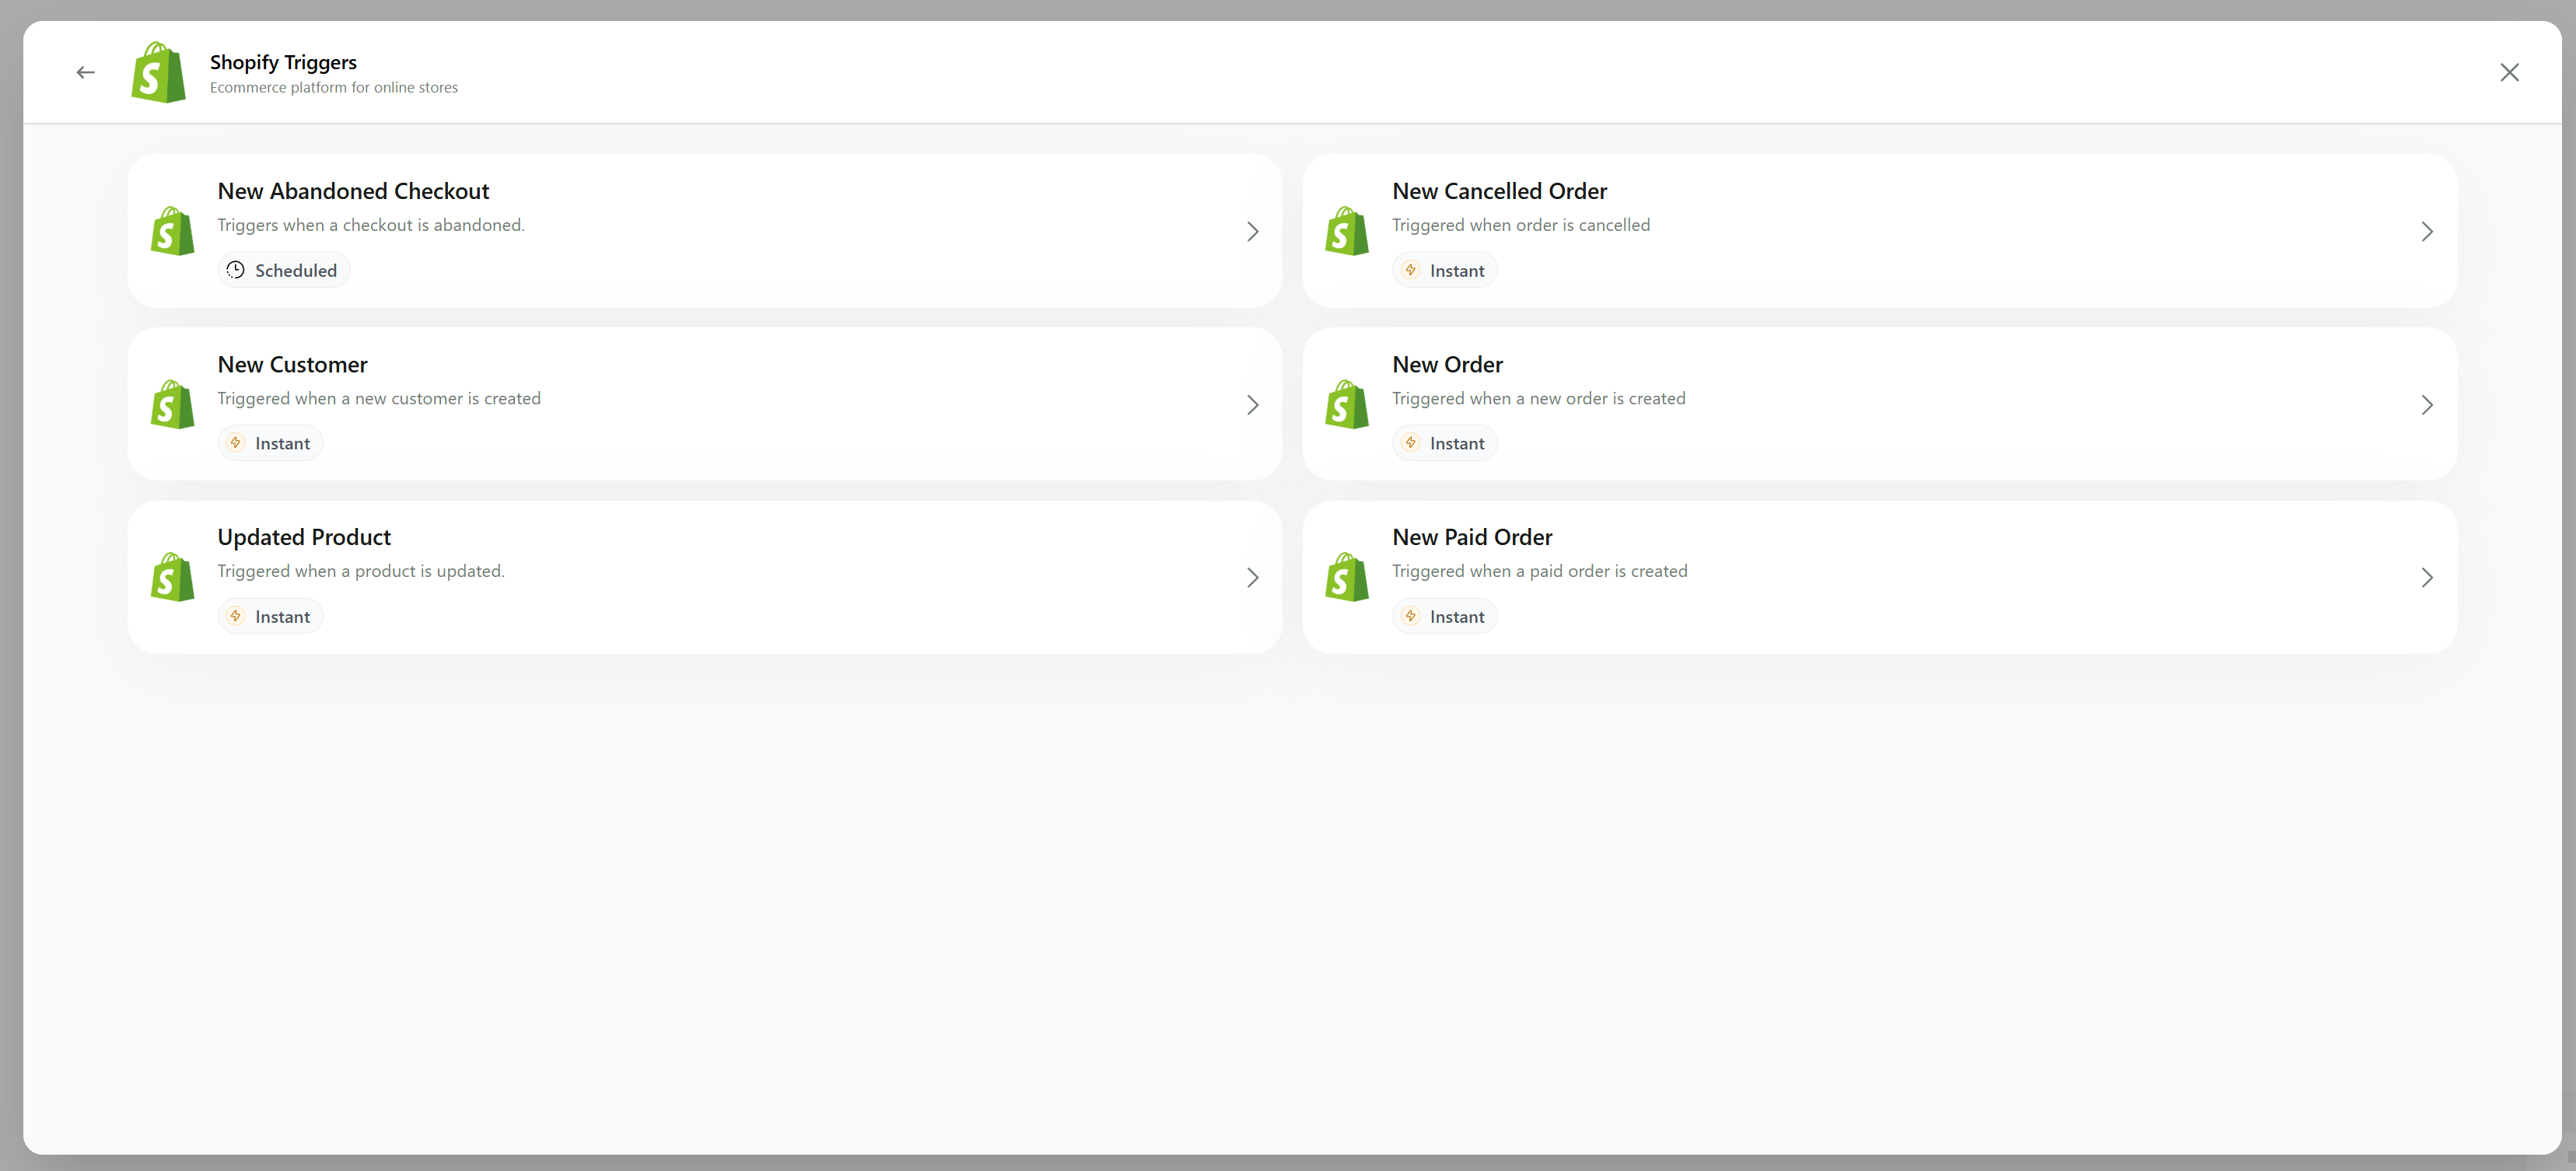
Triggers come in two types: **instant** and **scheduled**. Instant triggers add contacts as soon as the action fires, while scheduled triggers check for new data at regular intervals (typically every 5 minutes). Both types are configured the same way.
Each trigger has a label indicating its type — look for the **Instant** label with a lightning bolt icon or the **Scheduled** label with a clock icon next to each trigger name.
### Trigger Types
Triggers come in two types: **instant** and **scheduled**. Instant triggers add contacts as soon as the action fires, while scheduled triggers check for new data at regular intervals (typically every 5 minutes). Both types are configured the same way.
Each trigger has a label indicating its type — look for the **Instant** label with a lightning bolt icon or the **Scheduled** label with a clock icon next to each trigger name.
 ### Example: Setting Up a HubSpot Trigger
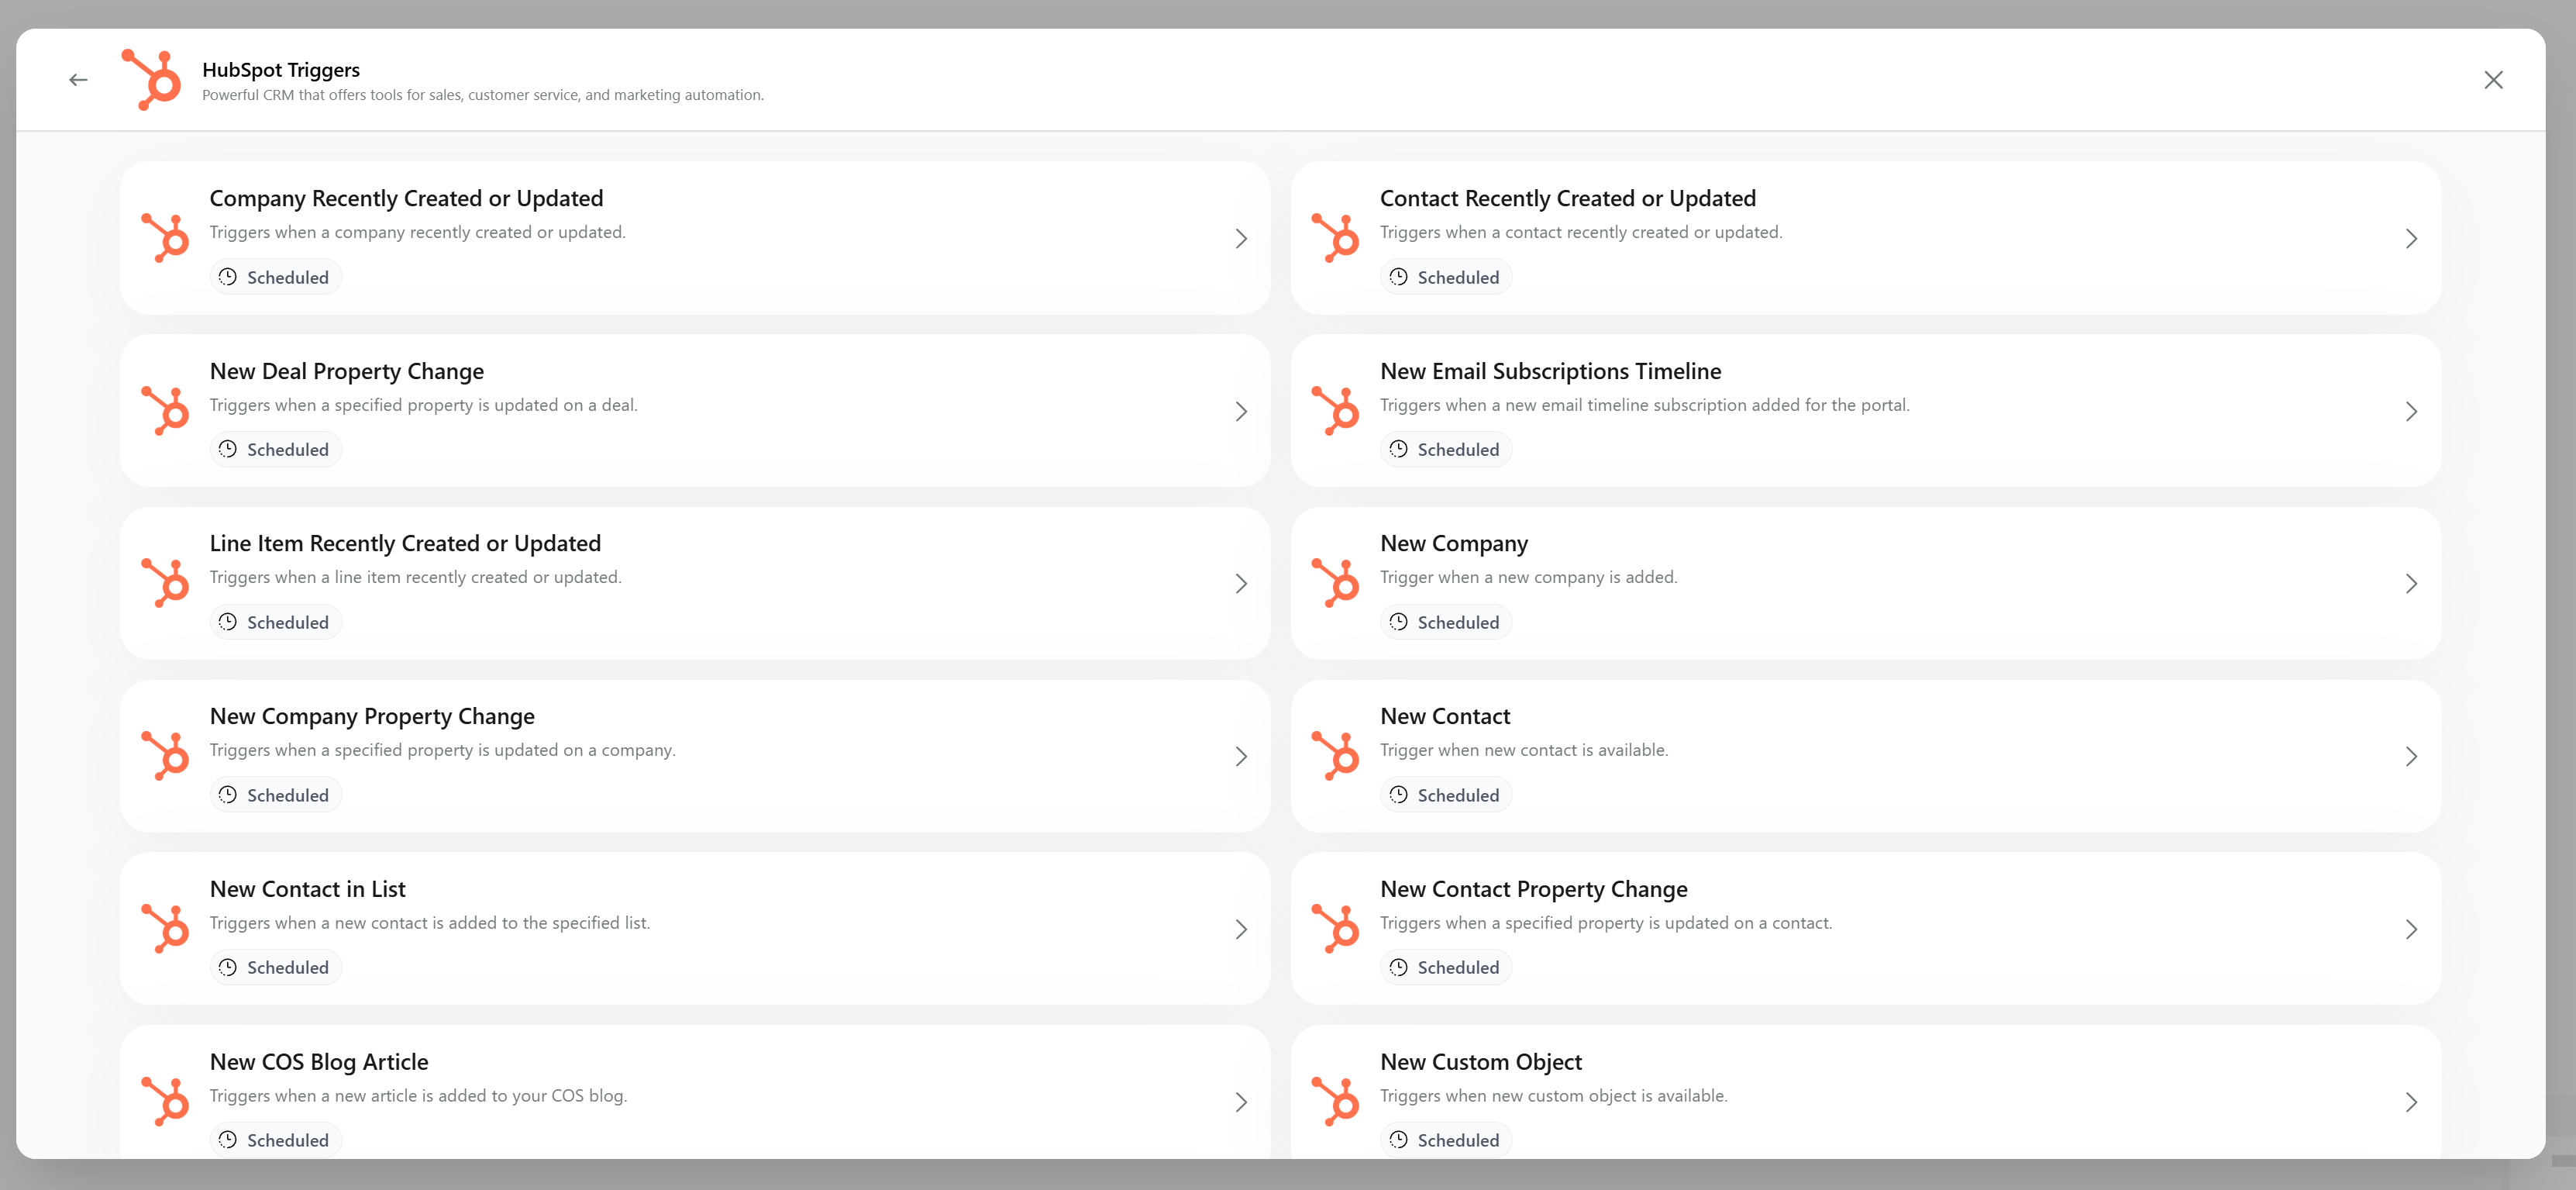
Let's set up a HubSpot trigger as an example. HubSpot uses scheduled triggers, so we'll configure the **New Contact** trigger to automatically add contacts whenever they're created in HubSpot.
### Example: Setting Up a HubSpot Trigger
Let's set up a HubSpot trigger as an example. HubSpot uses scheduled triggers, so we'll configure the **New Contact** trigger to automatically add contacts whenever they're created in HubSpot.
 Once you've selected the trigger, click **Load Test Data** to pull in sample data. Make sure you have at least one contact in your HubSpot account for this to work.
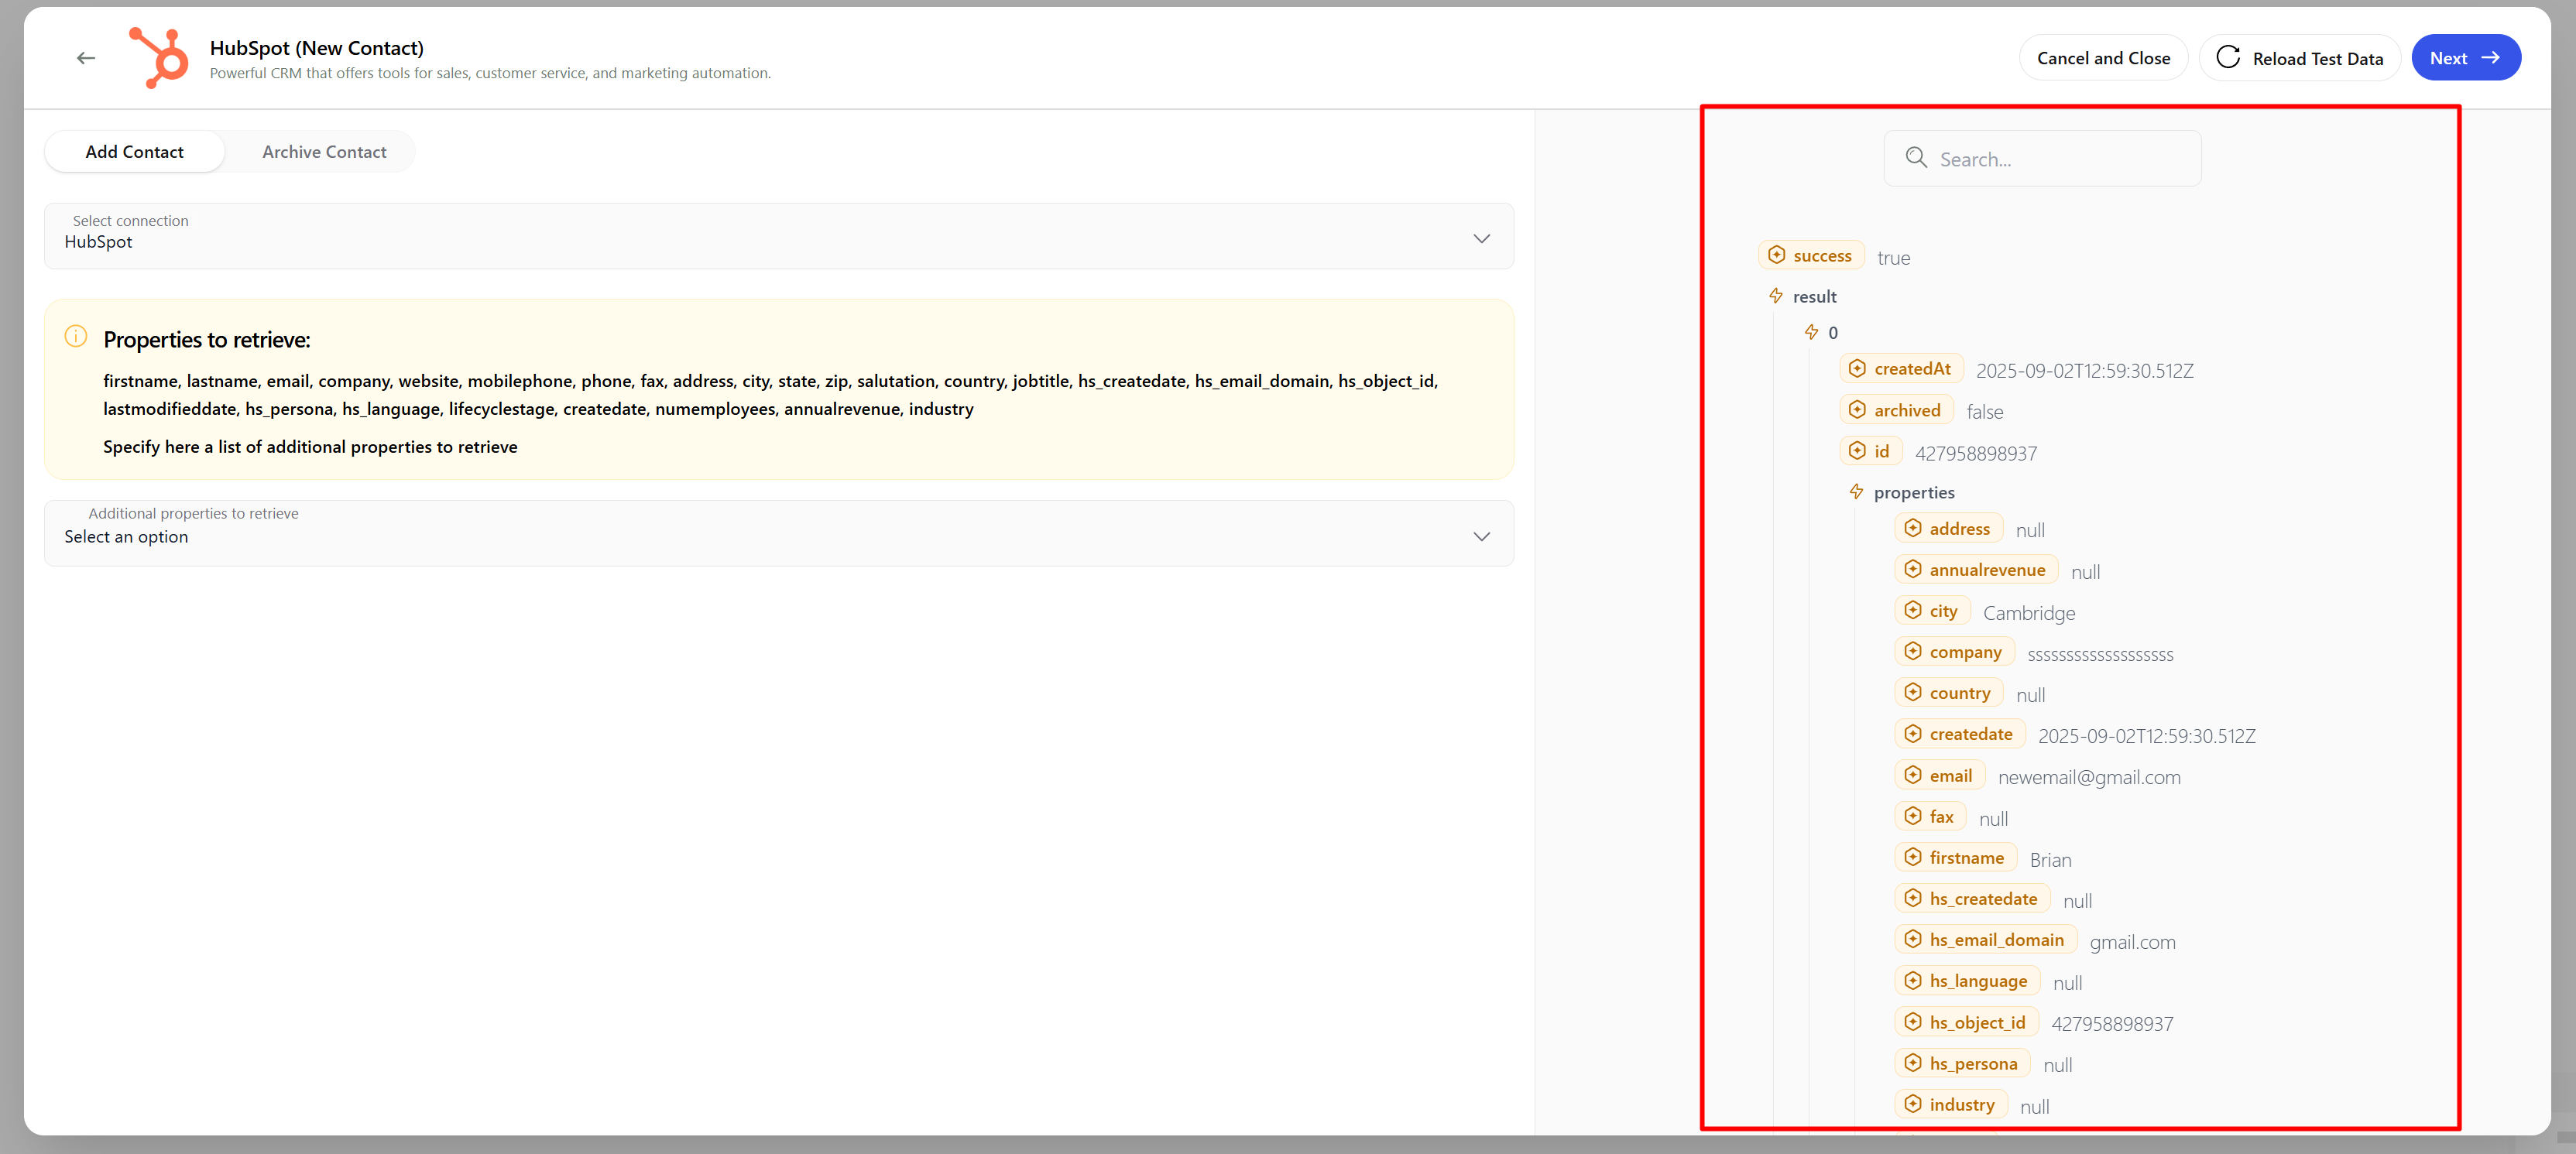
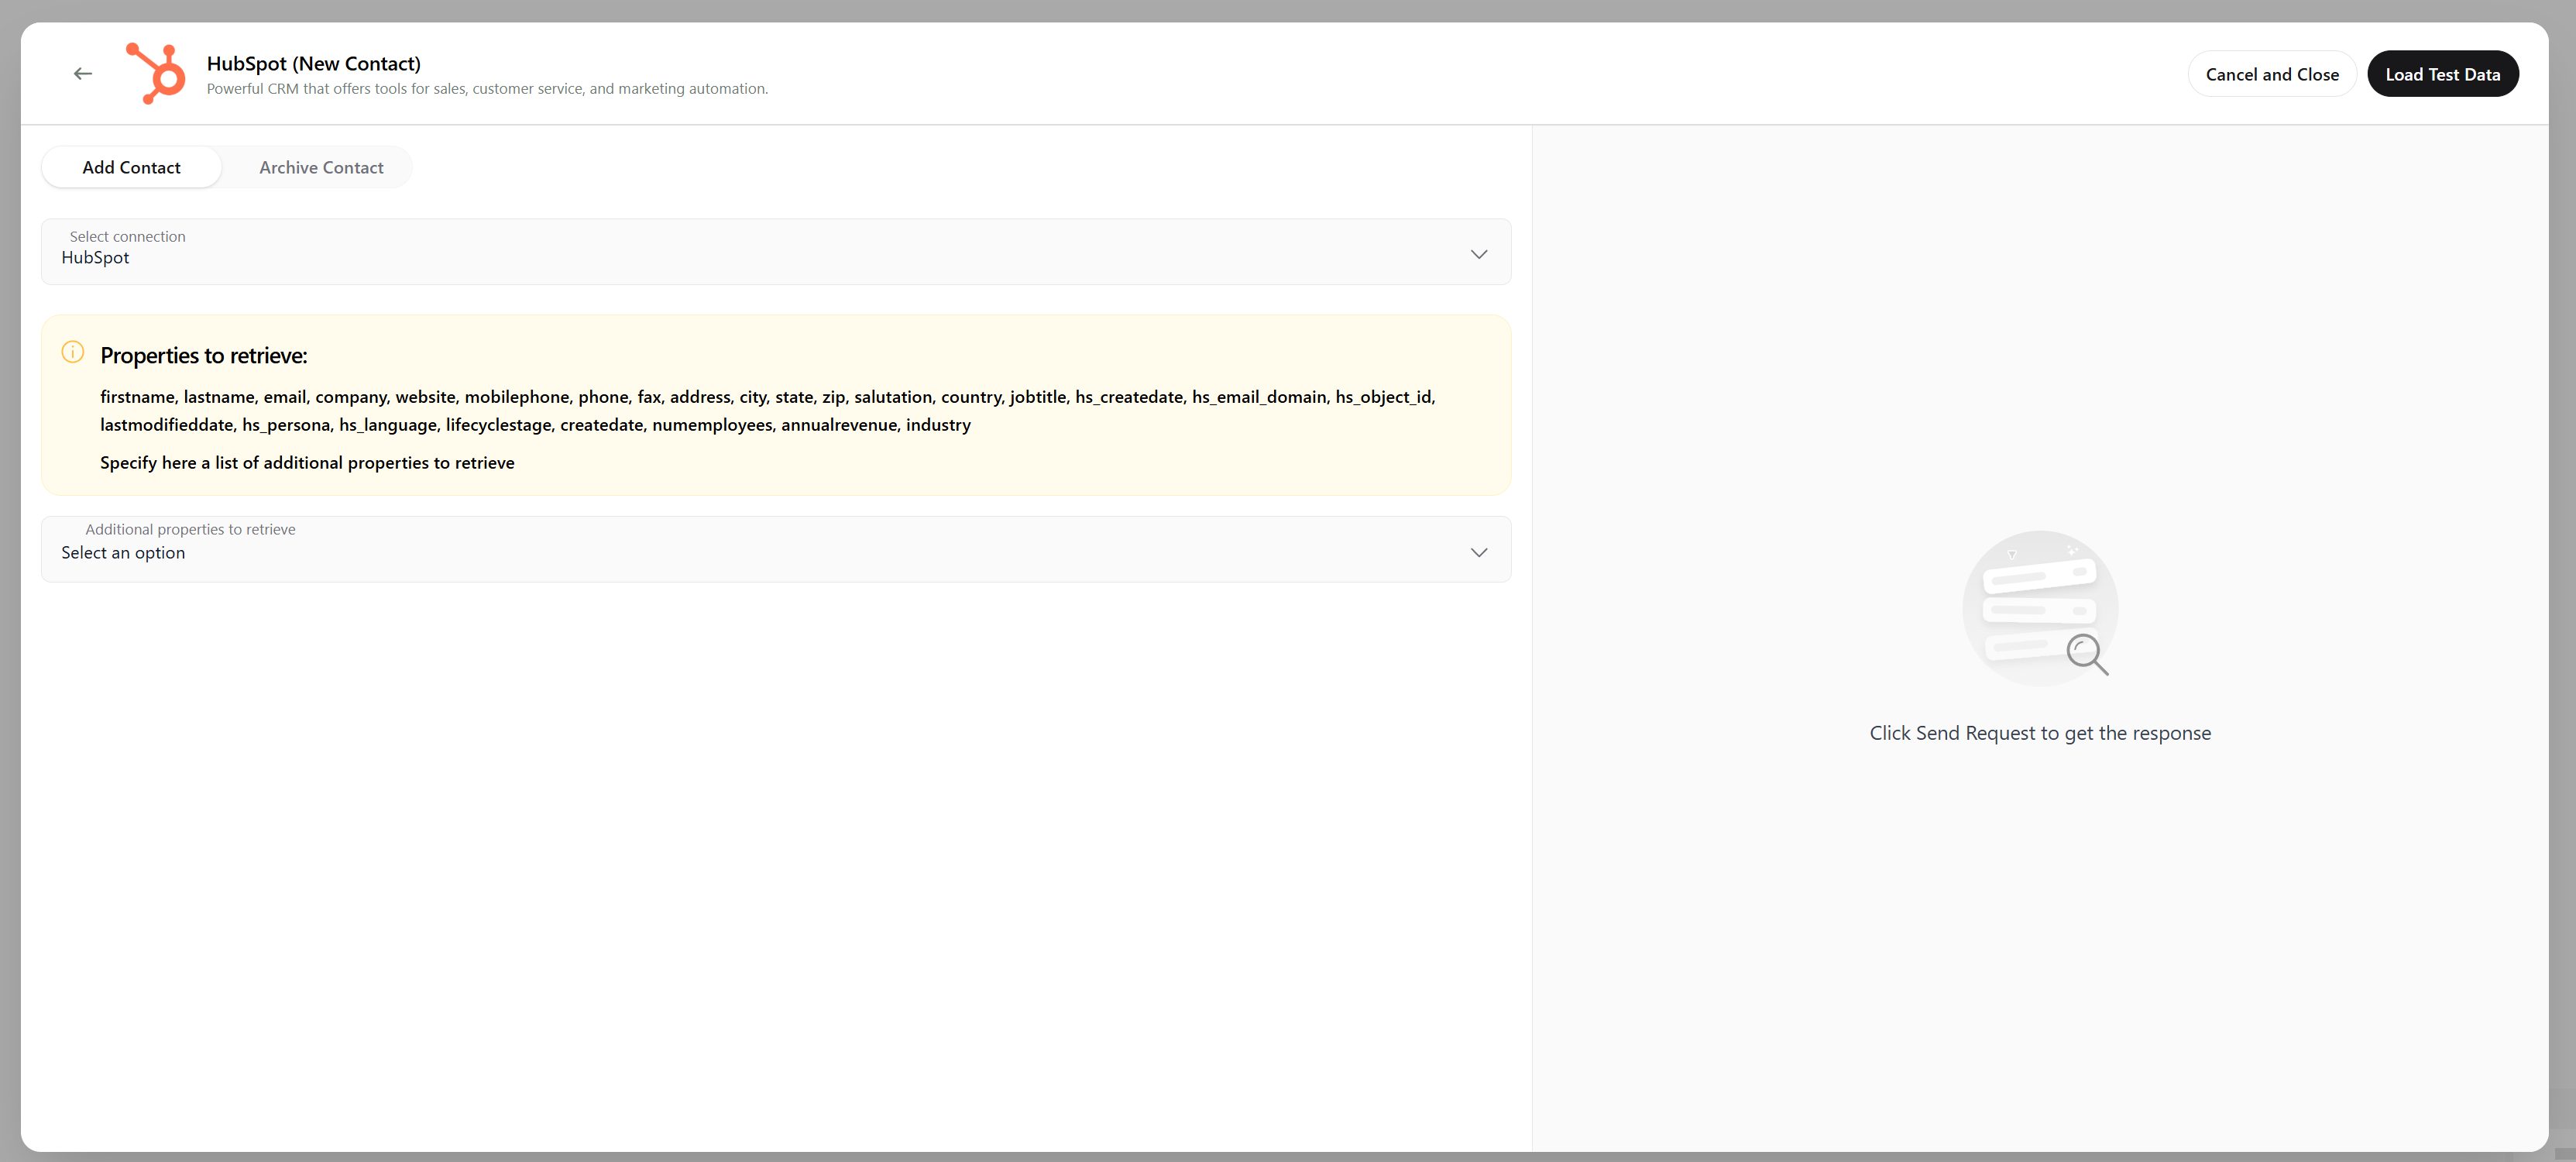 When the test contact loads successfully, you'll see a success message in the right panel showing all the fields the trigger can retrieve. Click **Next** to continue.
 ### Mapping Contact Variables
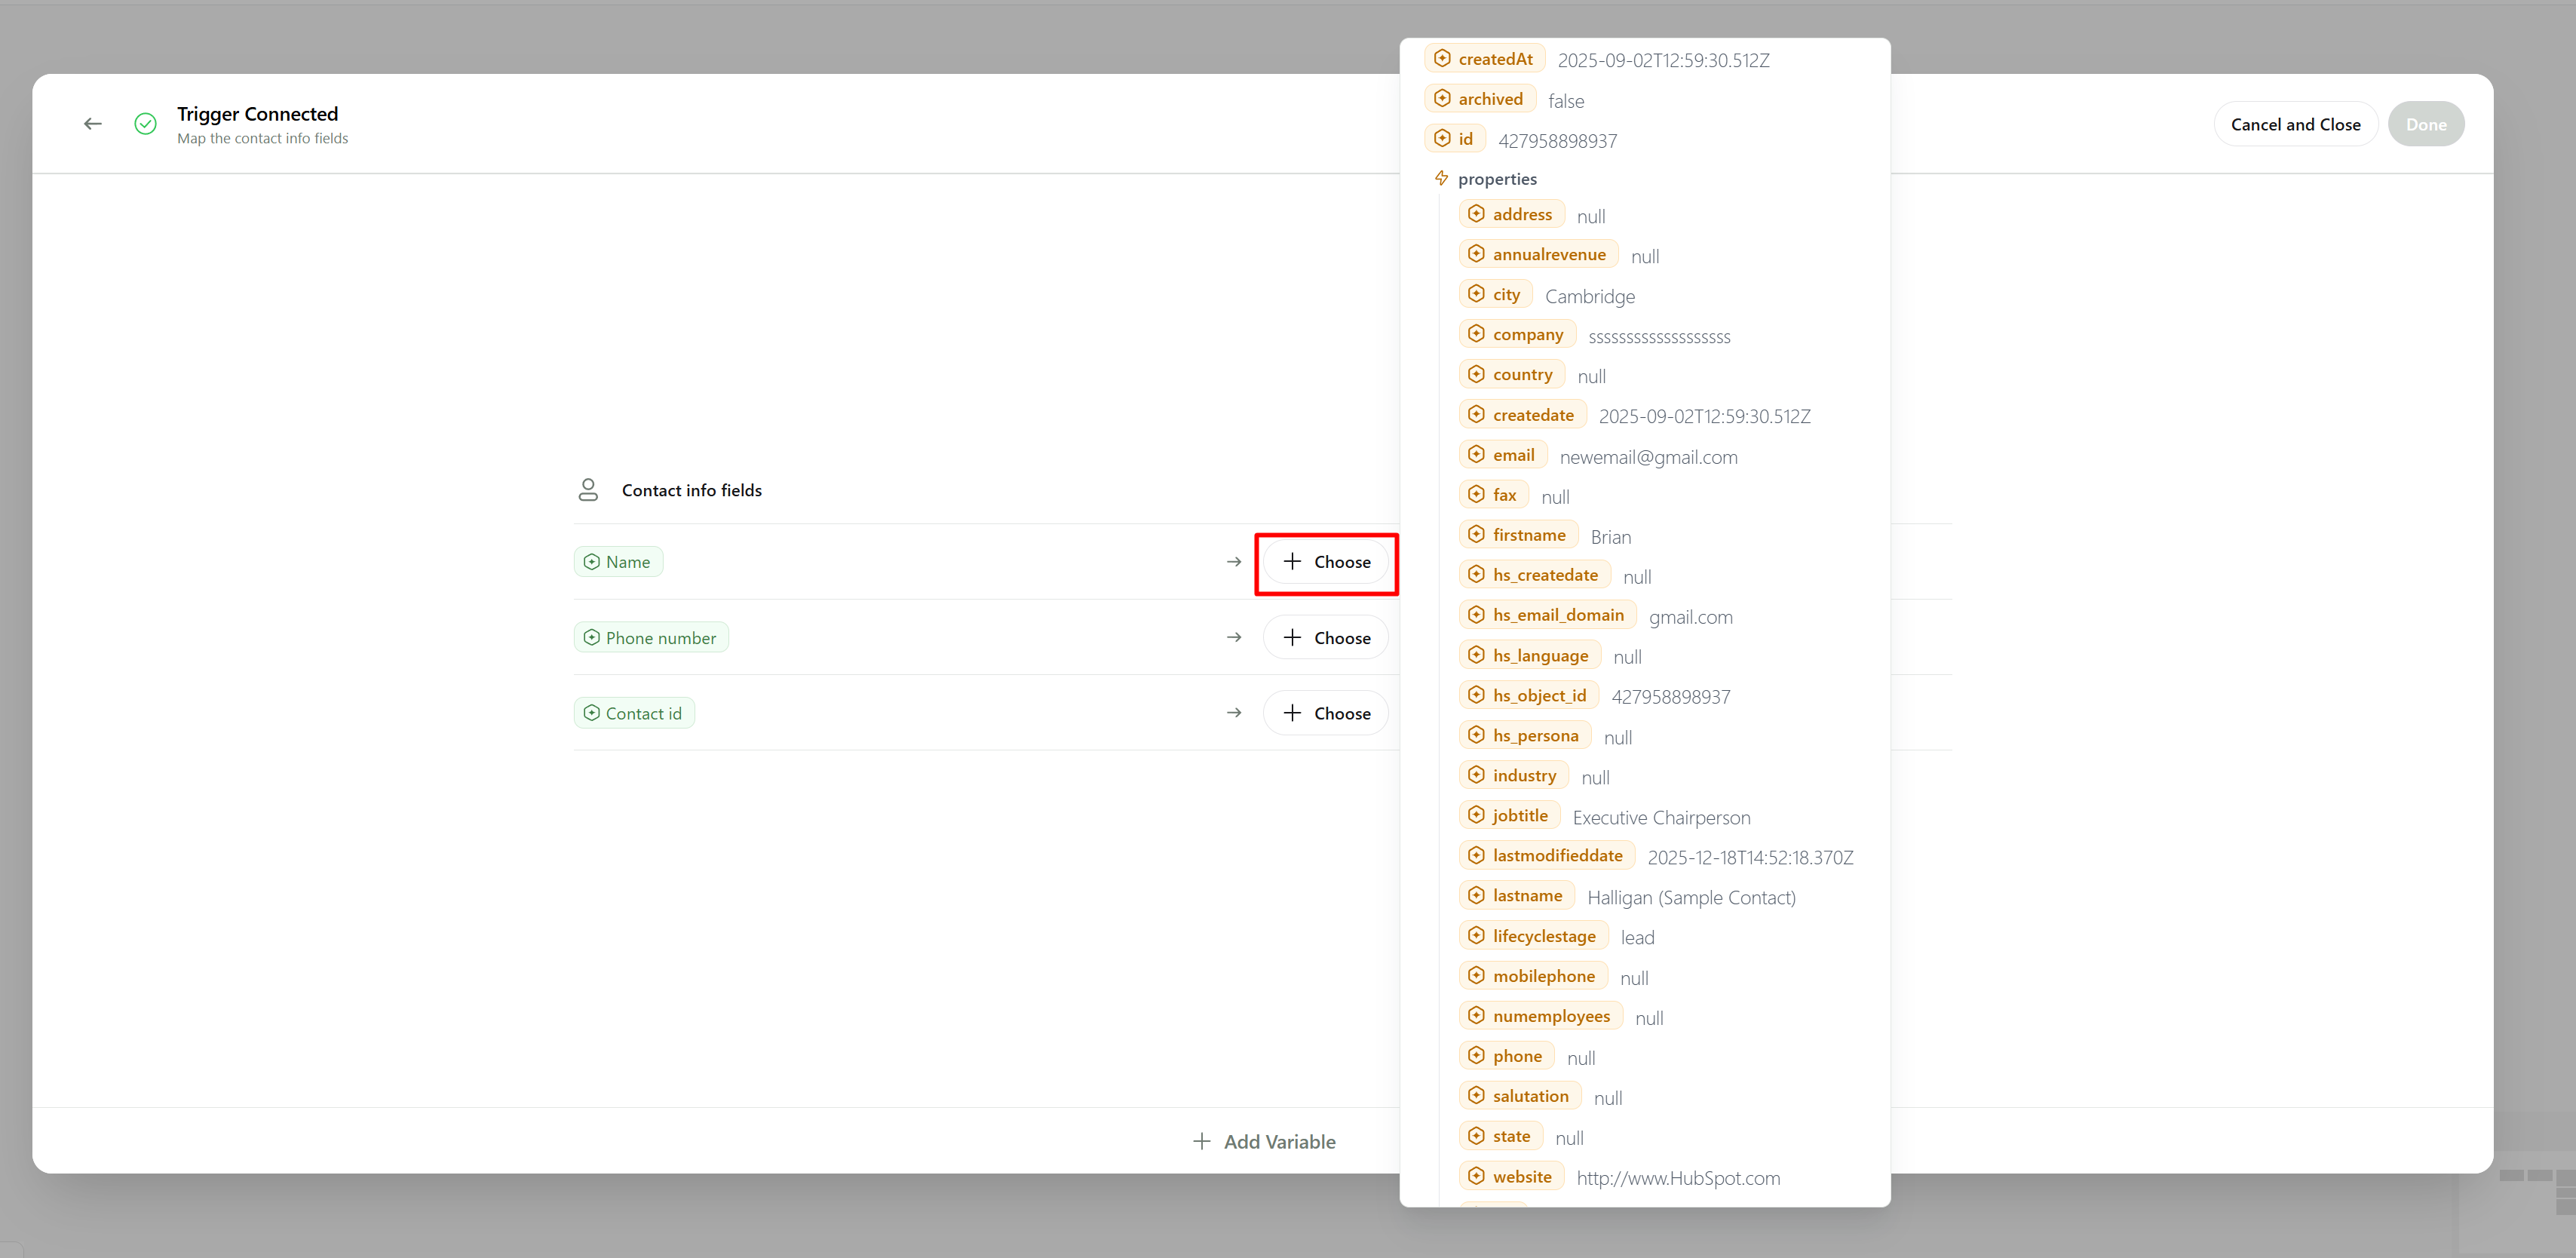
In the next window, map your AI script's contact variables to the fields coming from the trigger. Click **Choose** next to each variable and select the matching field from the trigger data.
**Important:** Make sure phone numbers are in **E.164** format — they must start with a plus sign and include the country code (for example, `+14155552671`).
### Mapping Contact Variables
In the next window, map your AI script's contact variables to the fields coming from the trigger. Click **Choose** next to each variable and select the matching field from the trigger data.
**Important:** Make sure phone numbers are in **E.164** format — they must start with a plus sign and include the country code (for example, `+14155552671`).
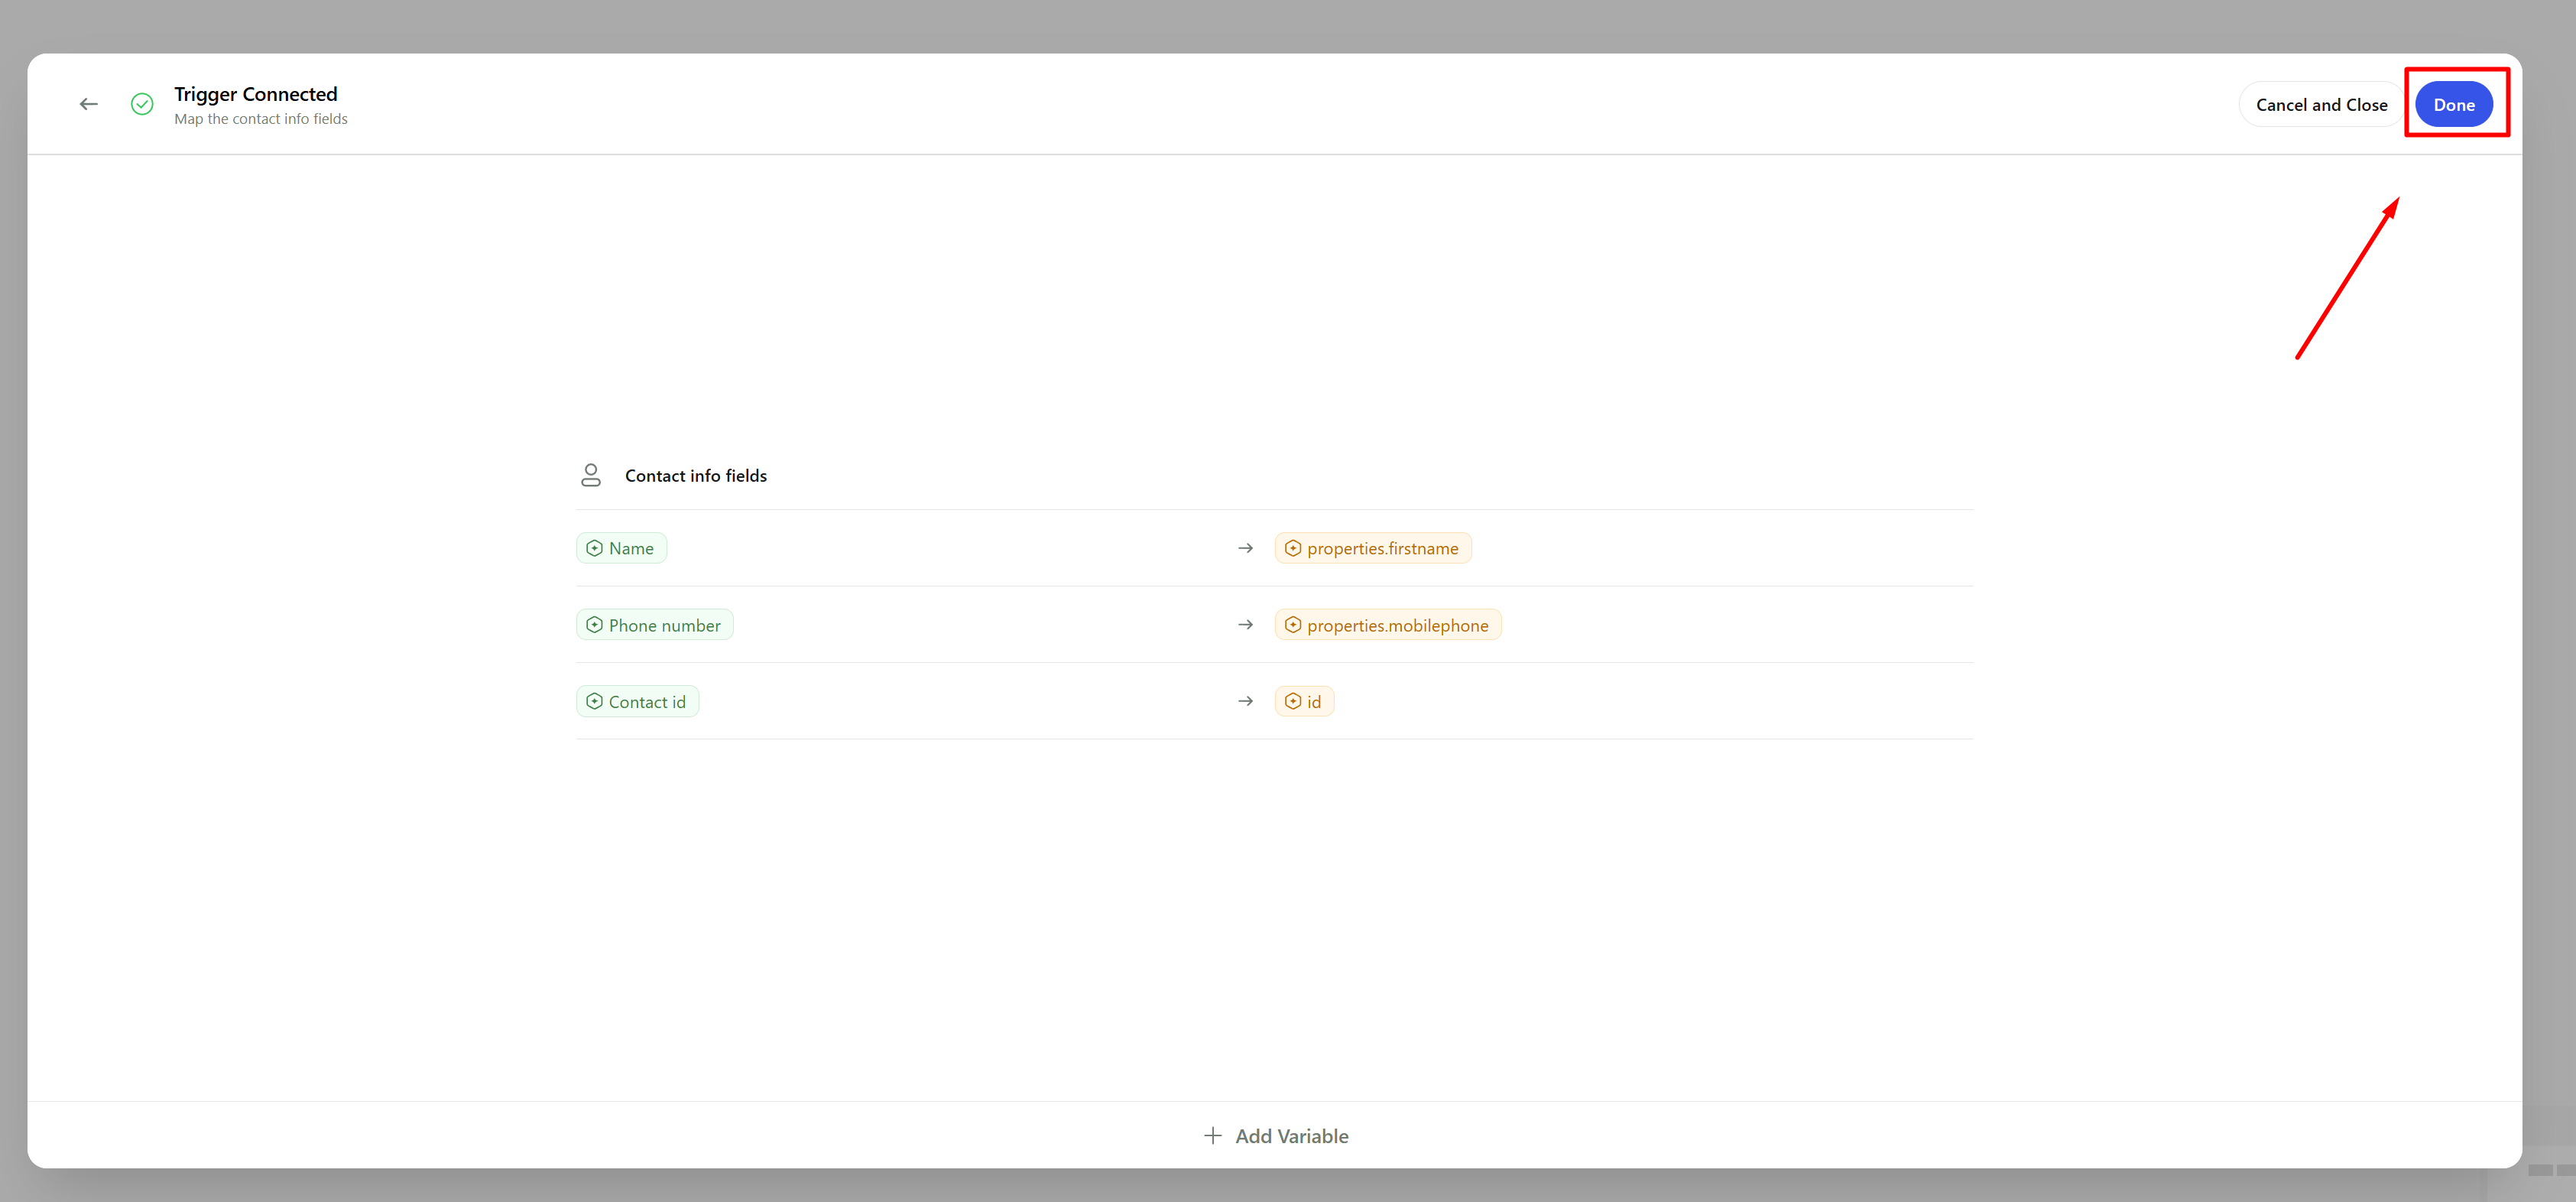
 Once you've finished mapping all variables, click **Done**. Your trigger is now active and ready to use.
 ### How It Works
Once your trigger is set up, new contacts from your CRM are automatically added to your Callers dashboard. For instant triggers, this happens immediately. For scheduled triggers, the system checks for new contacts every few minutes. All new contacts will be called during your campaign's business hours according to your settings.
### How It Works
Once your trigger is set up, new contacts from your CRM are automatically added to your Callers dashboard. For instant triggers, this happens immediately. For scheduled triggers, the system checks for new contacts every few minutes. All new contacts will be called during your campaign's business hours according to your settings.