> ## Documentation Index
> Fetch the complete documentation index at: https://docs.callers.ai/llms.txt
> Use this file to discover all available pages before exploring further.
# Cal.com
> Seamlessly schedule meetings by integrating Cal.com with Callers. This integration enables you to leverage Cal.com’s scheduling capabilities directly through Callers' voice agents, streamlining the scheduling process and improving efficiency.
### Connecting Cal.com to Callers
* **Navigate to the App Center and find `cal.com` integration:**.
* **Connect Cal.com:** Click on `+` button in the Cal.com integration block. A new window will open prompting you to enter your **API Key** from Cal.com to authorize Callers.
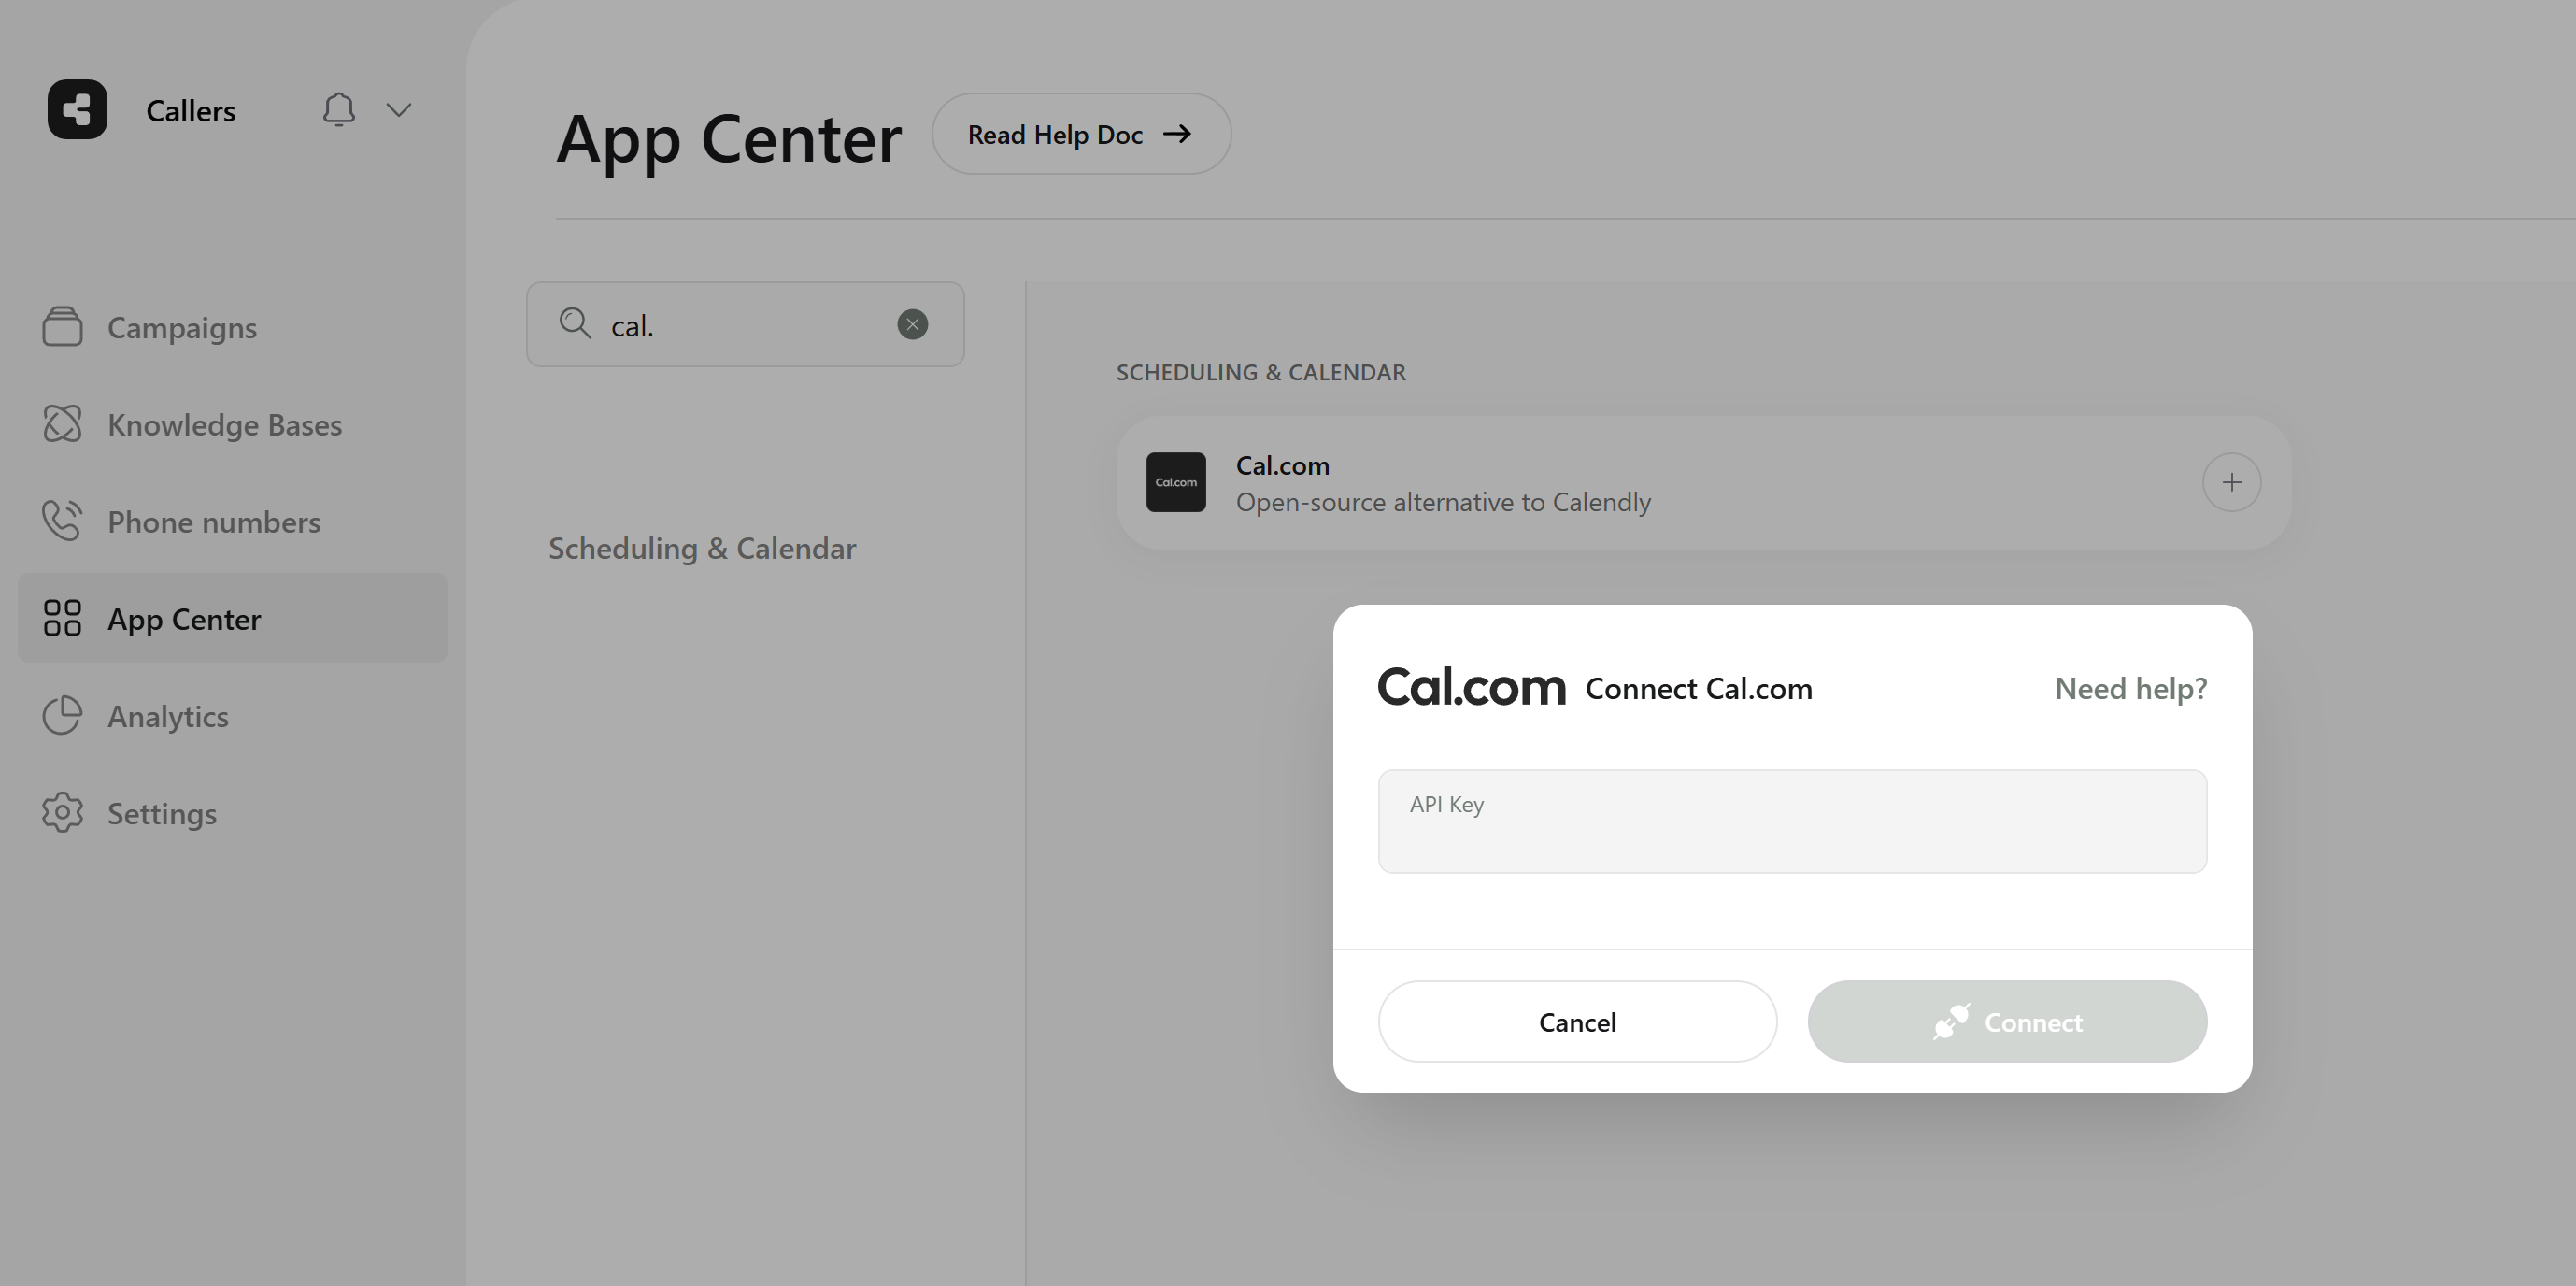 **If you do not have an API Key, follow these steps to create one:**
1. Log in to **Cal.com** and navigate to **Settings** (located at the bottom left of the dashboard).
2. In the side menu, find and click on **"API keys"** under the **Developer** section.
3. Click `Add` to create a new API key.
4. Name your API key, And enable the **"Never expires"** toggle to prevent expiration.
5. Click `Save` to generate the API key.
6. Copy the API key, as it will not be retrievable once you click **Done**.
7. Paste the copied API key into Callers to complete the connection.
### Adding a Cal.com Step in a Callers Campaign
Note that to add this step, each contact must have an **`Email`.**
**Email Handling for Cal.com Integration:**
Callers will attempt to obtain the contact's email in the following order:
1. From the contact field (if available)
2. From the SIP headers (if provided by your telephony provider)
3. By extracting it from the conversation transcript
If the email cannot be found, the meeting will be scheduled without sending an invite to the contact.
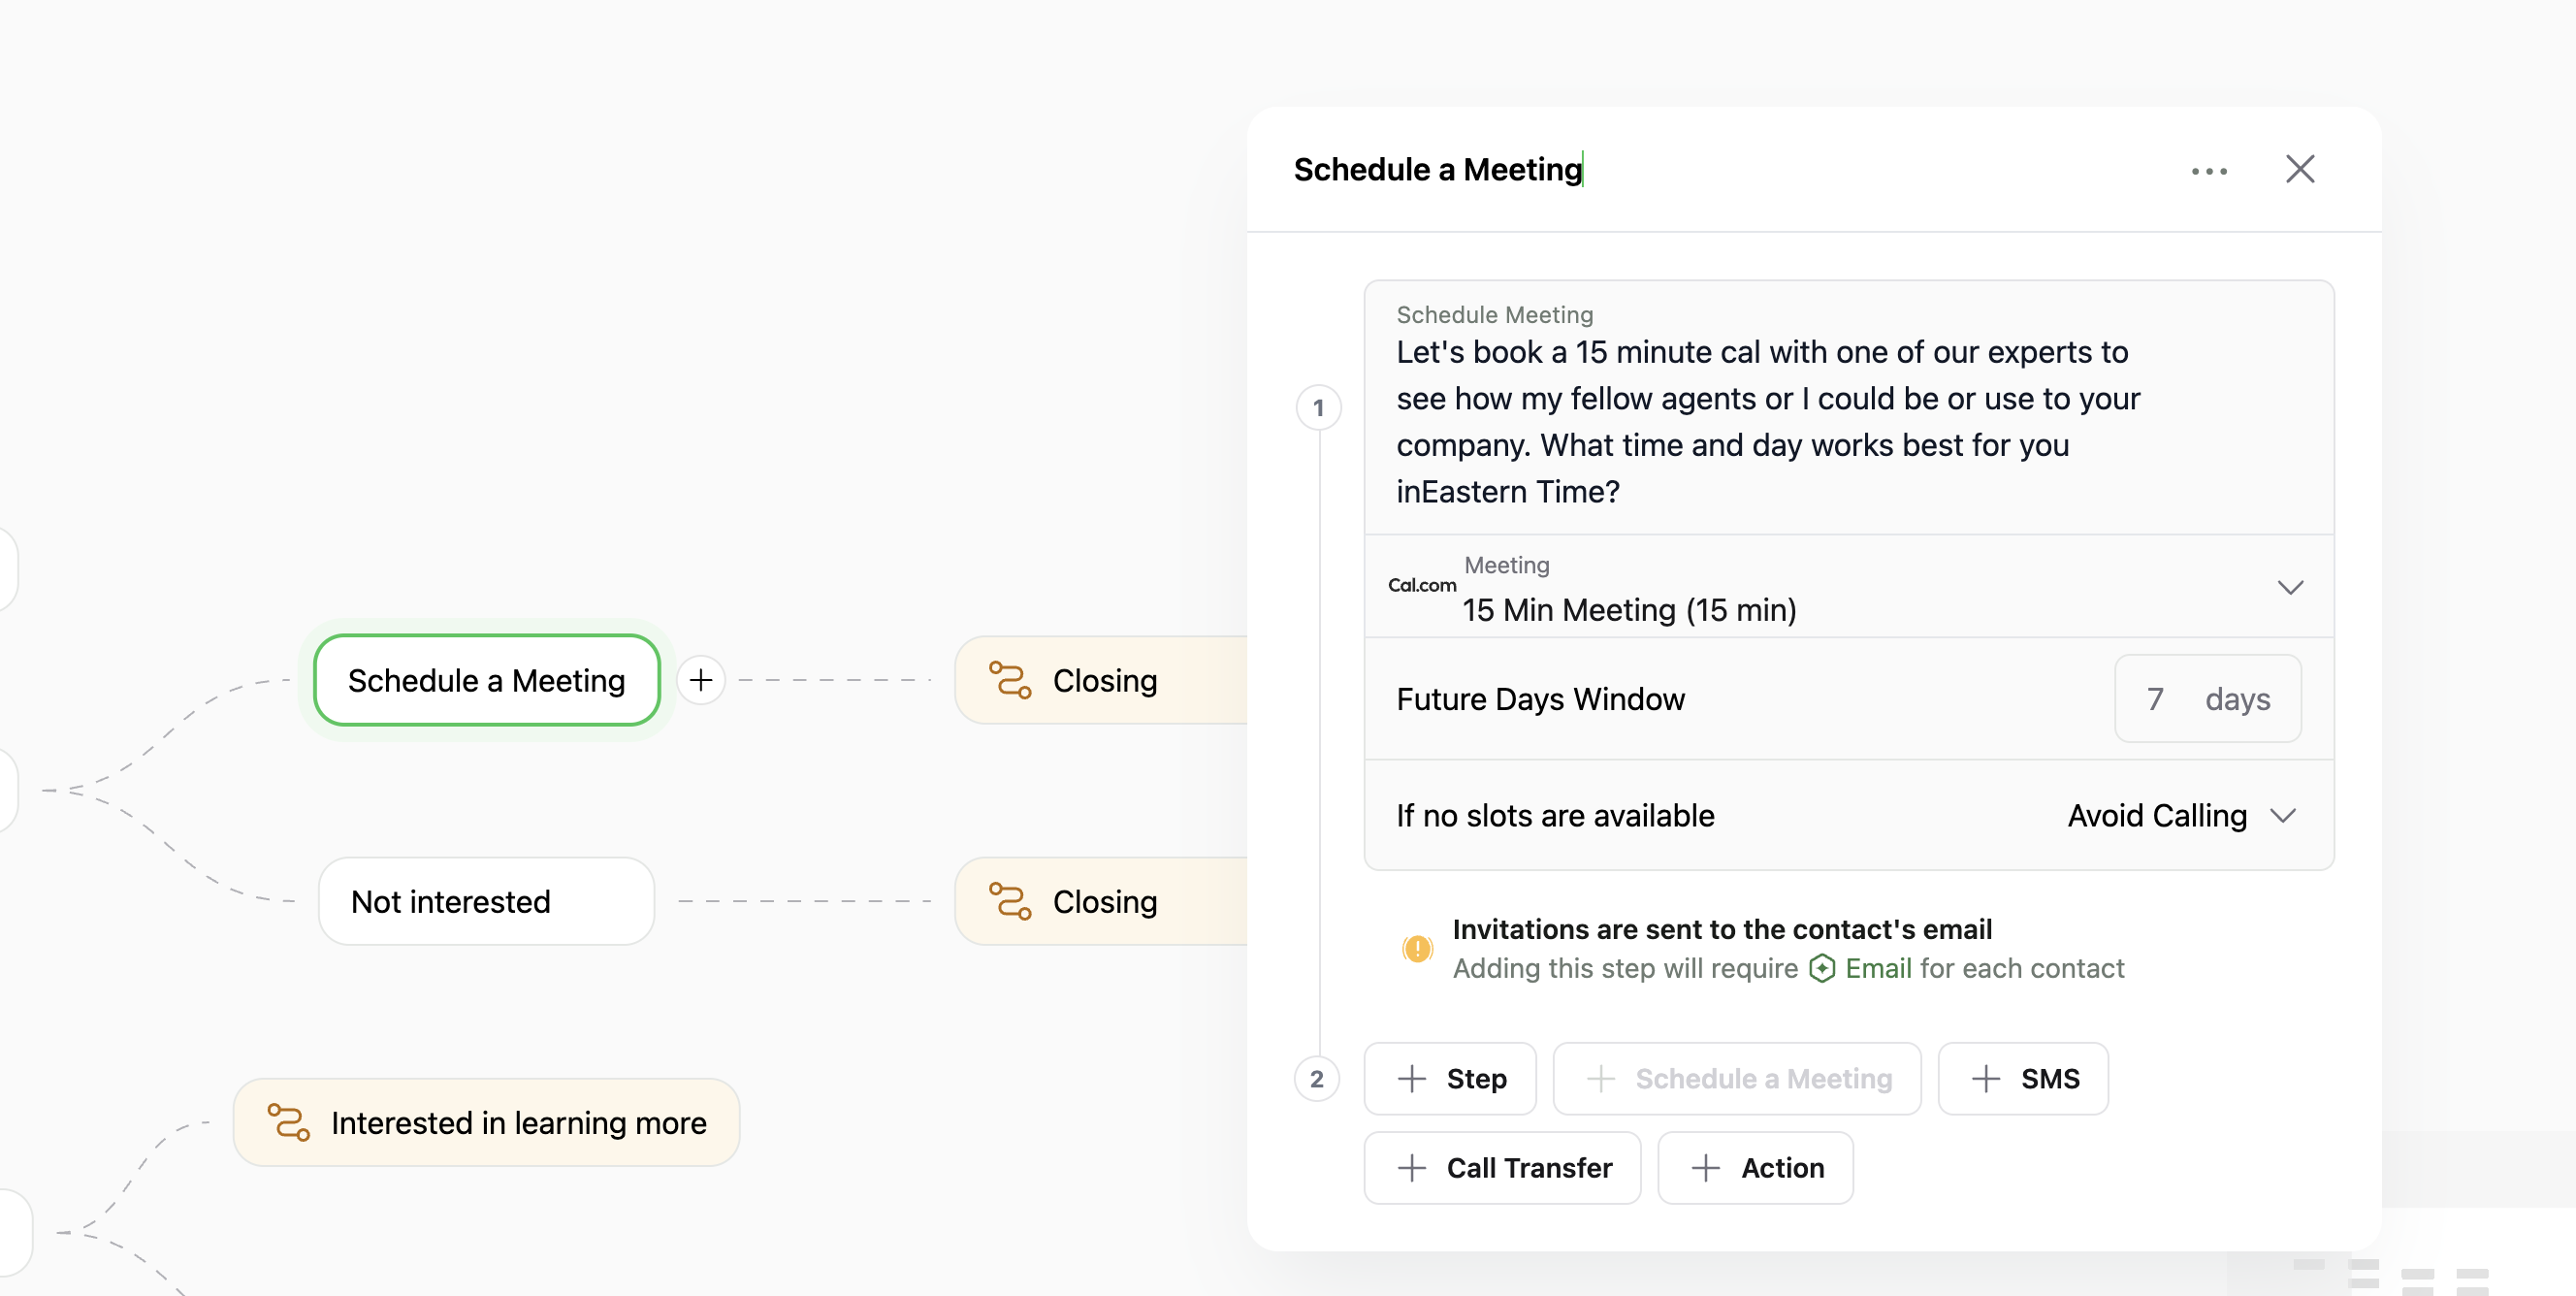
* Press the `Schedule a Meeting` button.
* Determine the **assistant's spoken content** before offering time slots
* Choose the relevant **event** from the dropdown.
* Set how many days in advance clients can schedule meetings by setting the '**Schedule days ahead**' field.
### Handling No Available Time Slots
* **Avoid Calling**: Prevents the assistant from making calls when no slots are available.
* **Use Fallback Phrase**: Allows the assistant to use a custom fallback phrase.
* Enter the phrase in the provided text field.
### Handling No Available Time Slots
**If you do not have an API Key, follow these steps to create one:**
1. Log in to **Cal.com** and navigate to **Settings** (located at the bottom left of the dashboard).
2. In the side menu, find and click on **"API keys"** under the **Developer** section.
3. Click `Add` to create a new API key.
4. Name your API key, And enable the **"Never expires"** toggle to prevent expiration.
5. Click `Save` to generate the API key.
6. Copy the API key, as it will not be retrievable once you click **Done**.
7. Paste the copied API key into Callers to complete the connection.
### Adding a Cal.com Step in a Callers Campaign
Note that to add this step, each contact must have an **`Email`.**
**Email Handling for Cal.com Integration:**
Callers will attempt to obtain the contact's email in the following order:
1. From the contact field (if available)
2. From the SIP headers (if provided by your telephony provider)
3. By extracting it from the conversation transcript
If the email cannot be found, the meeting will be scheduled without sending an invite to the contact.
* Press the `Schedule a Meeting` button.
* Determine the **assistant's spoken content** before offering time slots
* Choose the relevant **event** from the dropdown.
* Set how many days in advance clients can schedule meetings by setting the '**Schedule days ahead**' field.
### Handling No Available Time Slots
* **Avoid Calling**: Prevents the assistant from making calls when no slots are available.
* **Use Fallback Phrase**: Allows the assistant to use a custom fallback phrase.
* Enter the phrase in the provided text field.
### Handling No Available Time Slots
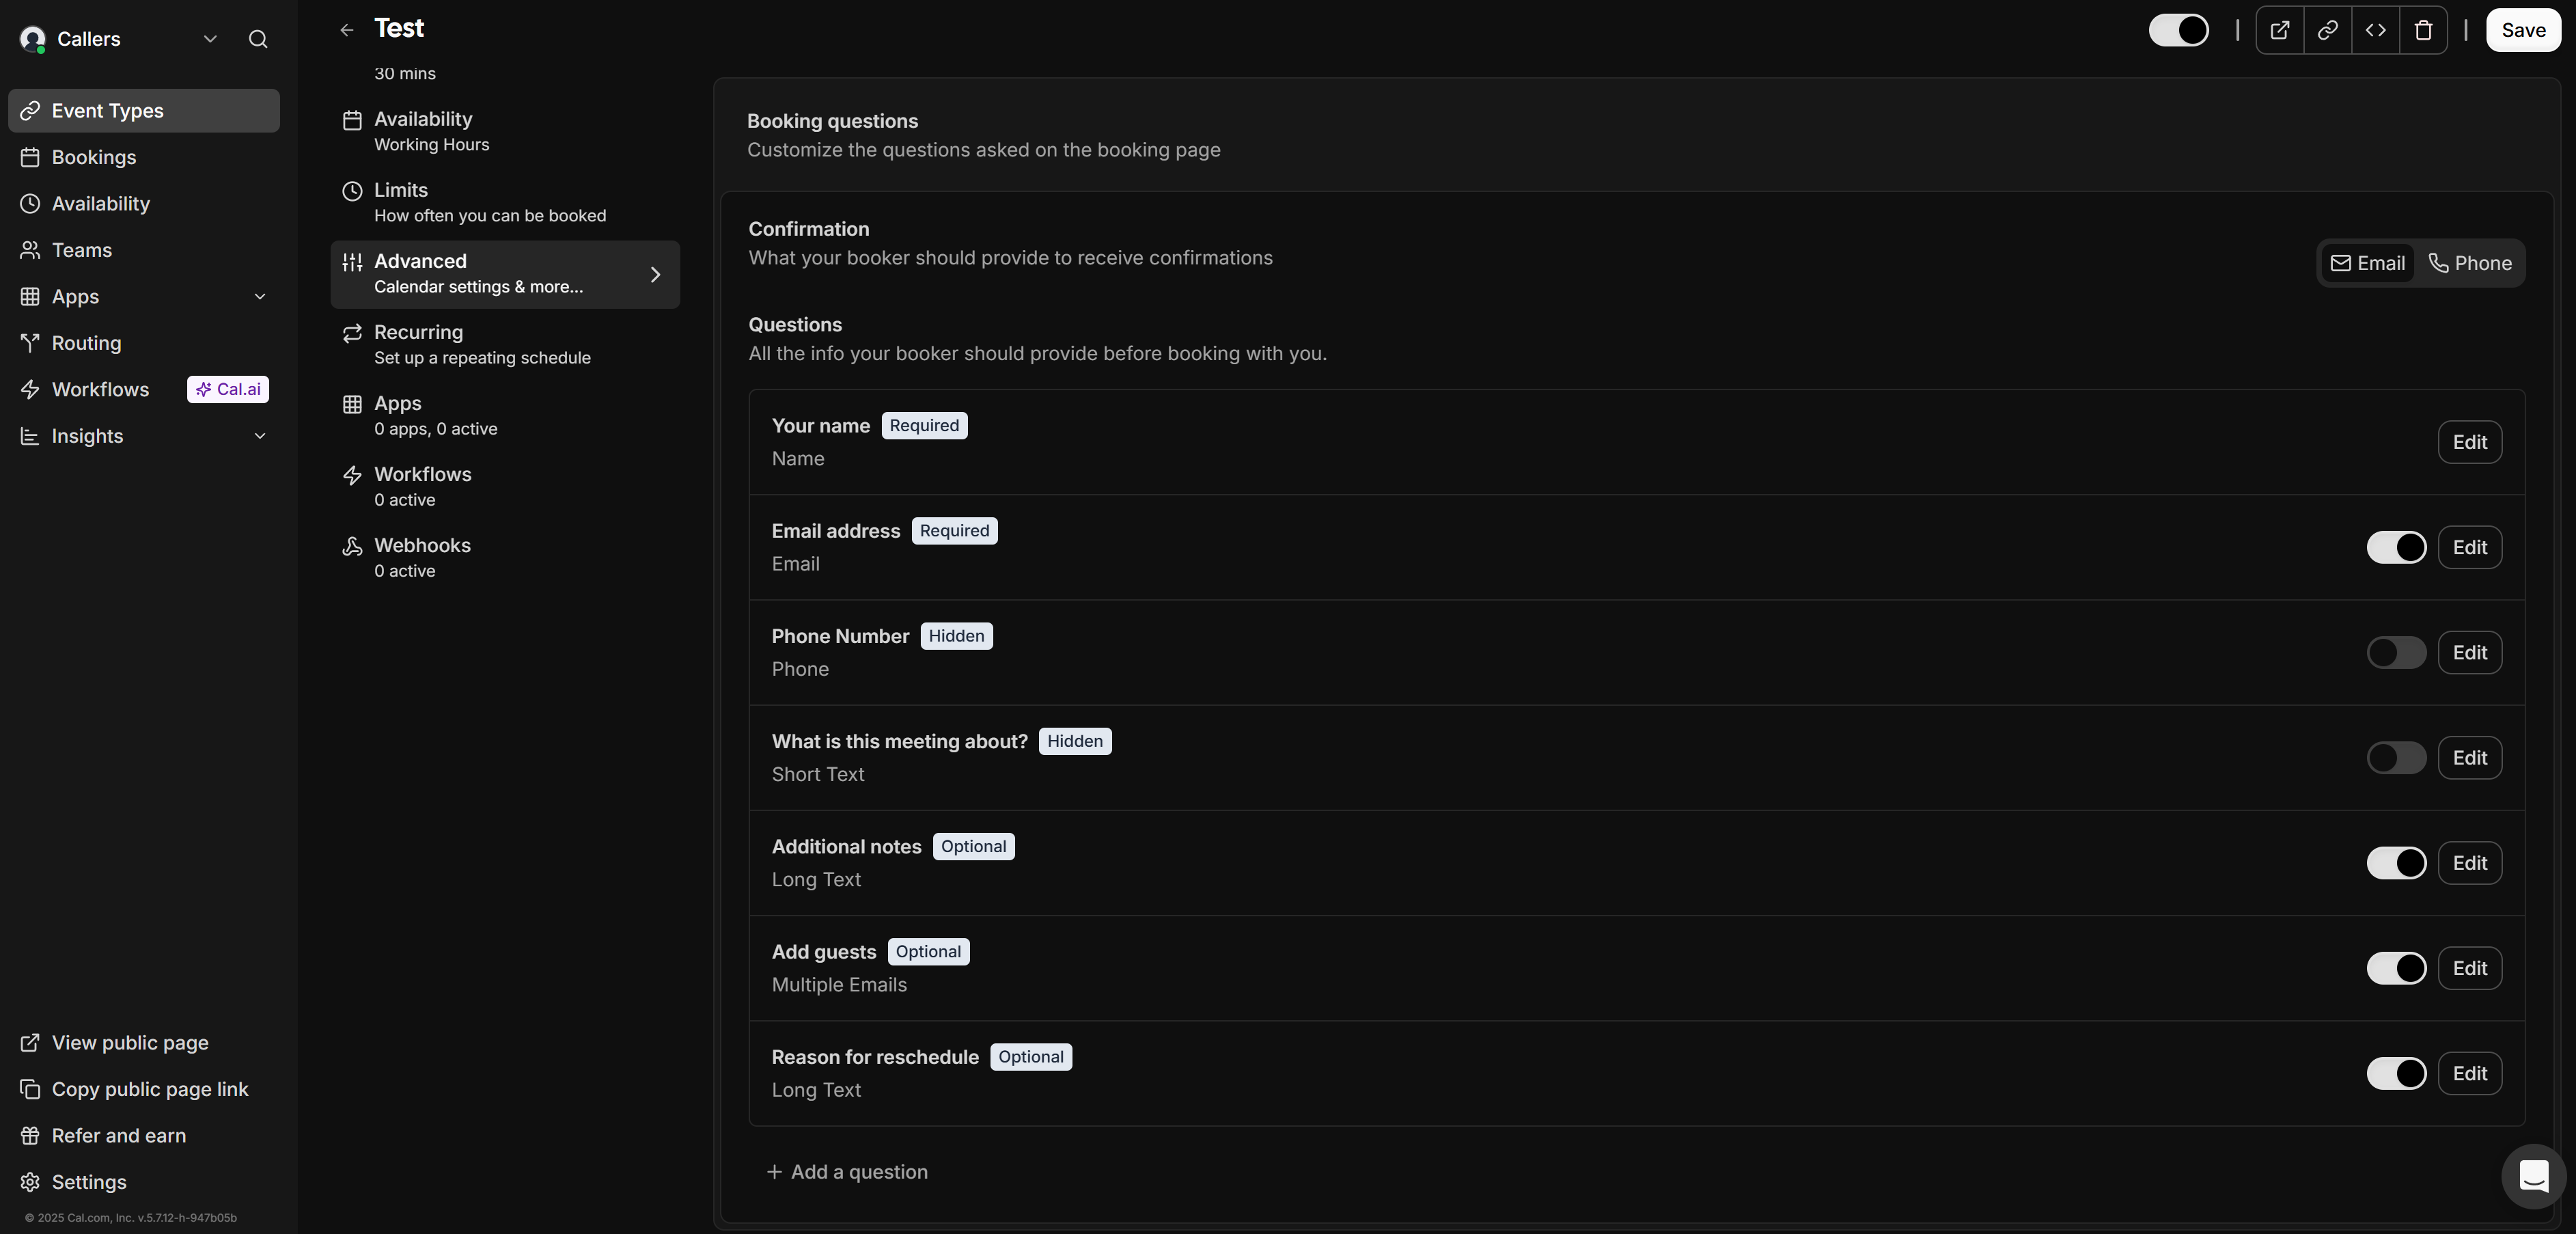
 ### Verifying Cal.com Settings
To ensure seamless integration with Callers, verify the event settings within Cal.com:
1. Log in to your **Cal.com**
2. Navigate to the event you want to integrate with Callers.
3. Go to the **Advanced** tab within the event settings.
4. Ensure **additional questions are optional** (events with required questions cannot be used in Callers).
### Verifying Cal.com Settings
To ensure seamless integration with Callers, verify the event settings within Cal.com:
1. Log in to your **Cal.com**
2. Navigate to the event you want to integrate with Callers.
3. Go to the **Advanced** tab within the event settings.
4. Ensure **additional questions are optional** (events with required questions cannot be used in Callers).
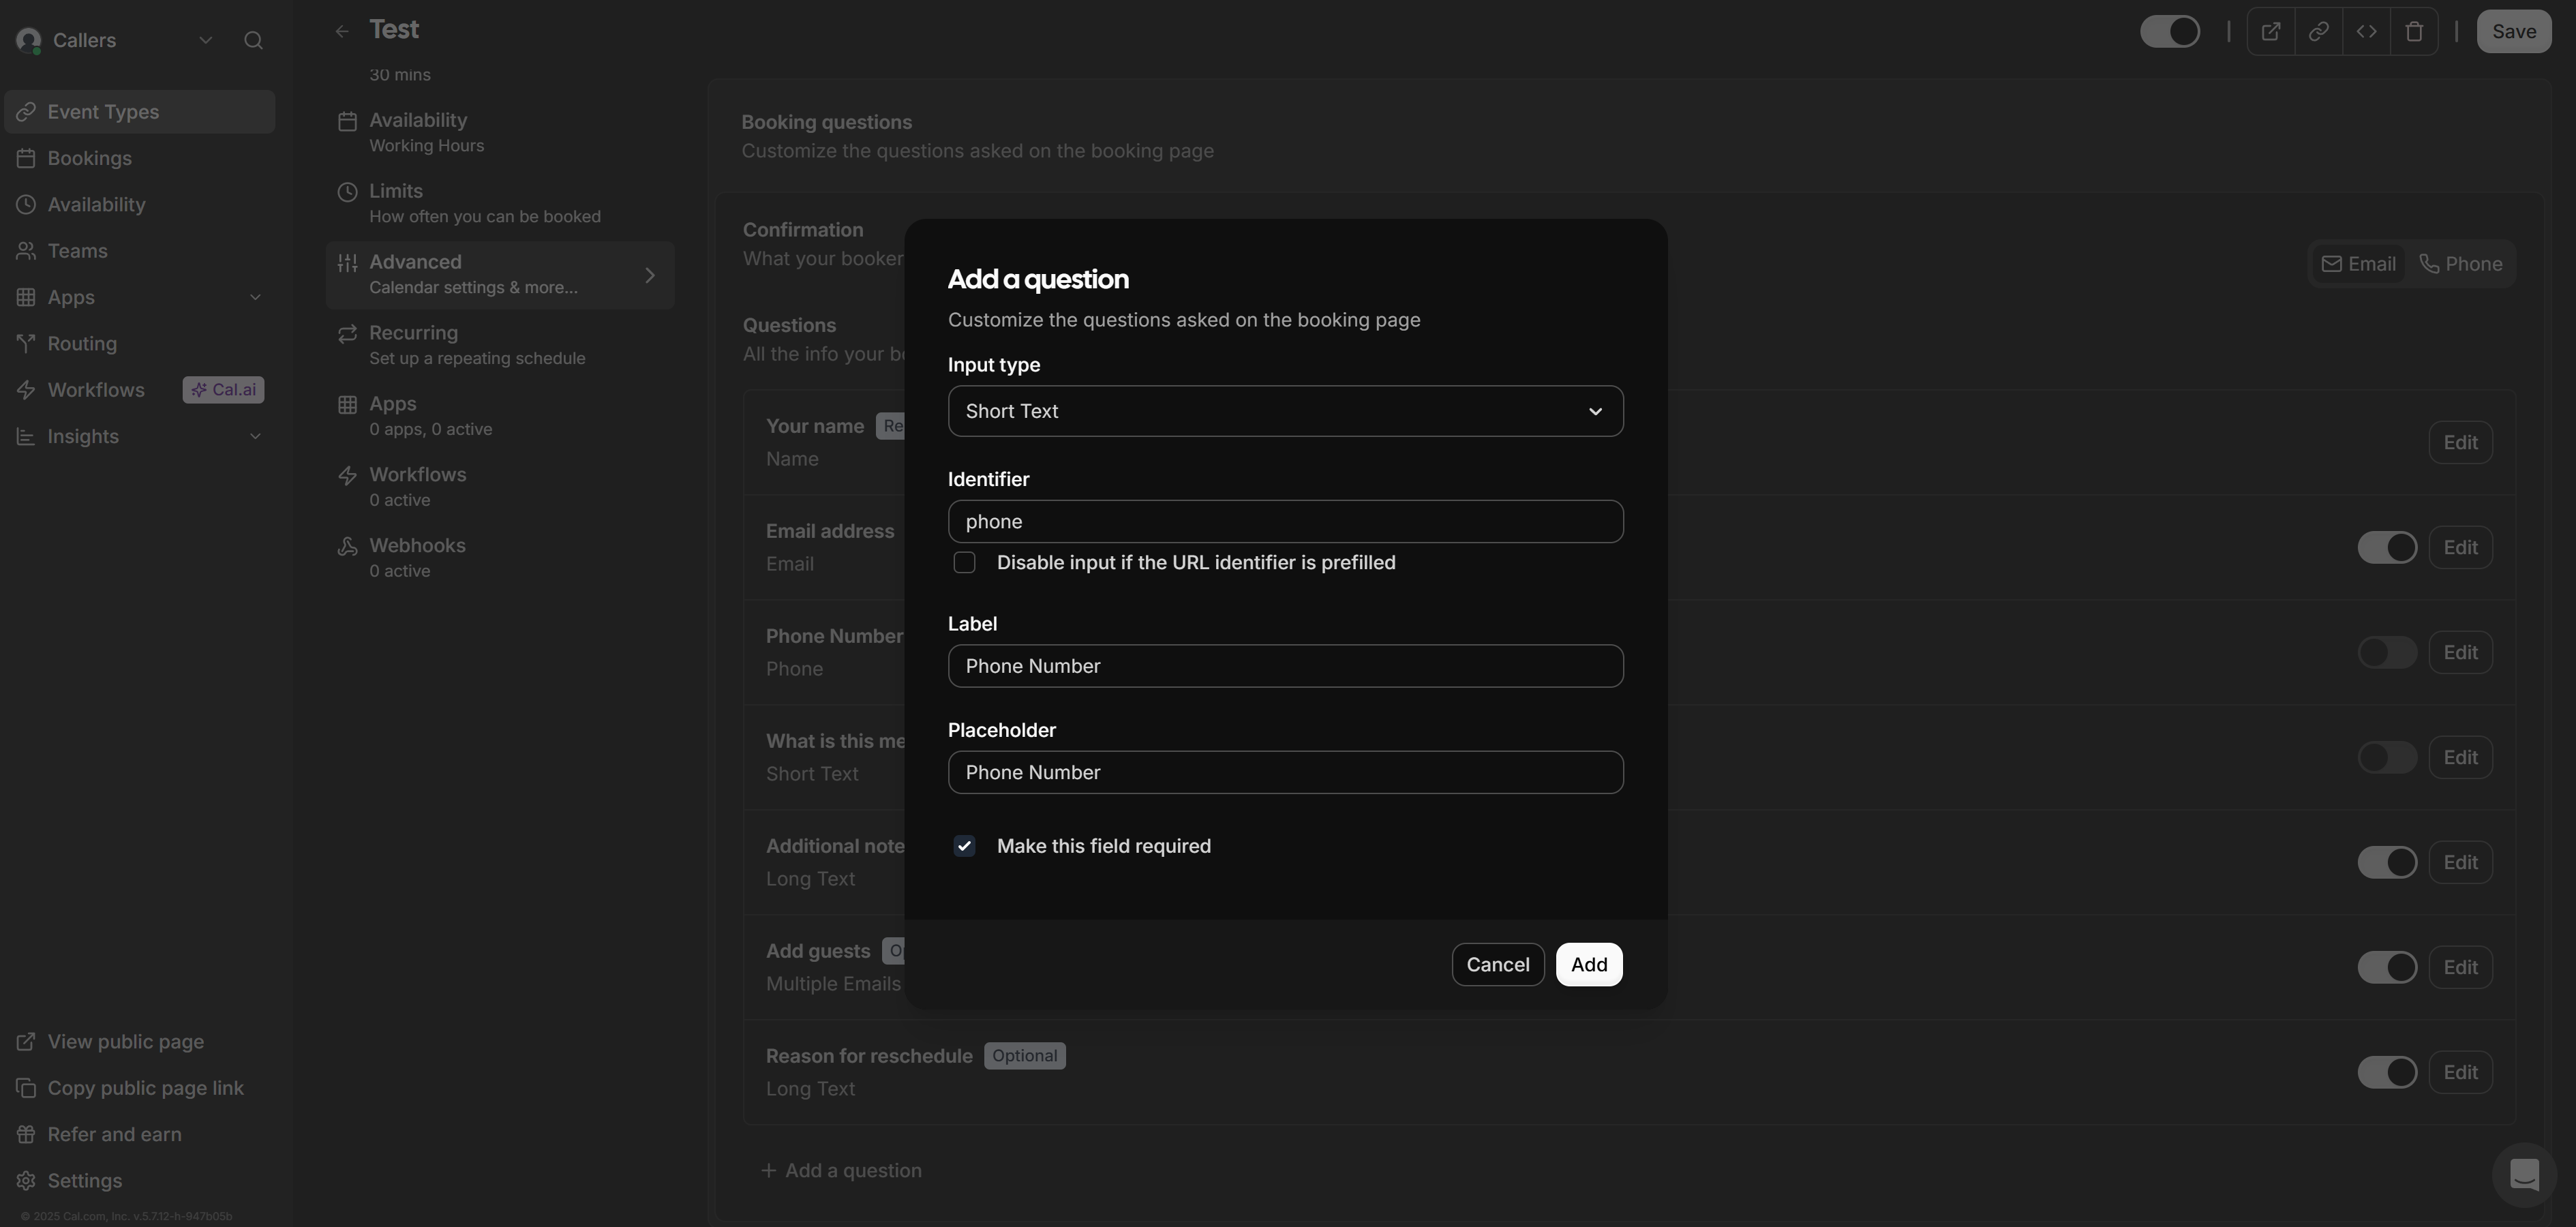
 ### Adding Contact's Phone Number to the Invite
* **Access Event Settings:** Navigate to your Cal.com account and select the event integrated with Callers and go to the ***Advanced*** tab within the event settings.
* **Add a New Question:** Scroll to the **Booking questions** and click `Add a question`.
* **Configure the Question Settings:**
* **Input type:** Short Text
* **Identifier:** phone
* **Disable input if the URL identifier is prefilled:** unchecked
* **Required:** No
* **Customization Options:** Only **Label** and **Placeholder** fields are customizable. Adjust these as necessary to fit the context of your event.
* **Save the Configuration:**
* Click `Add` to include the field in your invite.
* Click `Save` at the top right of the event settings to apply changes.
### Adding Contact's Phone Number to the Invite
* **Access Event Settings:** Navigate to your Cal.com account and select the event integrated with Callers and go to the ***Advanced*** tab within the event settings.
* **Add a New Question:** Scroll to the **Booking questions** and click `Add a question`.
* **Configure the Question Settings:**
* **Input type:** Short Text
* **Identifier:** phone
* **Disable input if the URL identifier is prefilled:** unchecked
* **Required:** No
* **Customization Options:** Only **Label** and **Placeholder** fields are customizable. Adjust these as necessary to fit the context of your event.
* **Save the Configuration:**
* Click `Add` to include the field in your invite.
* Click `Save` at the top right of the event settings to apply changes.