> ## Documentation Index
> Fetch the complete documentation index at: https://docs.callers.ai/llms.txt
> Use this file to discover all available pages before exploring further.
# Campaign Script
> This guide provides an overview of how to create a versatile and effective campaign script within the Callers platform.Tailor the conversation flow to meet the unique needs of your campaign, whether it's for inbound or outbound calls.
### Understanding the Script Creation Process
Creating a campaign script involves setting up a series of decision points and responses that guide the conversation with your clients.
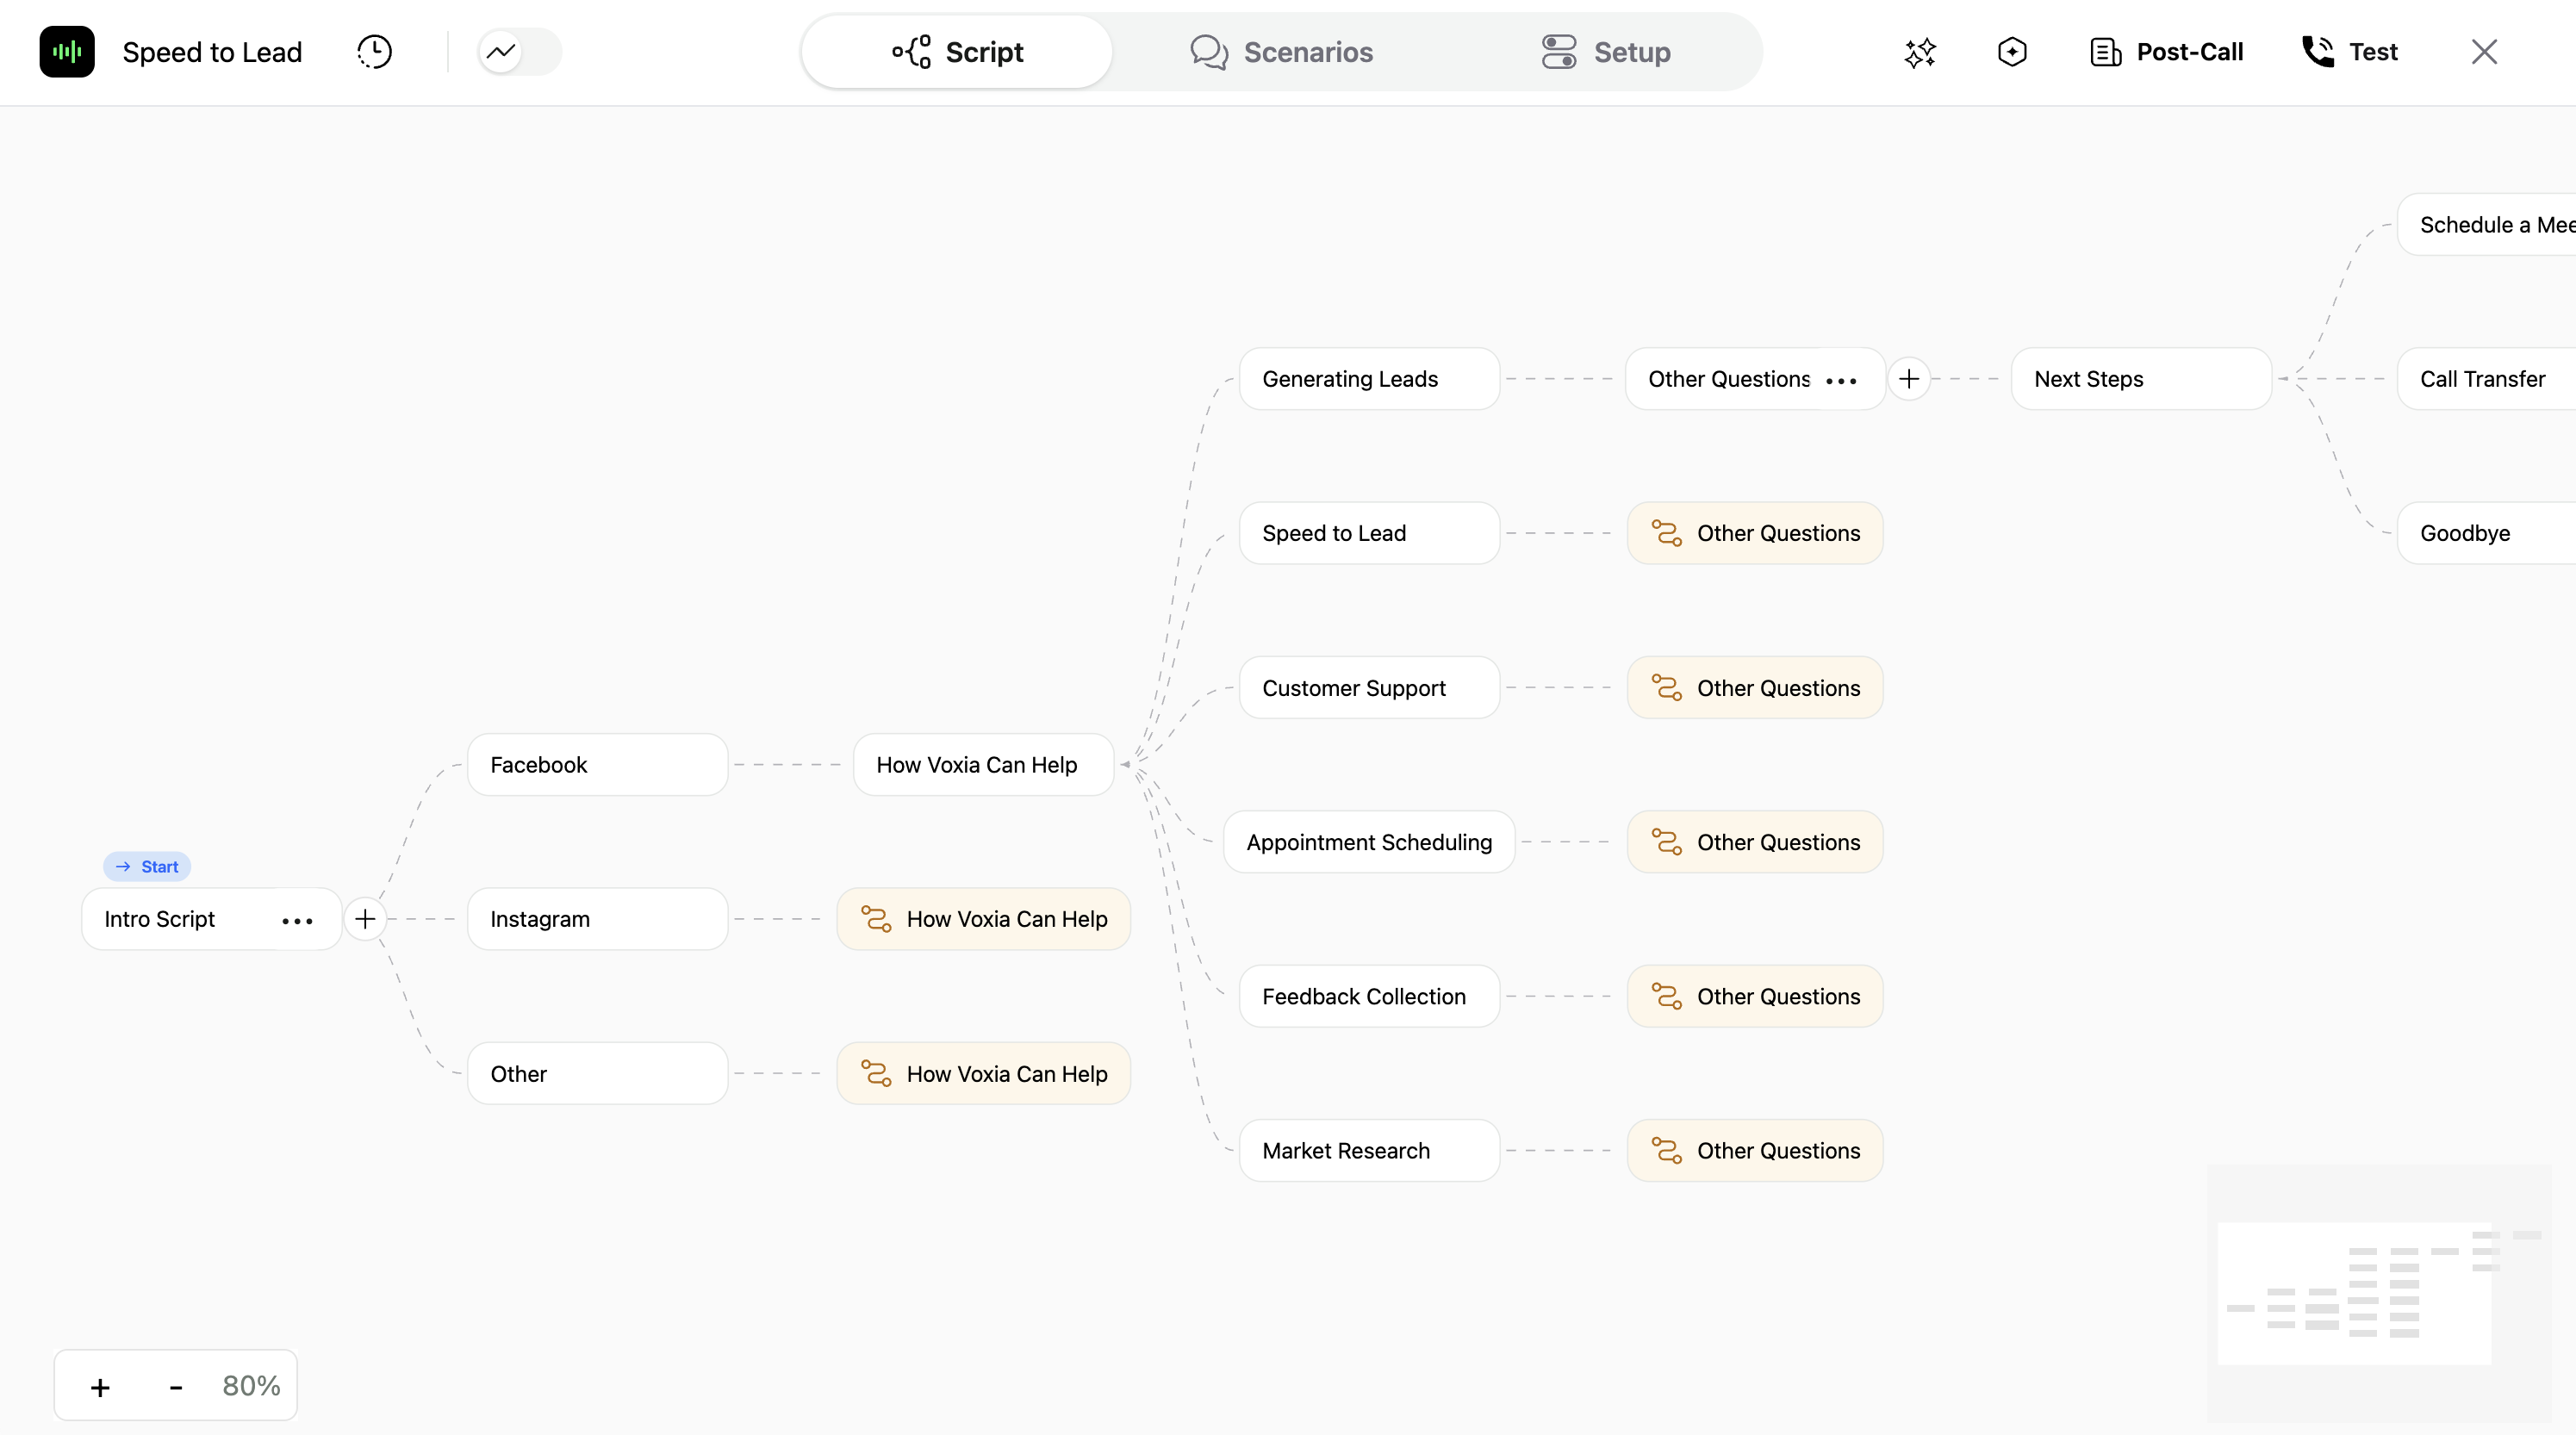 ### Steps to Create Your Script
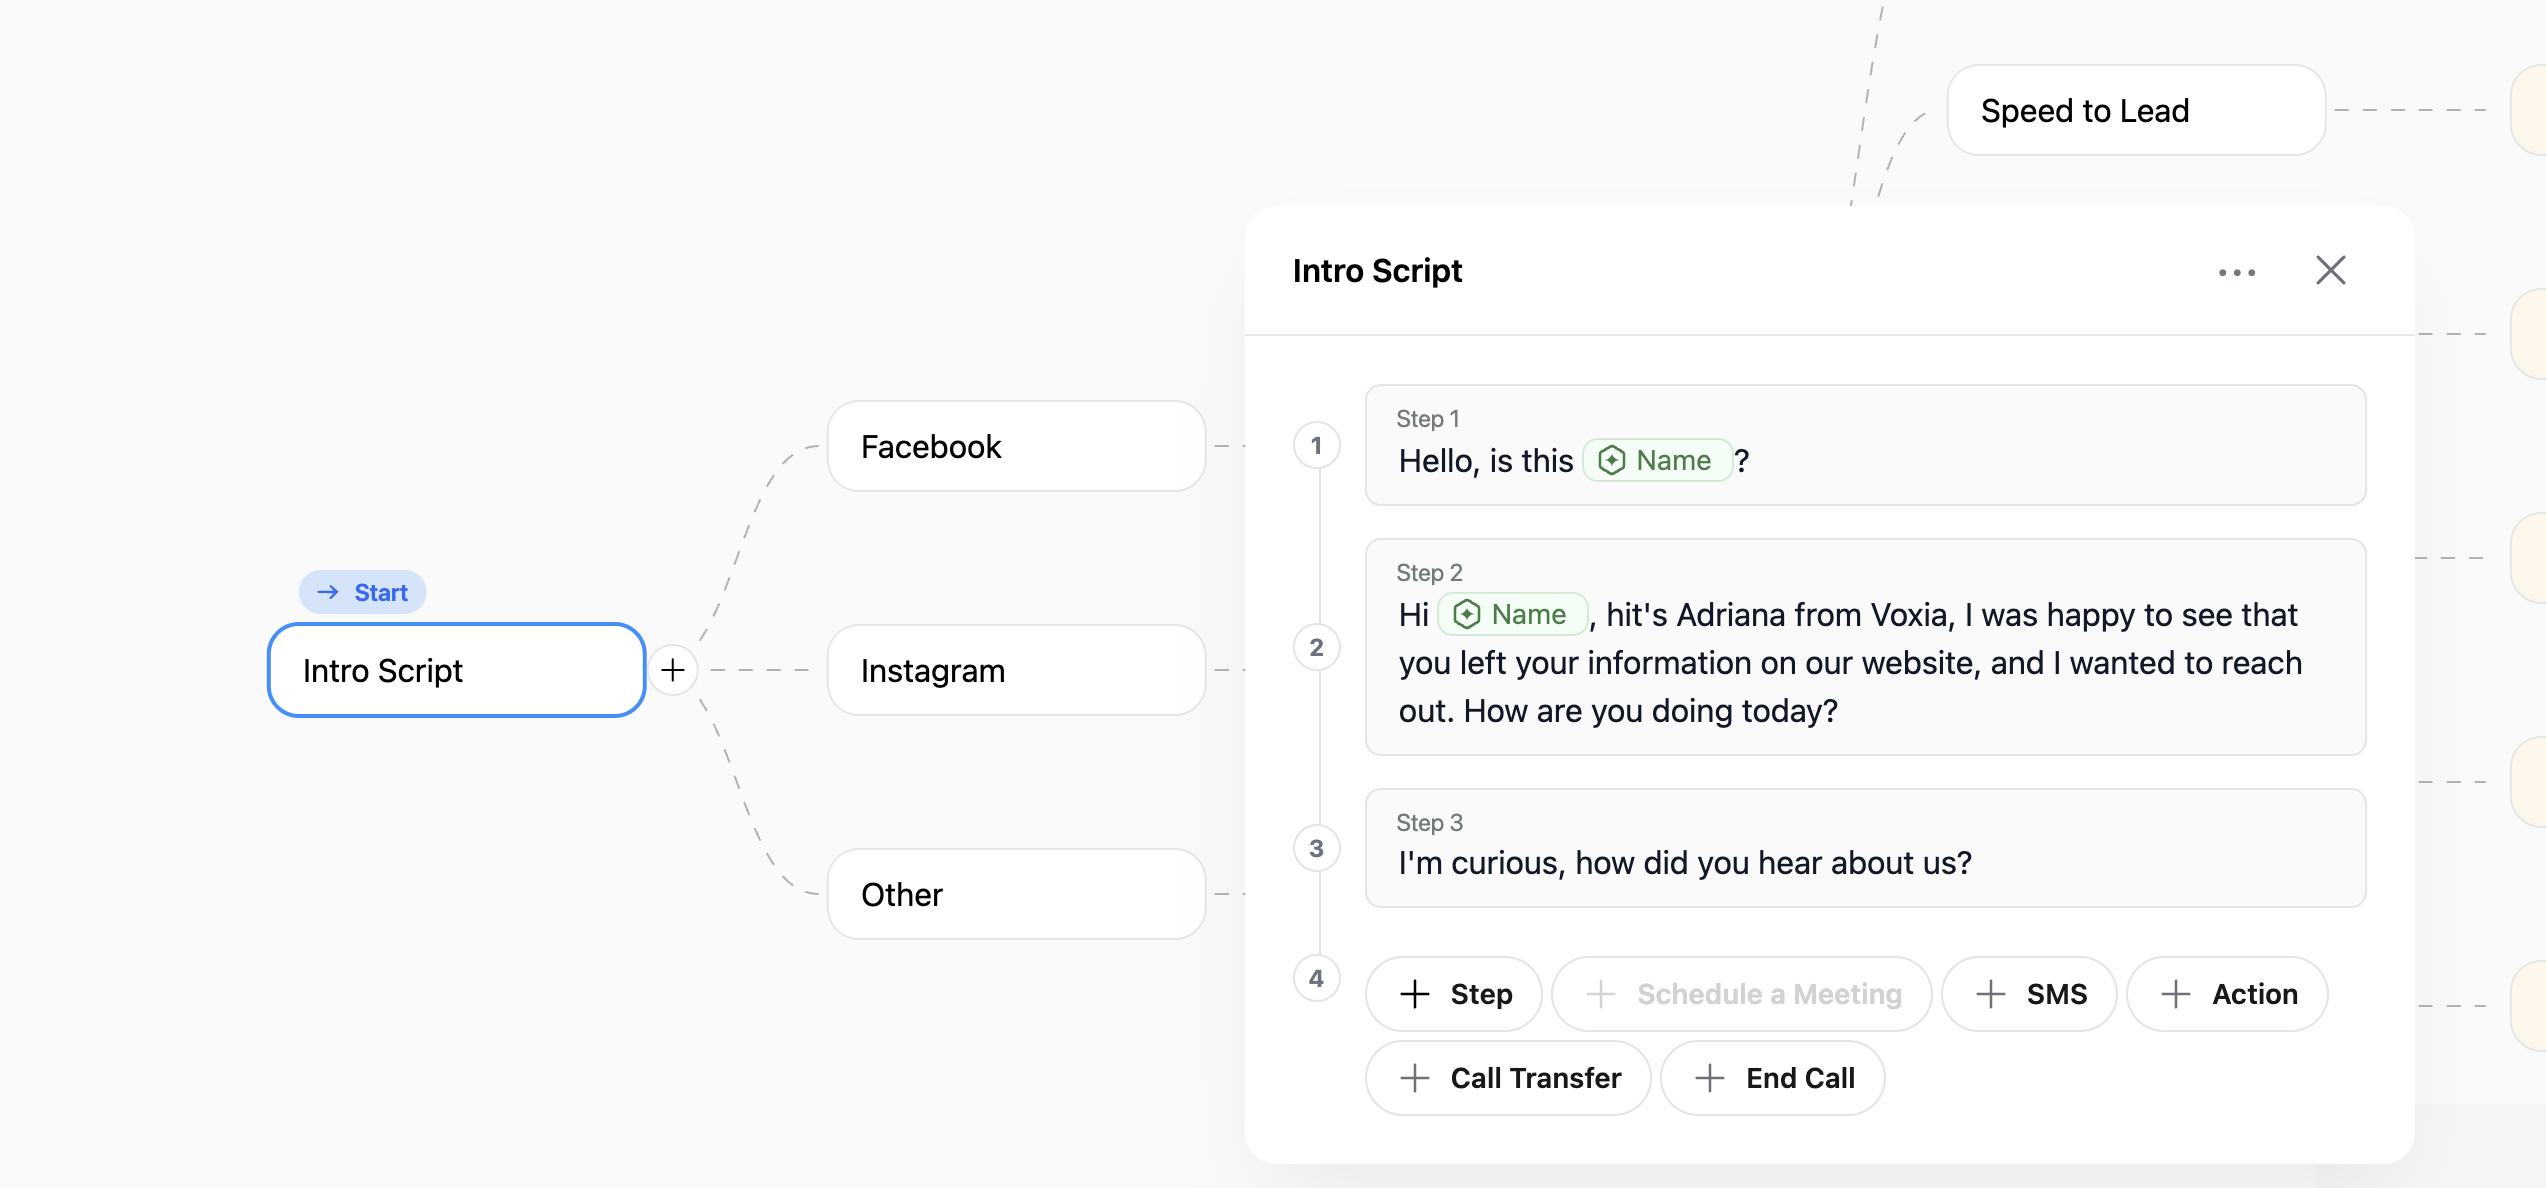
**Initiate with the Intro Script**
* **Inbound Calls**: As a suggestion, you might begin your script with an introductory script node where you confirm the client's identity by asking for their name and inquiring about their well-being. However, feel free to adjust this approach based on your specific needs.
* **Outbound Calls**: As a suggestion, start by confirming the client’s identity and then proceed with the planned interaction. This is just a guideline, and you can tailor it as required.
### Steps to Create Your Script
**Initiate with the Intro Script**
* **Inbound Calls**: As a suggestion, you might begin your script with an introductory script node where you confirm the client's identity by asking for their name and inquiring about their well-being. However, feel free to adjust this approach based on your specific needs.
* **Outbound Calls**: As a suggestion, start by confirming the client’s identity and then proceed with the planned interaction. This is just a guideline, and you can tailor it as required.
 #### **Branching the Conversation**
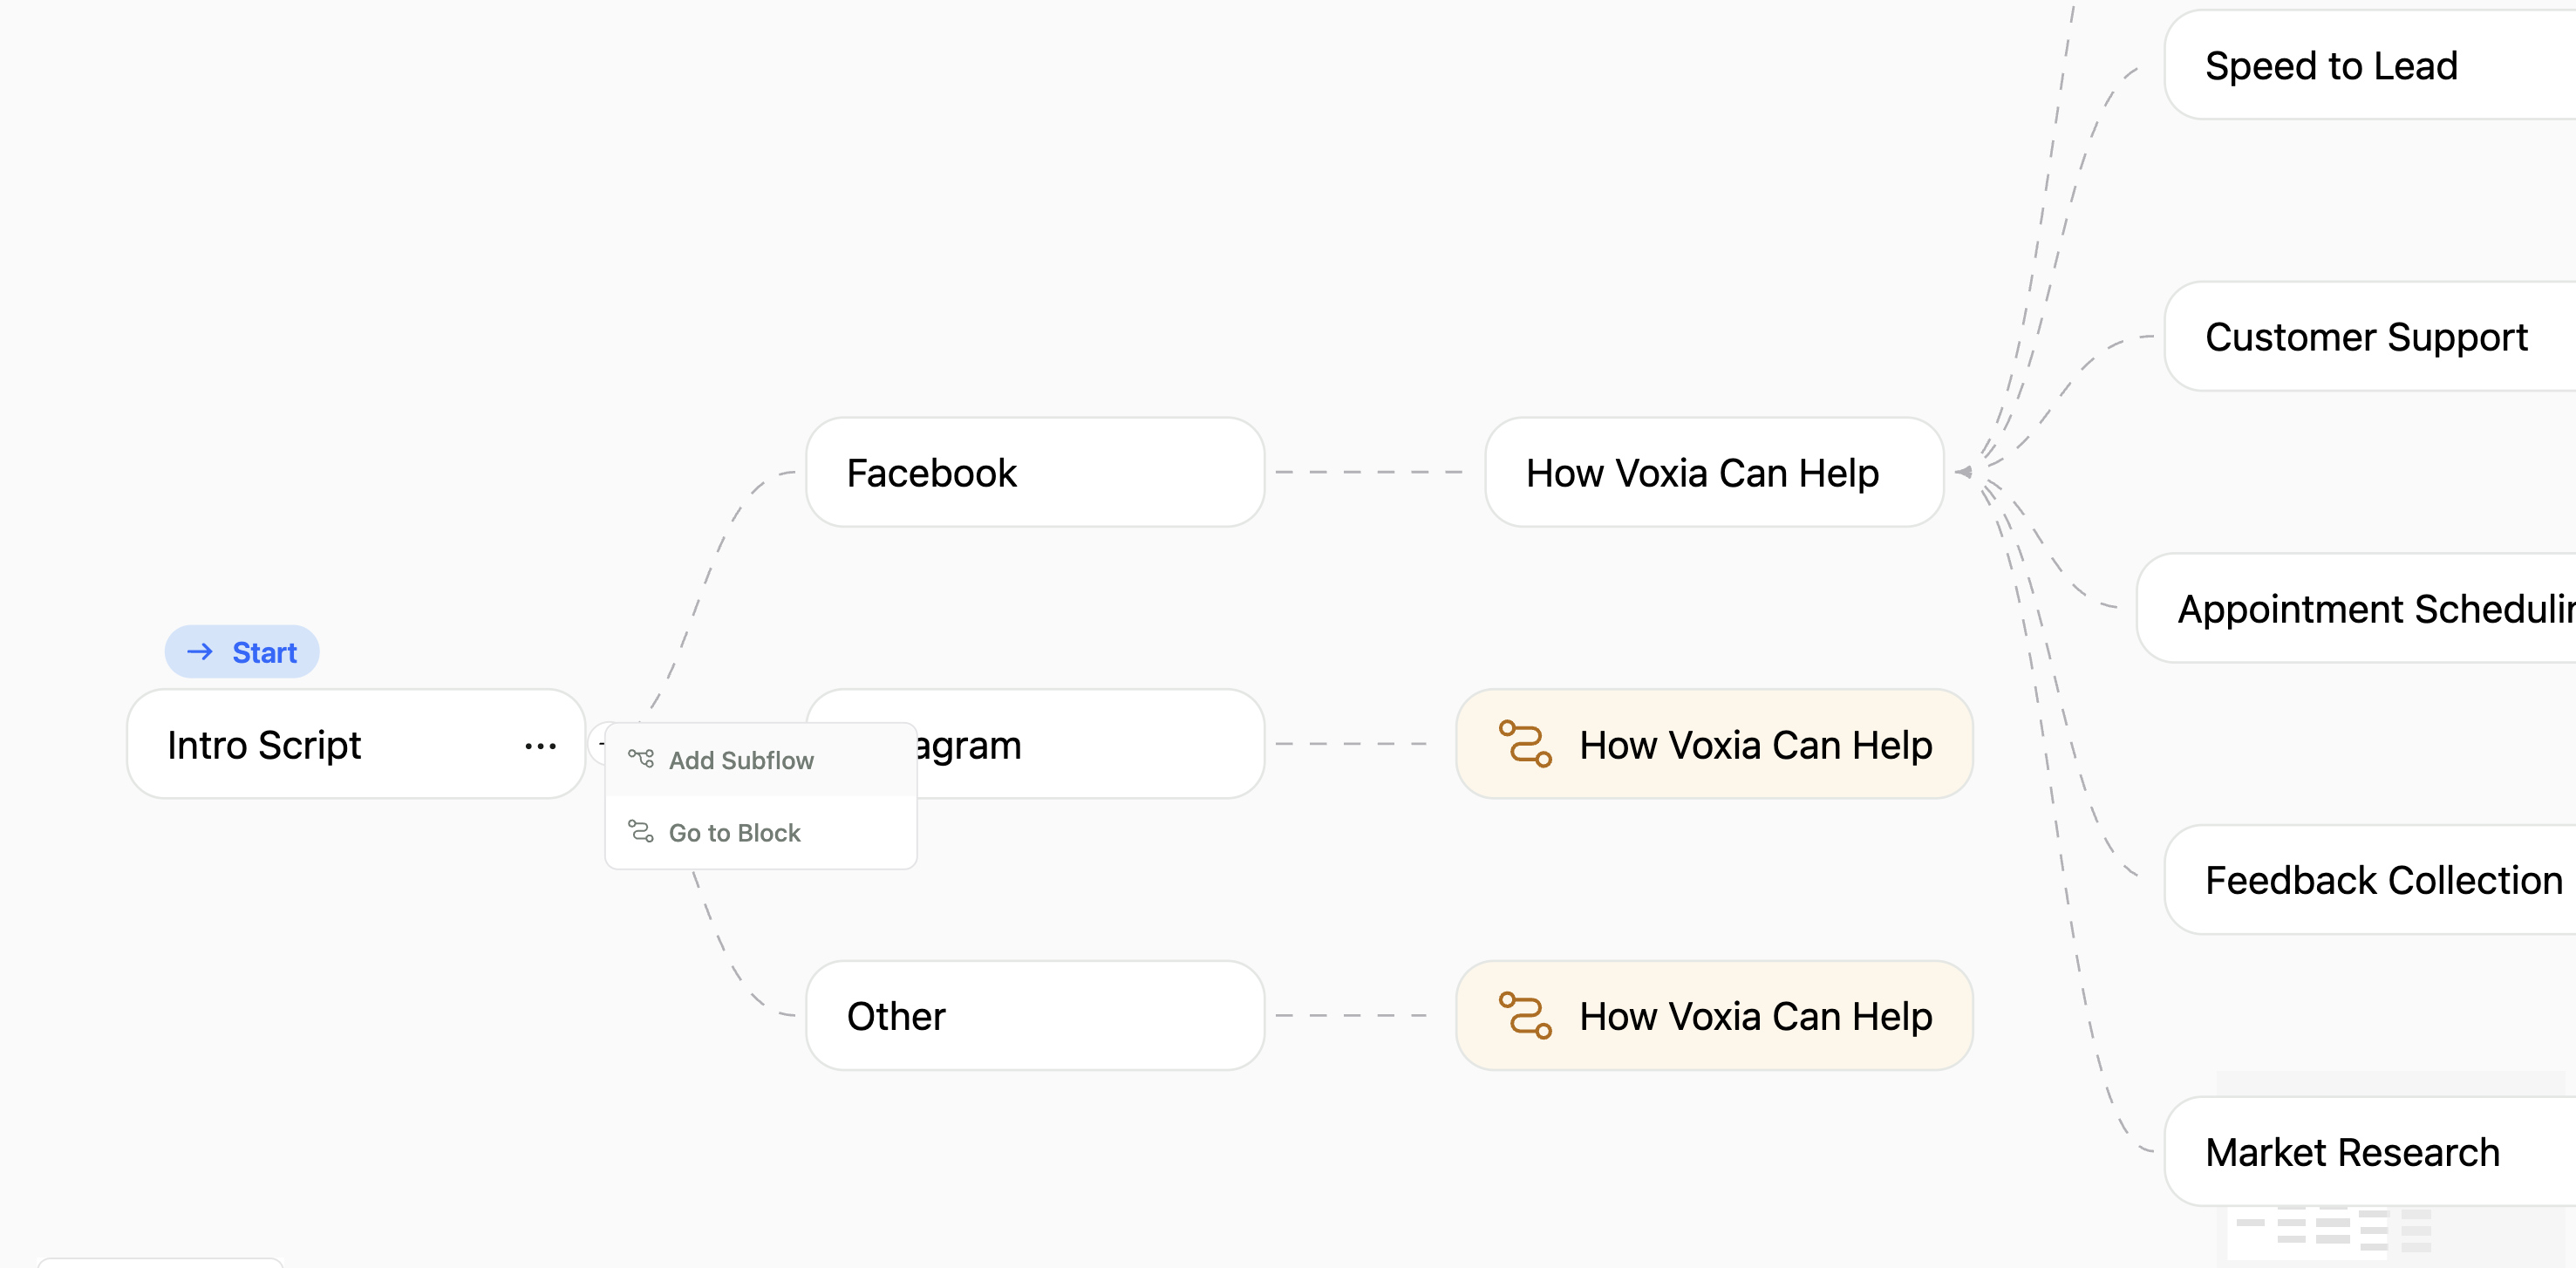
* After the initial engagement, introduce a question to guide the conversation. Based on the client's response, you can expand the script:
* Click the `+` button next to the current node.
* Select `Add Subflow` to create a new branch.
* In the new node, label it with a title that represents the client’s latest response which guides the agent to this node. Alternatively, you can simply give a title to this node based on its content.
#### **Branching the Conversation**
* After the initial engagement, introduce a question to guide the conversation. Based on the client's response, you can expand the script:
* Click the `+` button next to the current node.
* Select `Add Subflow` to create a new branch.
* In the new node, label it with a title that represents the client’s latest response which guides the agent to this node. Alternatively, you can simply give a title to this node based on its content.
 **Note**: If no decision split is required, you can continue the script in the same node.
### Managing Subflows, Nodes and Steps
* To modify your script effectively, you can move nodes, delete unnecessary subflows, or adjust branching logic.
* Moving or Deleting **Steps**:
* Position your cursor over the Subflow, click on the `•••` icon to the right of the subflow name.
**Note**: If no decision split is required, you can continue the script in the same node.
### Managing Subflows, Nodes and Steps
* To modify your script effectively, you can move nodes, delete unnecessary subflows, or adjust branching logic.
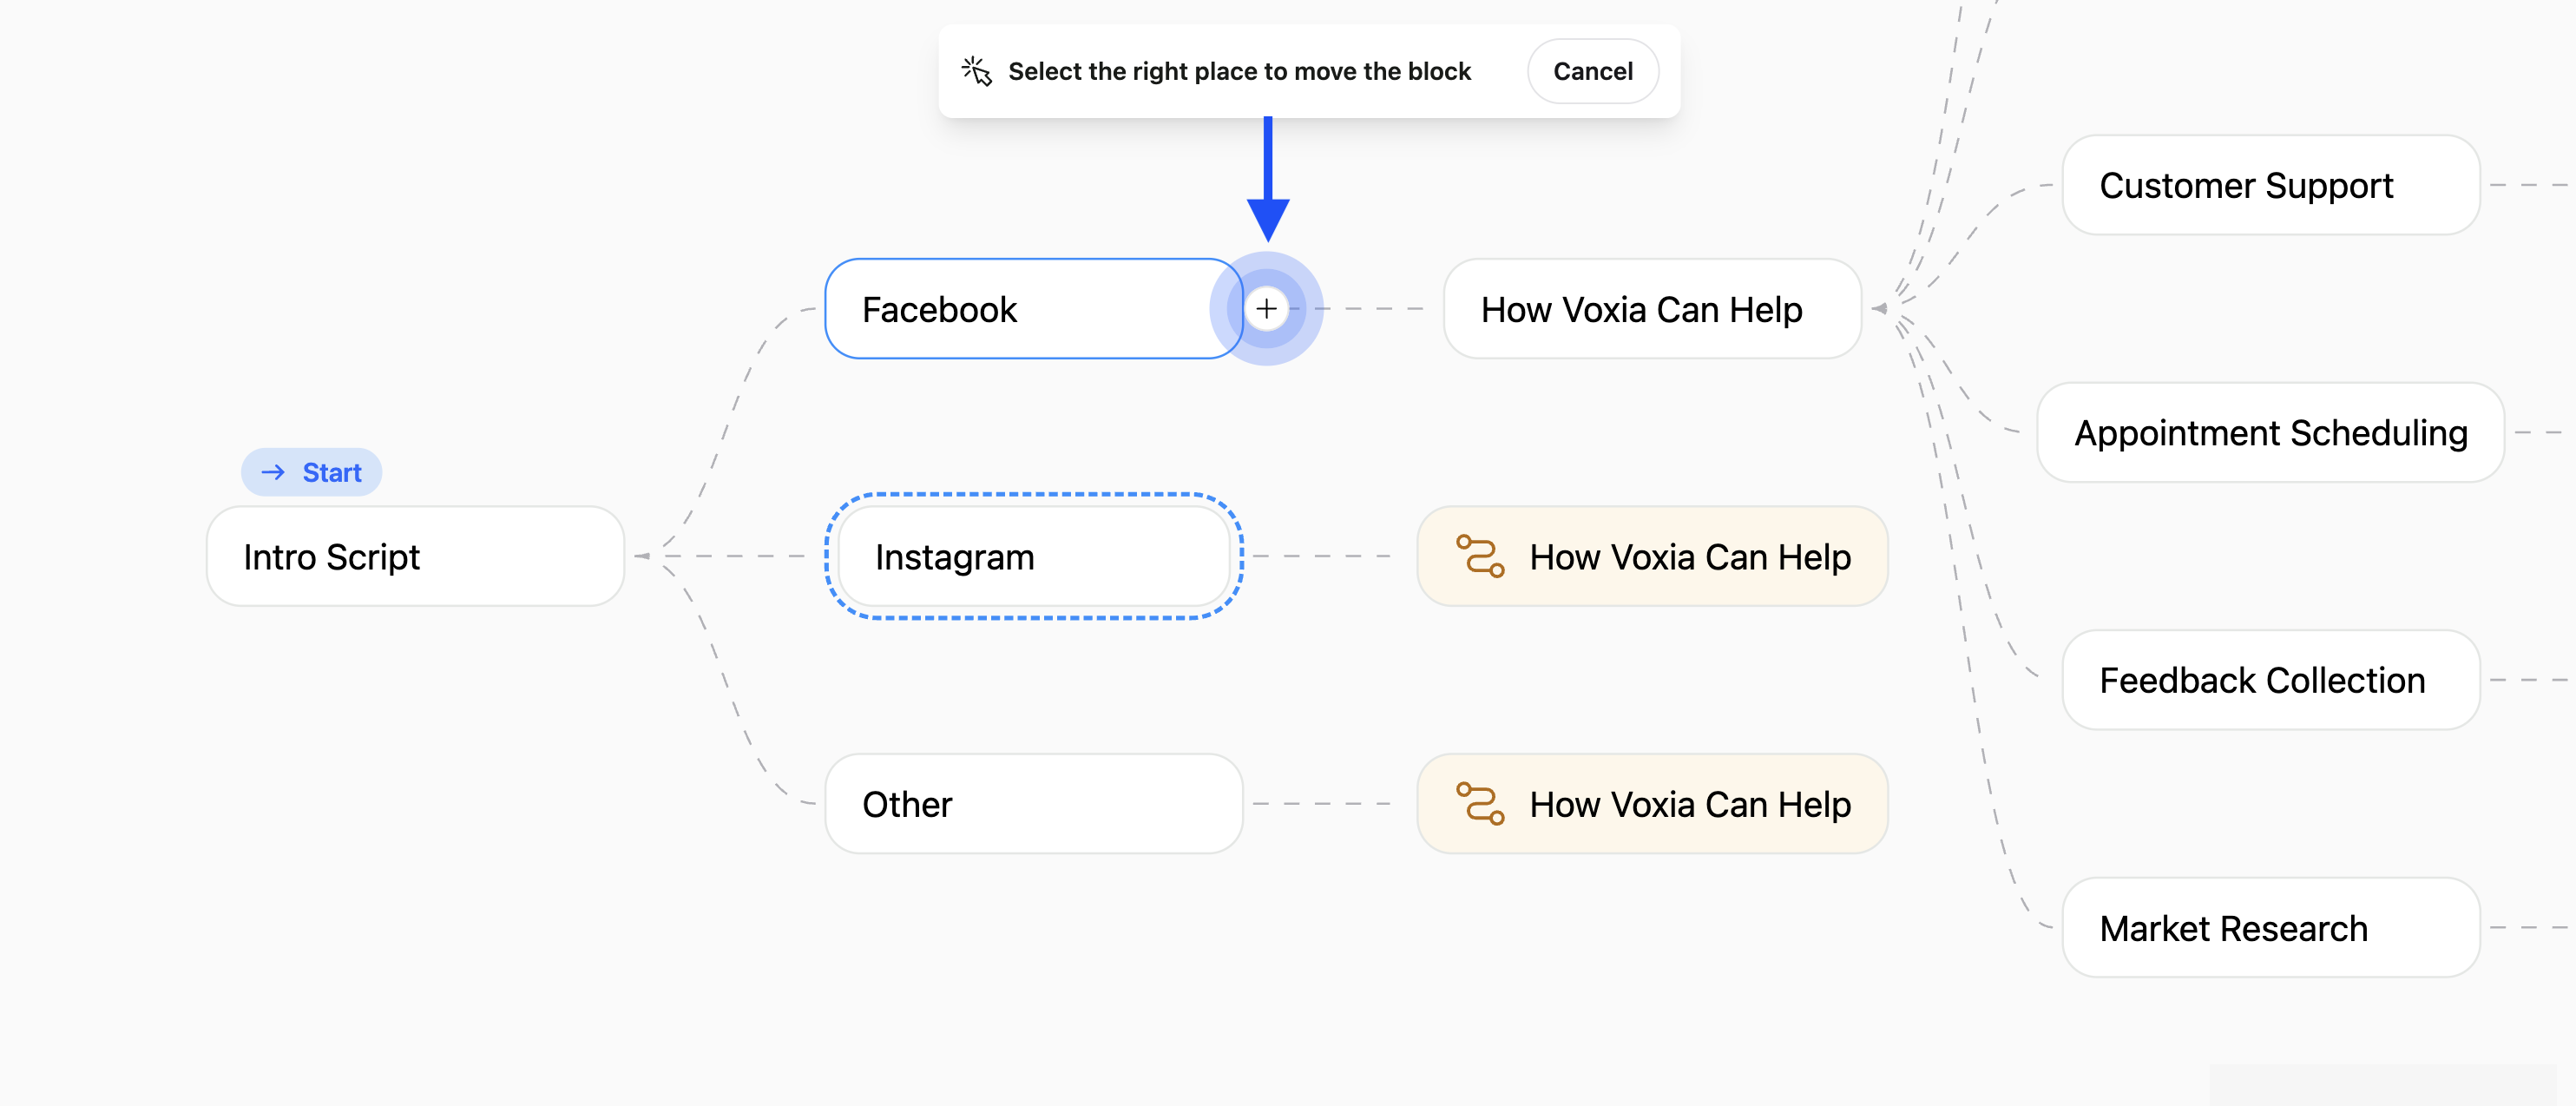
* Moving or Deleting **Steps**:
* Position your cursor over the Subflow, click on the `•••` icon to the right of the subflow name.
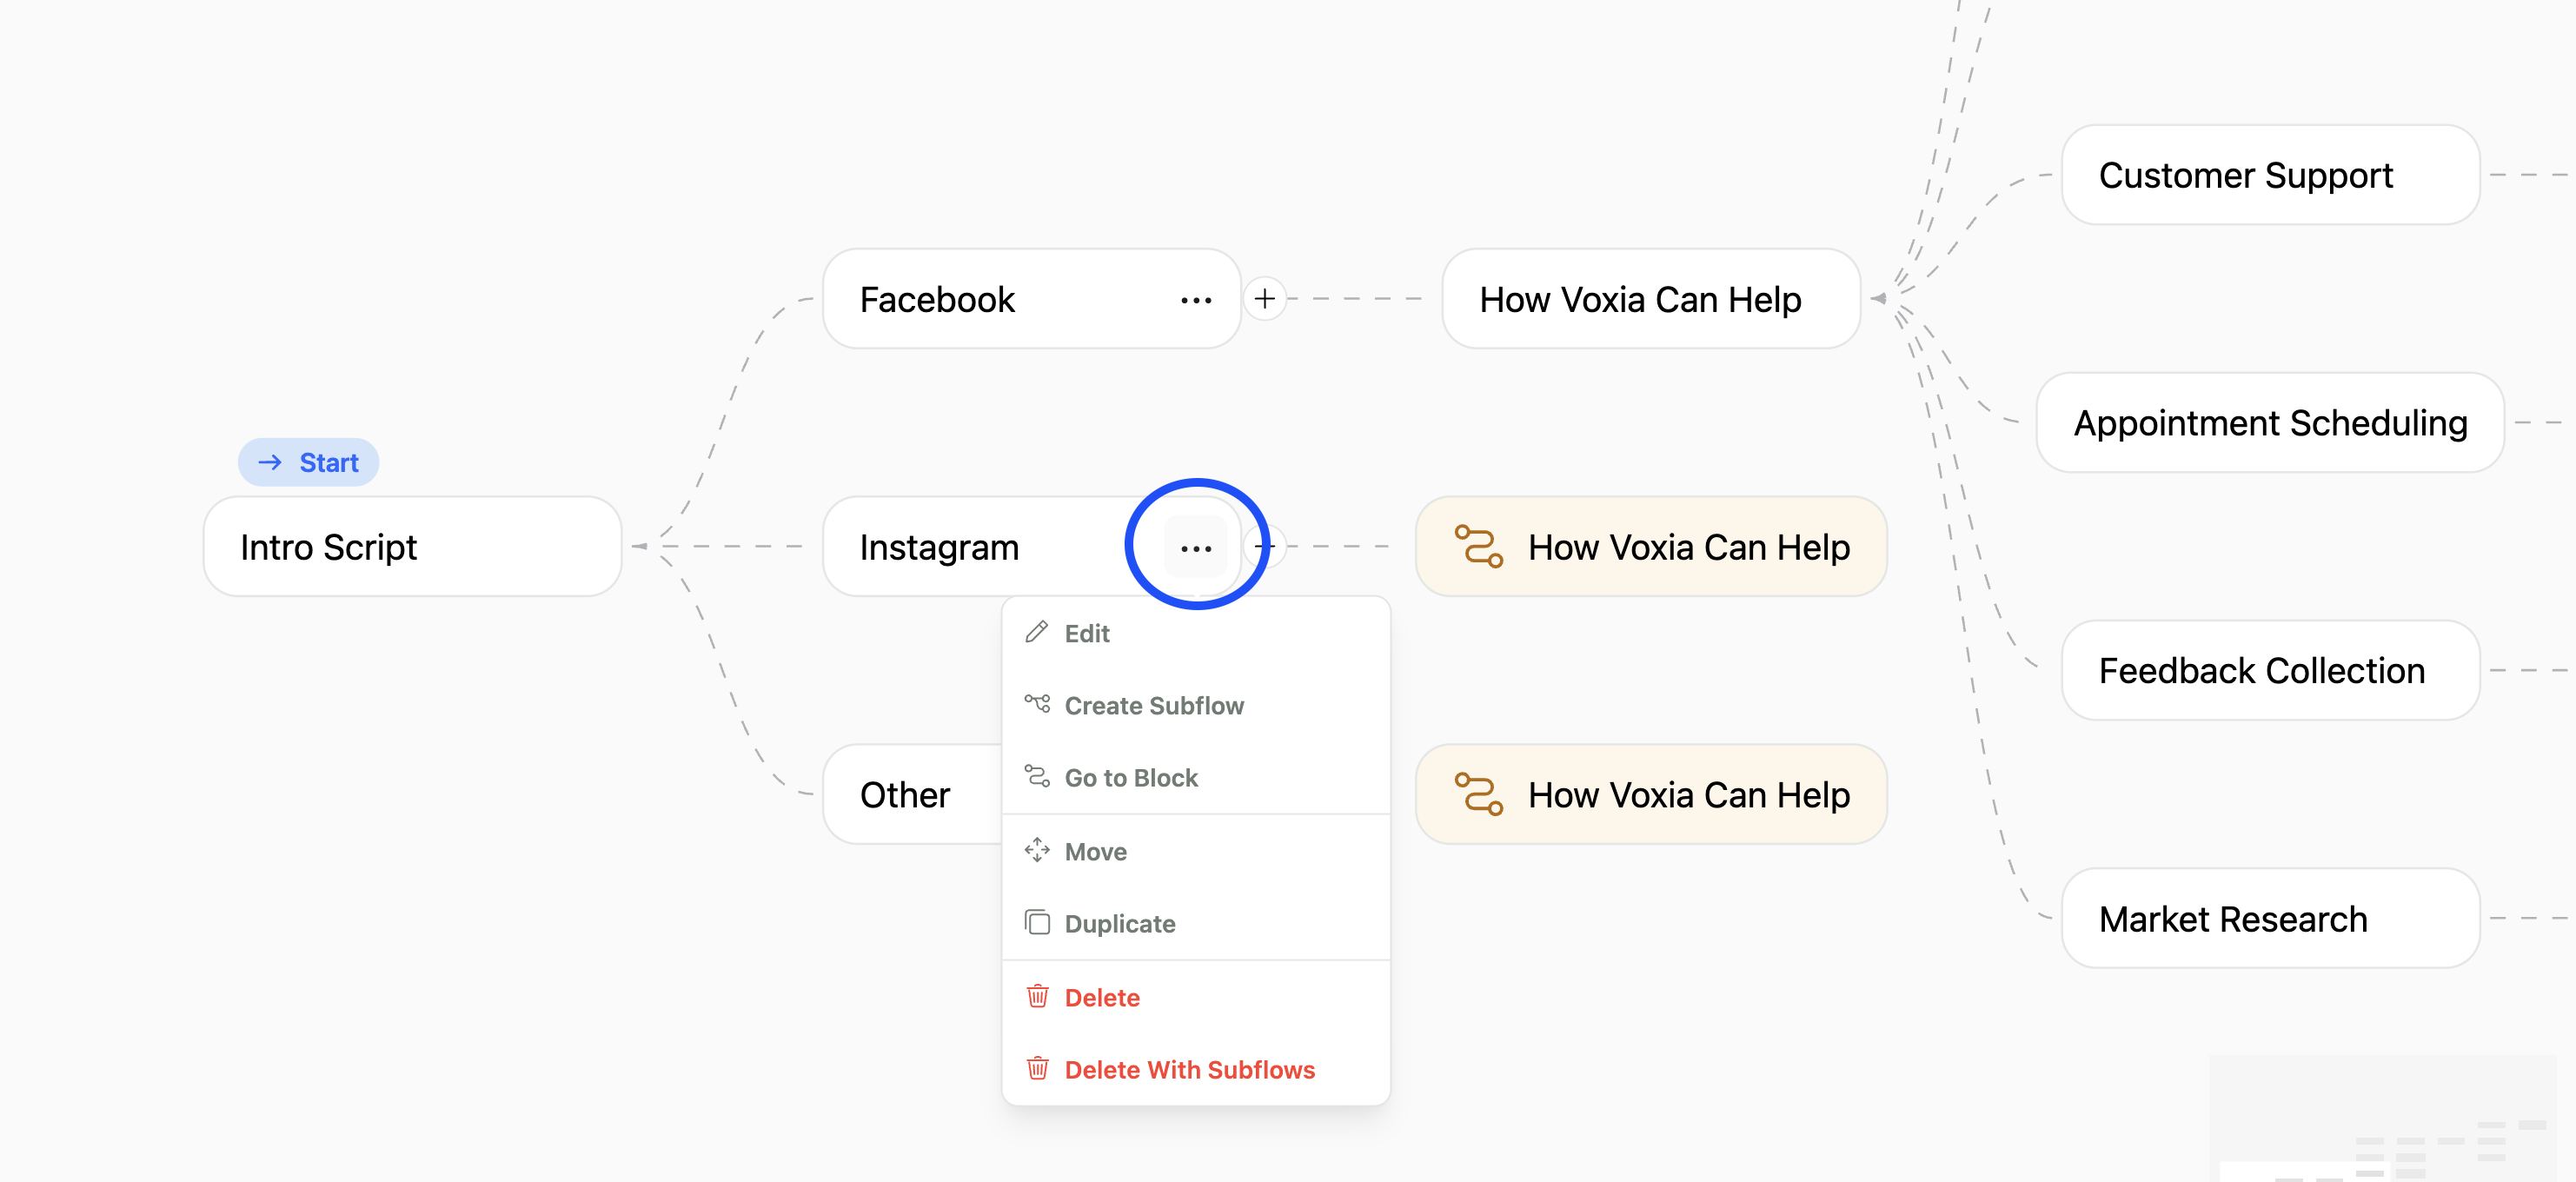 * To move a step, press move and select the step after which you will move it by clicking the `+` button.
 #### **Customize Node Content**
* Customize the dialogue and the questions in each node according to the campaign goals. Refer to the [Customize Steps](customizing-steps.md) page for more details.
**Note**: Each node must contain at least one step.
#### **Directing Flow Between Nodes**
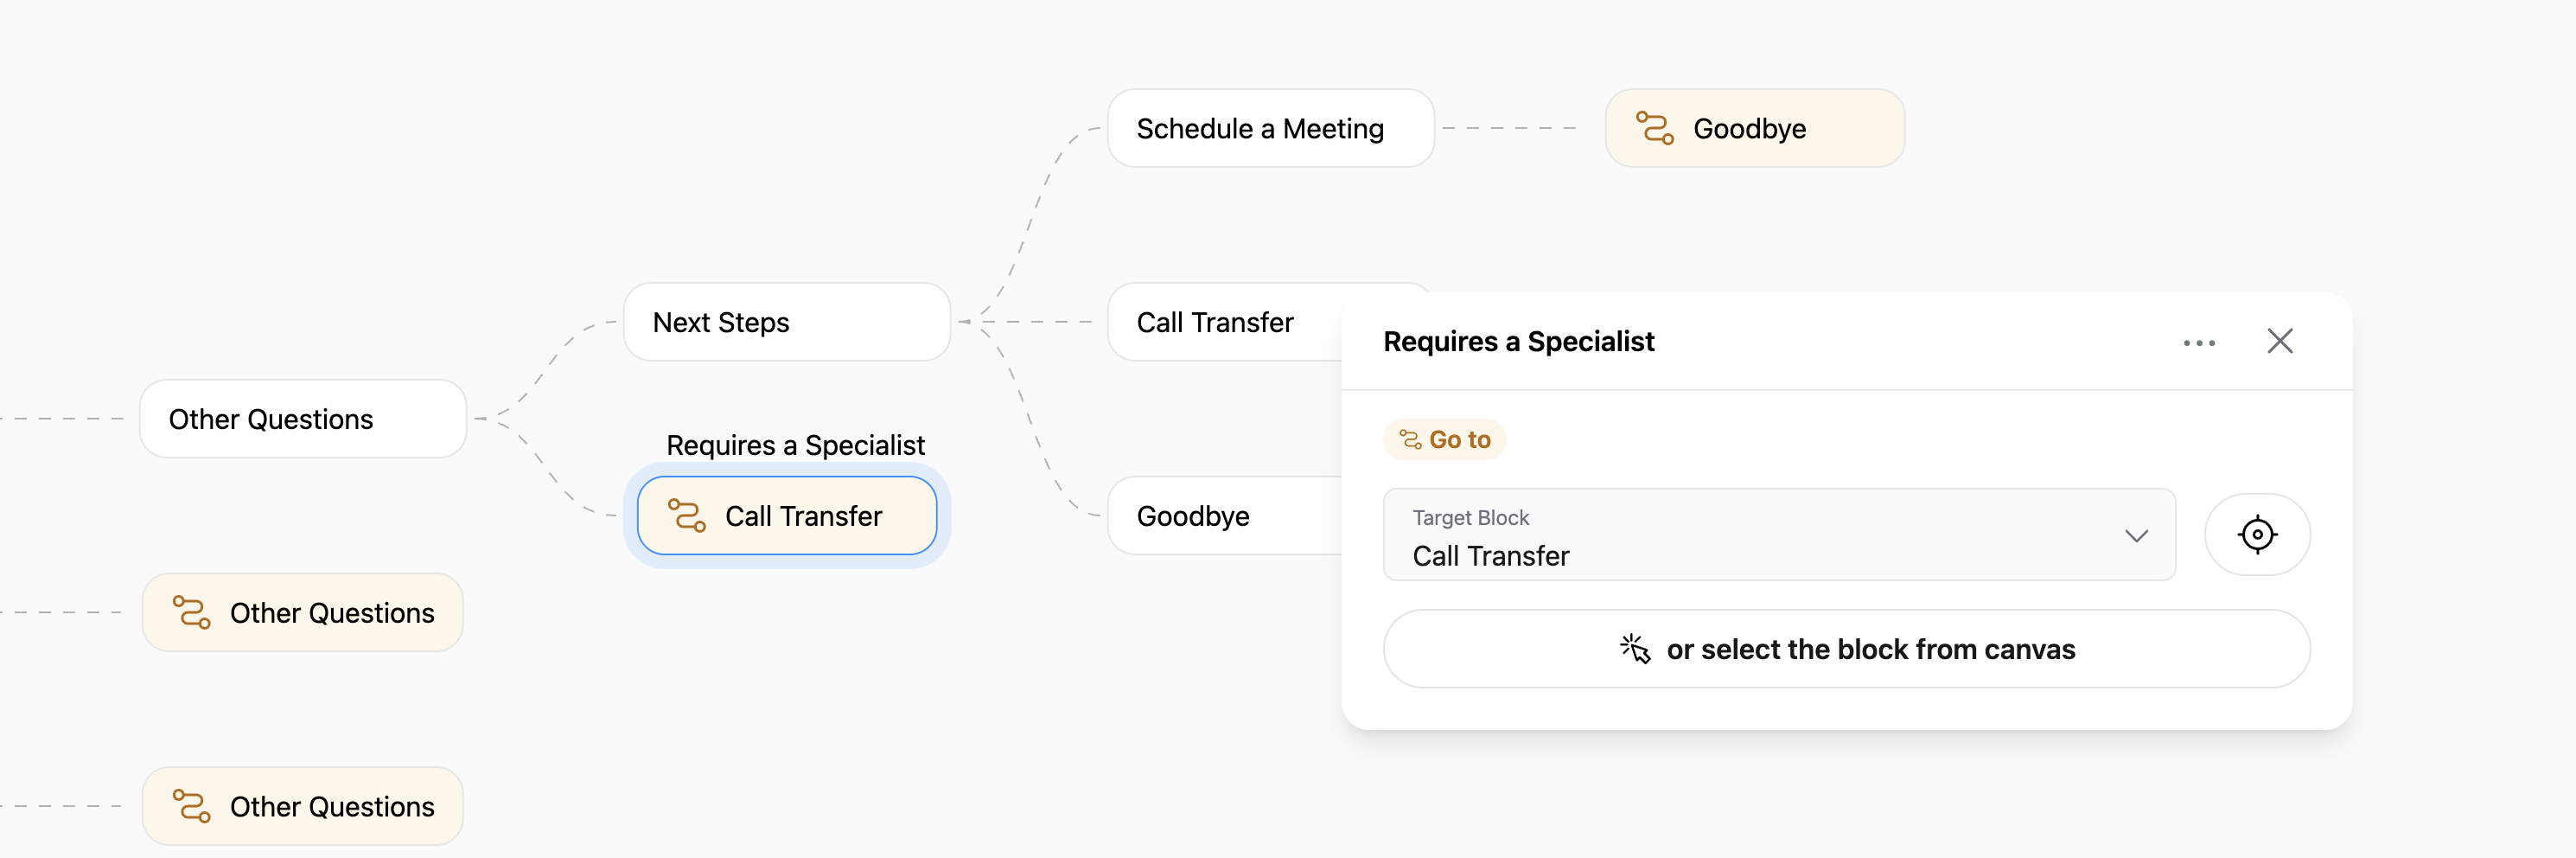
* To lead the script from a subflow back to a specific node or to continue the script from a particular point:
* Click the `+` button next to the node from which you want to continue.
* Select `Go to Block`.
* Choose the destination node. Optionally, you can set a title to specify if the script should lead to this node based on client’s latest response.
#### **Customize Node Content**
* Customize the dialogue and the questions in each node according to the campaign goals. Refer to the [Customize Steps](customizing-steps.md) page for more details.
**Note**: Each node must contain at least one step.
#### **Directing Flow Between Nodes**
* To lead the script from a subflow back to a specific node or to continue the script from a particular point:
* Click the `+` button next to the node from which you want to continue.
* Select `Go to Block`.
* Choose the destination node. Optionally, you can set a title to specify if the script should lead to this node based on client’s latest response.
 **Note:** You can add as many subflows as needed to accommodate various branches of the conversation.
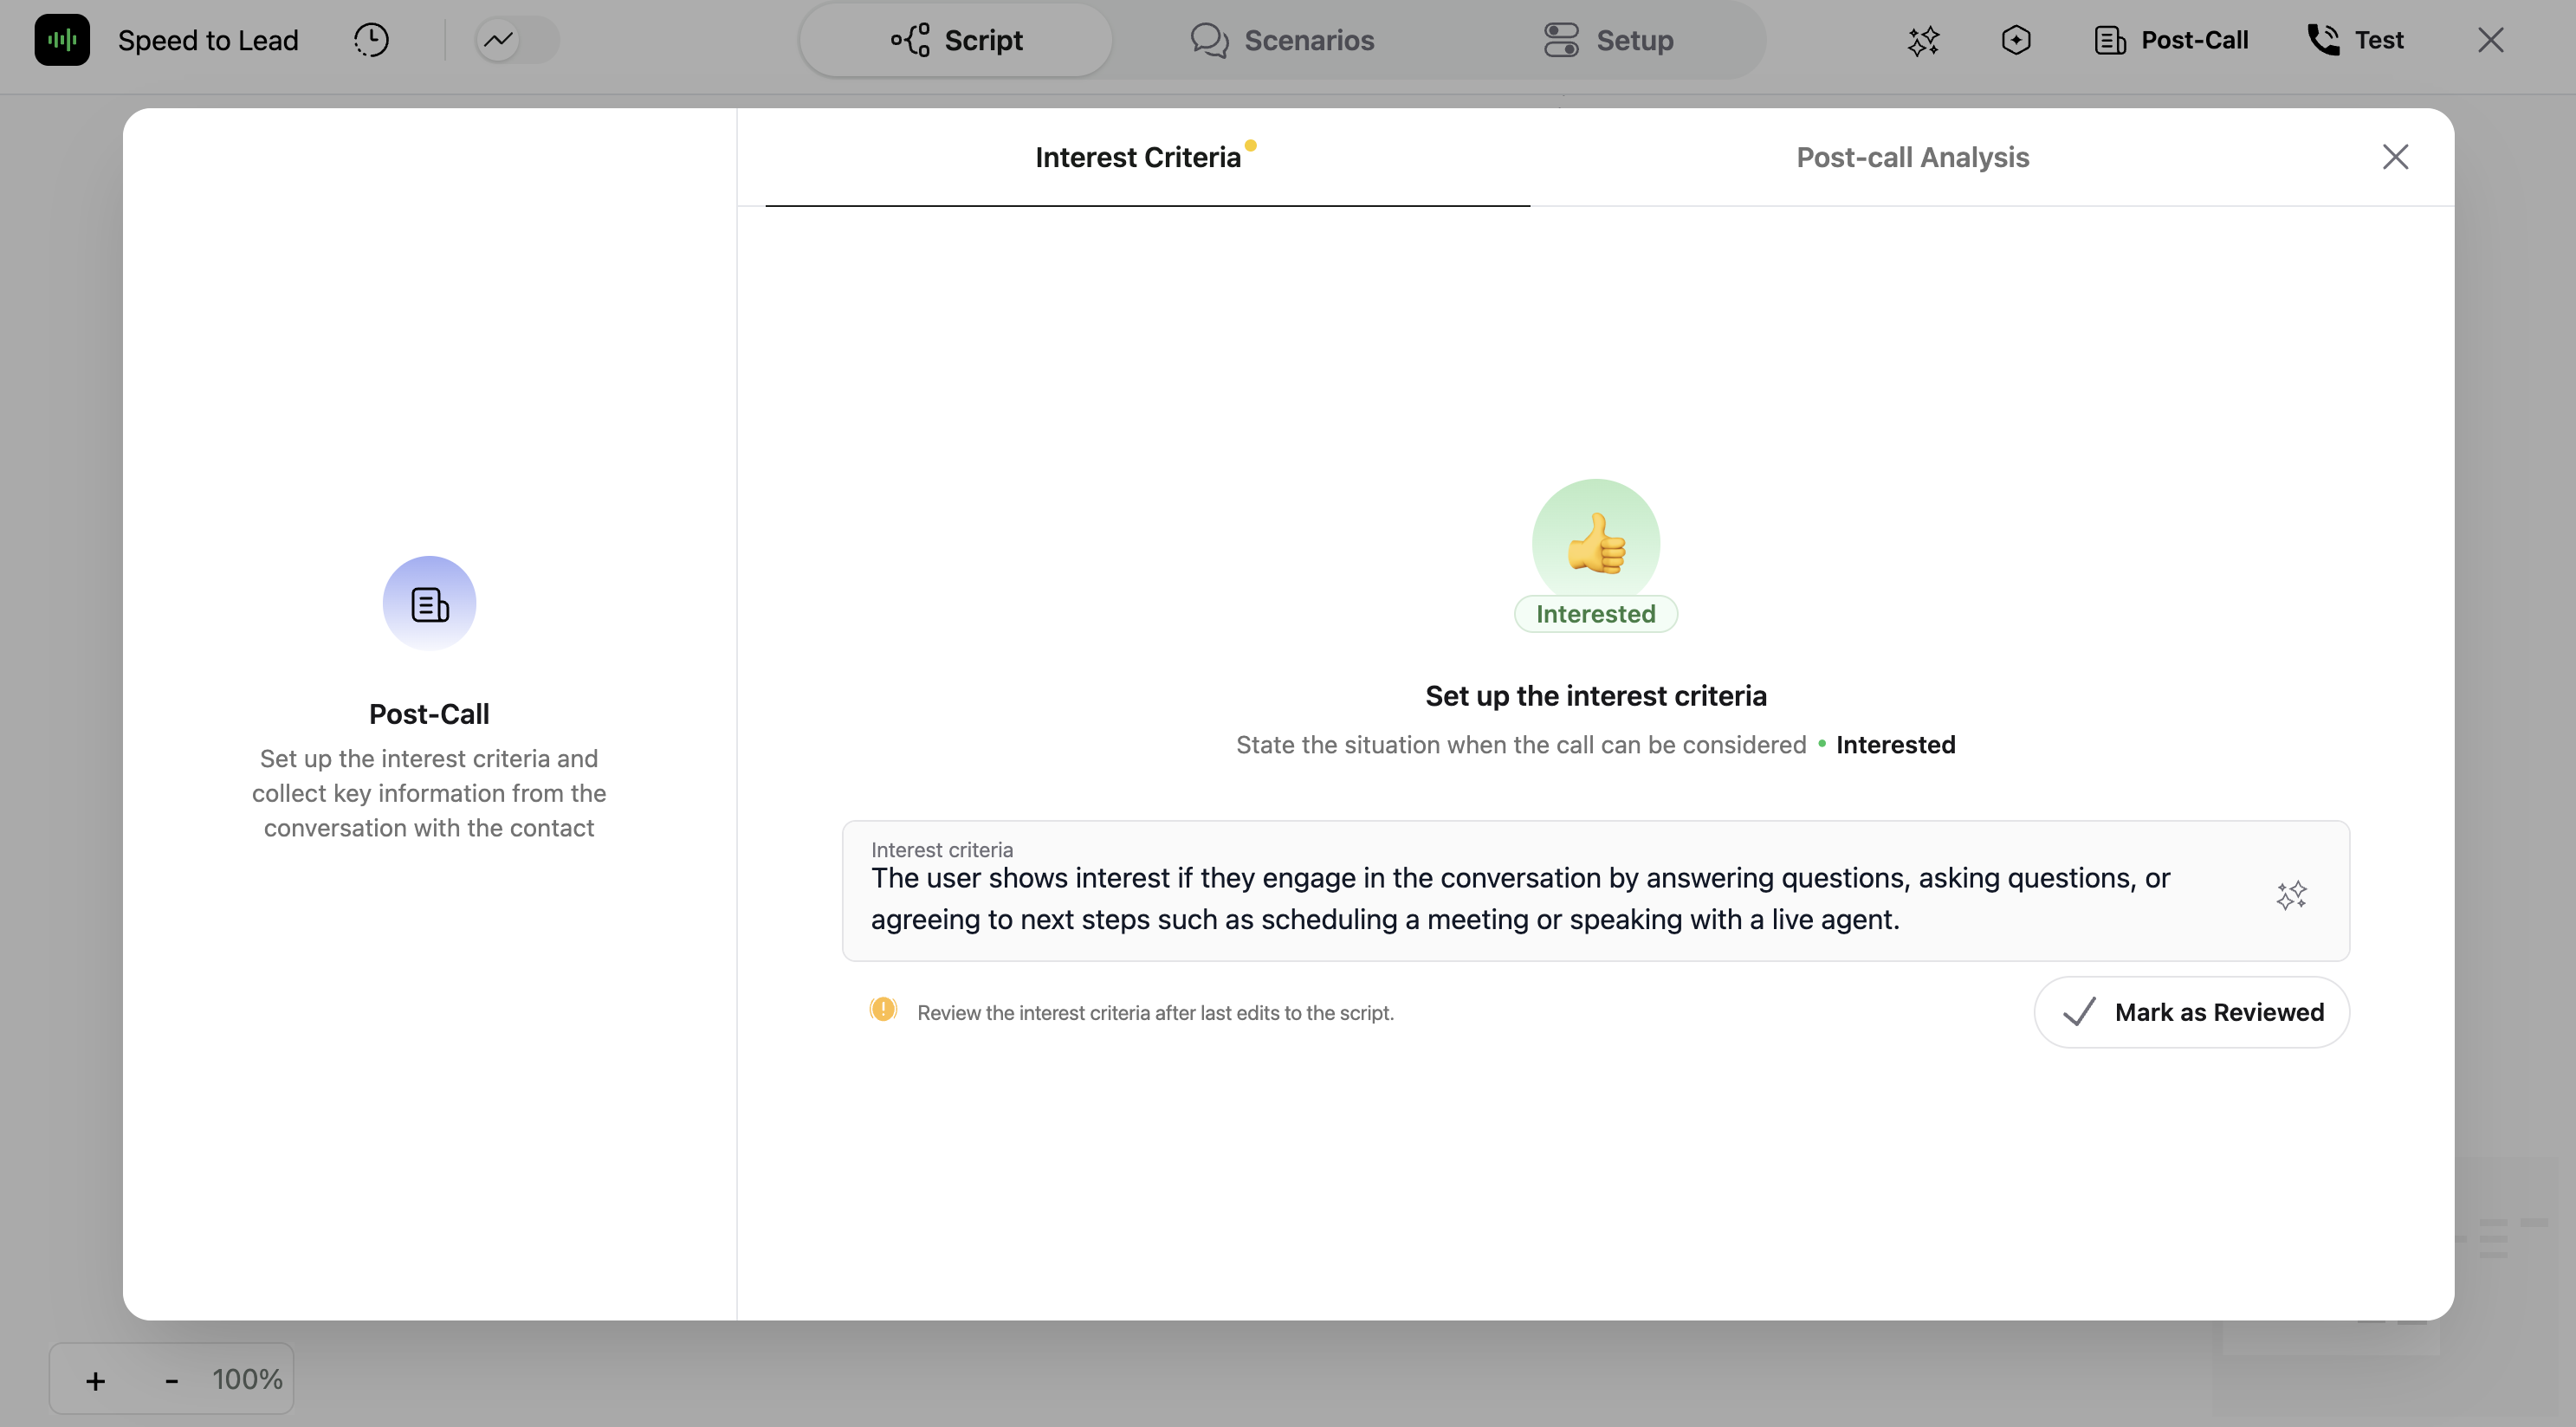
### **Generating Interest Criteria**
After completing the script, click the `Generate Interest Criteria` section located within the Post-Call button at the top right corner. To define the conditions under which a call can be considered **Interested**.
**Note:** You can add as many subflows as needed to accommodate various branches of the conversation.
### **Generating Interest Criteria**
After completing the script, click the `Generate Interest Criteria` section located within the Post-Call button at the top right corner. To define the conditions under which a call can be considered **Interested**.
 ### **Post-Call Analysis**
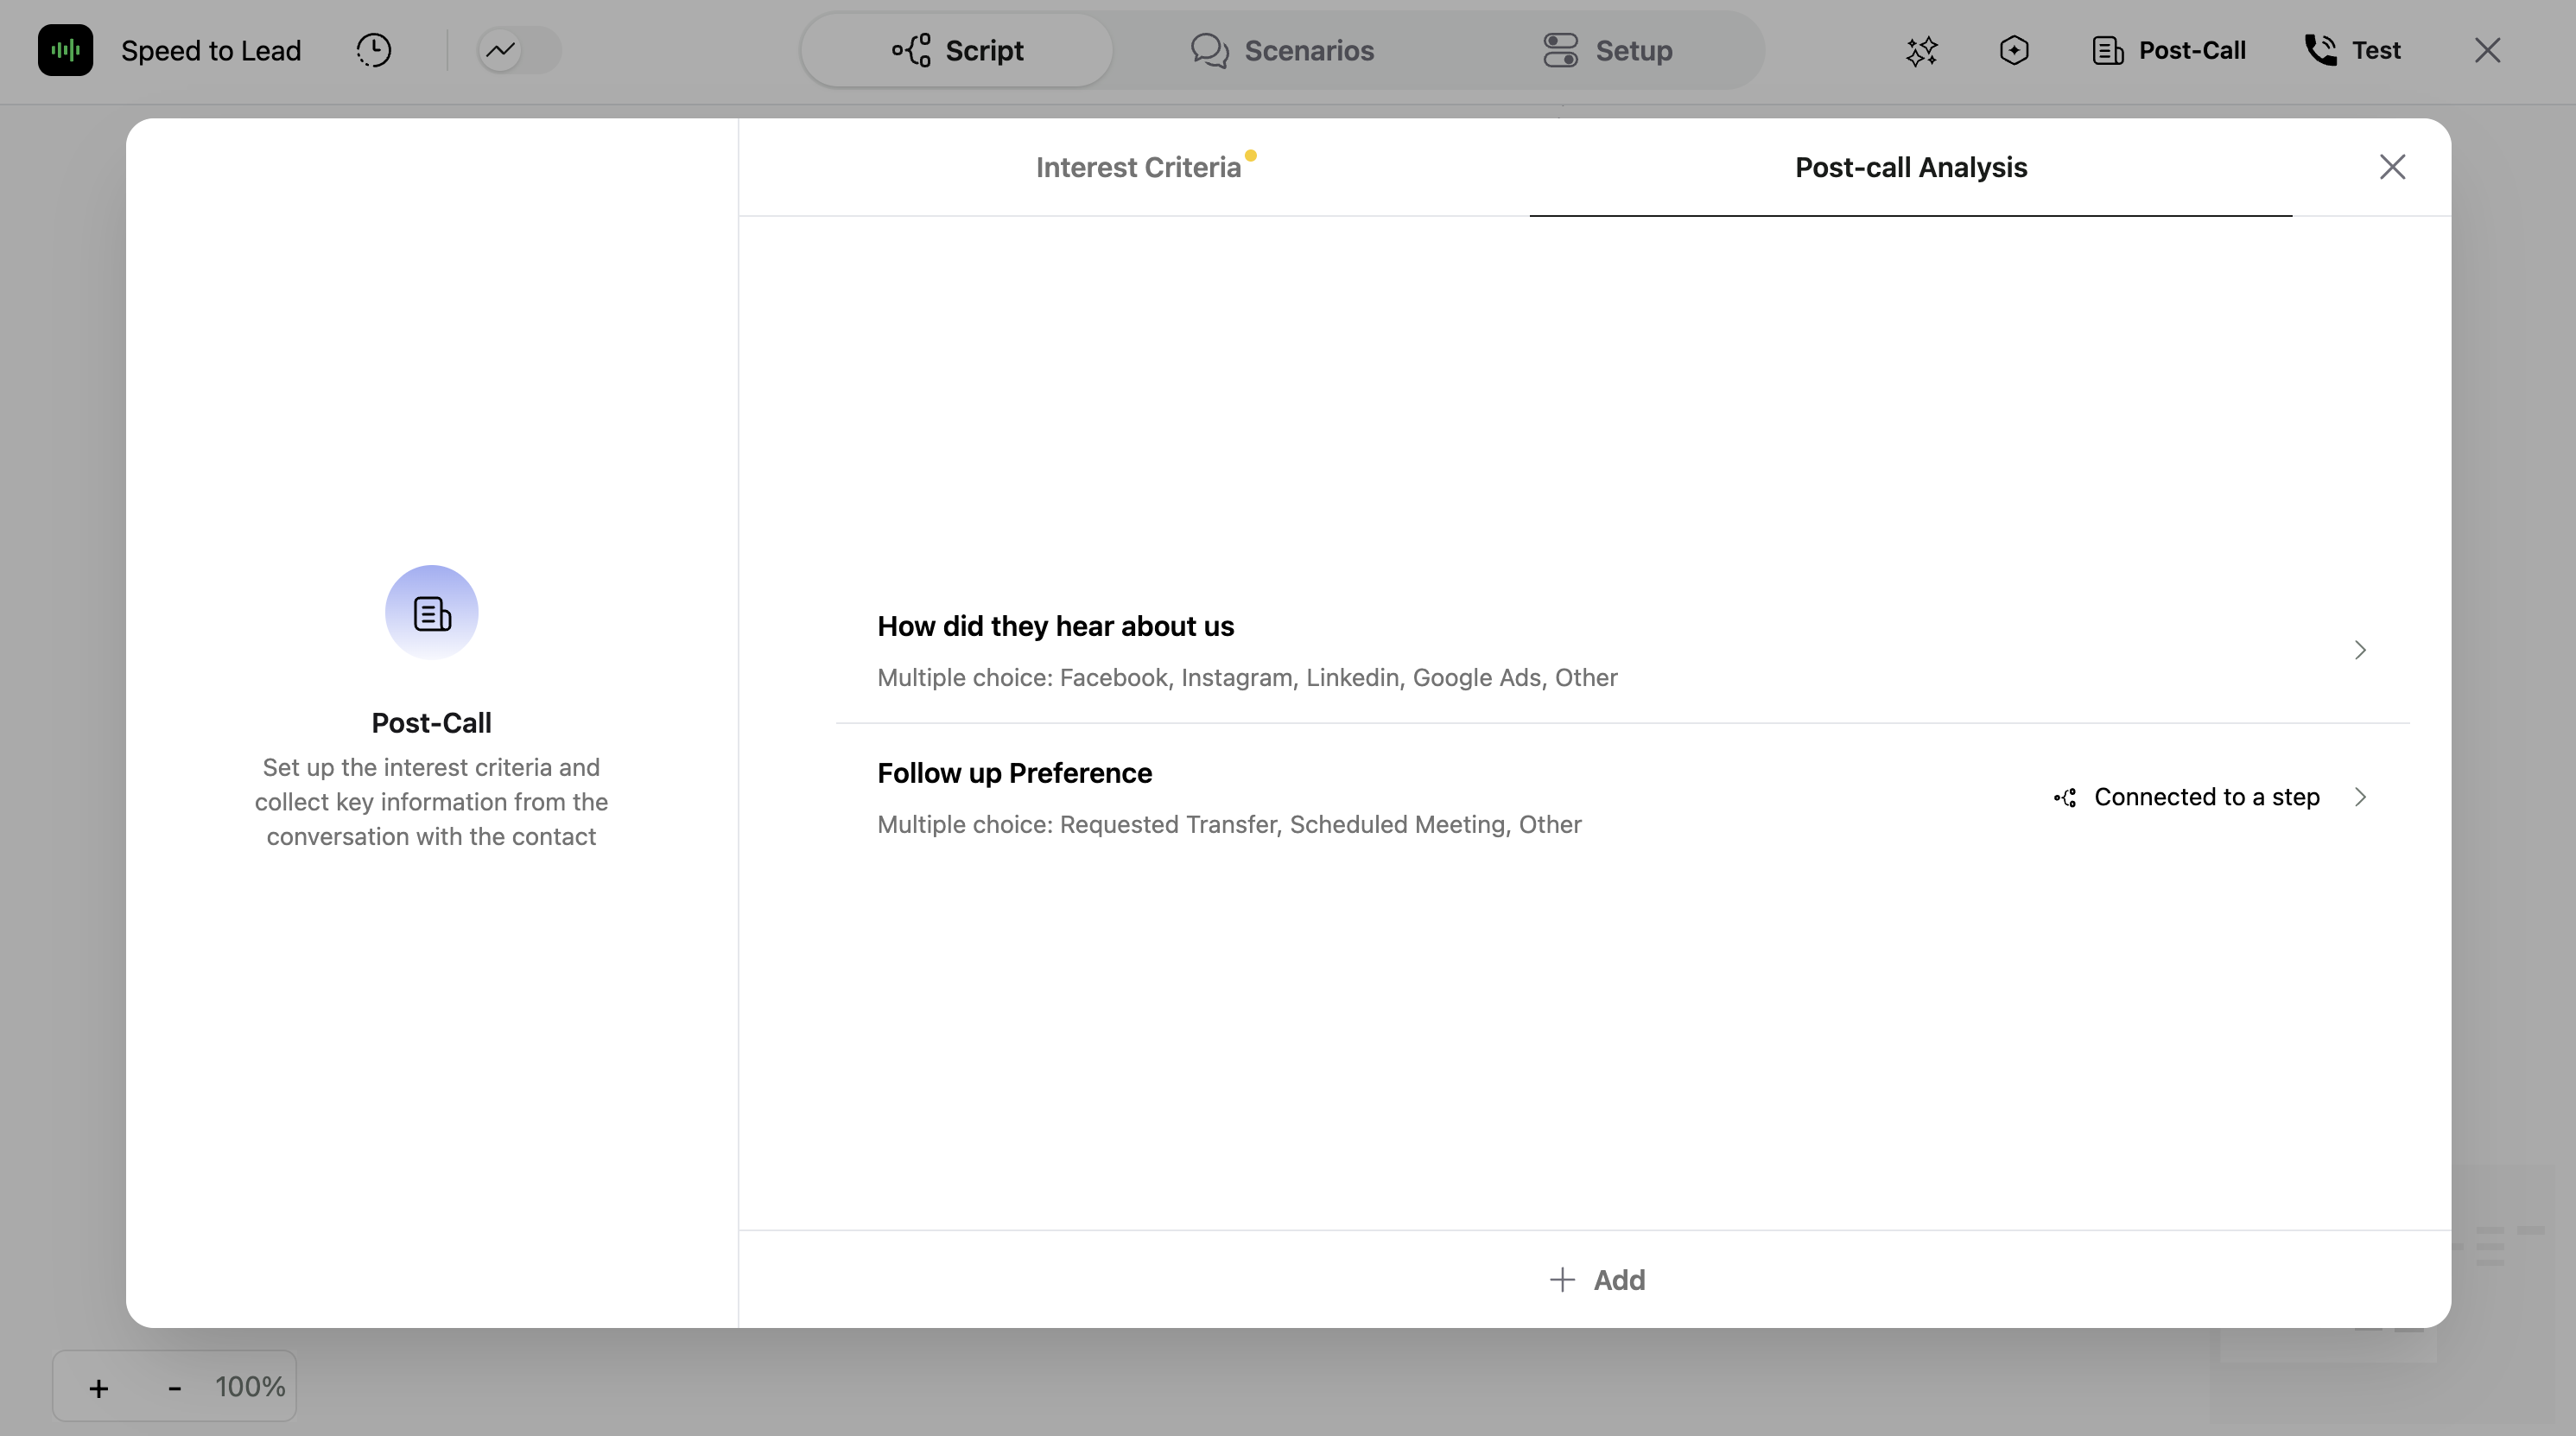
After completing the script, your Key Questions will be displayed in the post-call analysis section located within the Post-Call button at the top right corner. This section shows which step each key question is linked to and allows you to edit or delete them. Clicking the `+ Add` button lets you define additional information to be collected during the call, which will appear in the call summary along with other key questions.
### **Post-Call Analysis**
After completing the script, your Key Questions will be displayed in the post-call analysis section located within the Post-Call button at the top right corner. This section shows which step each key question is linked to and allows you to edit or delete them. Clicking the `+ Add` button lets you define additional information to be collected during the call, which will appear in the call summary along with other key questions.
 ### **Validating the Flow**
* Ensure all node links are correctly made to prevent any dead ends or loops in the conversation.
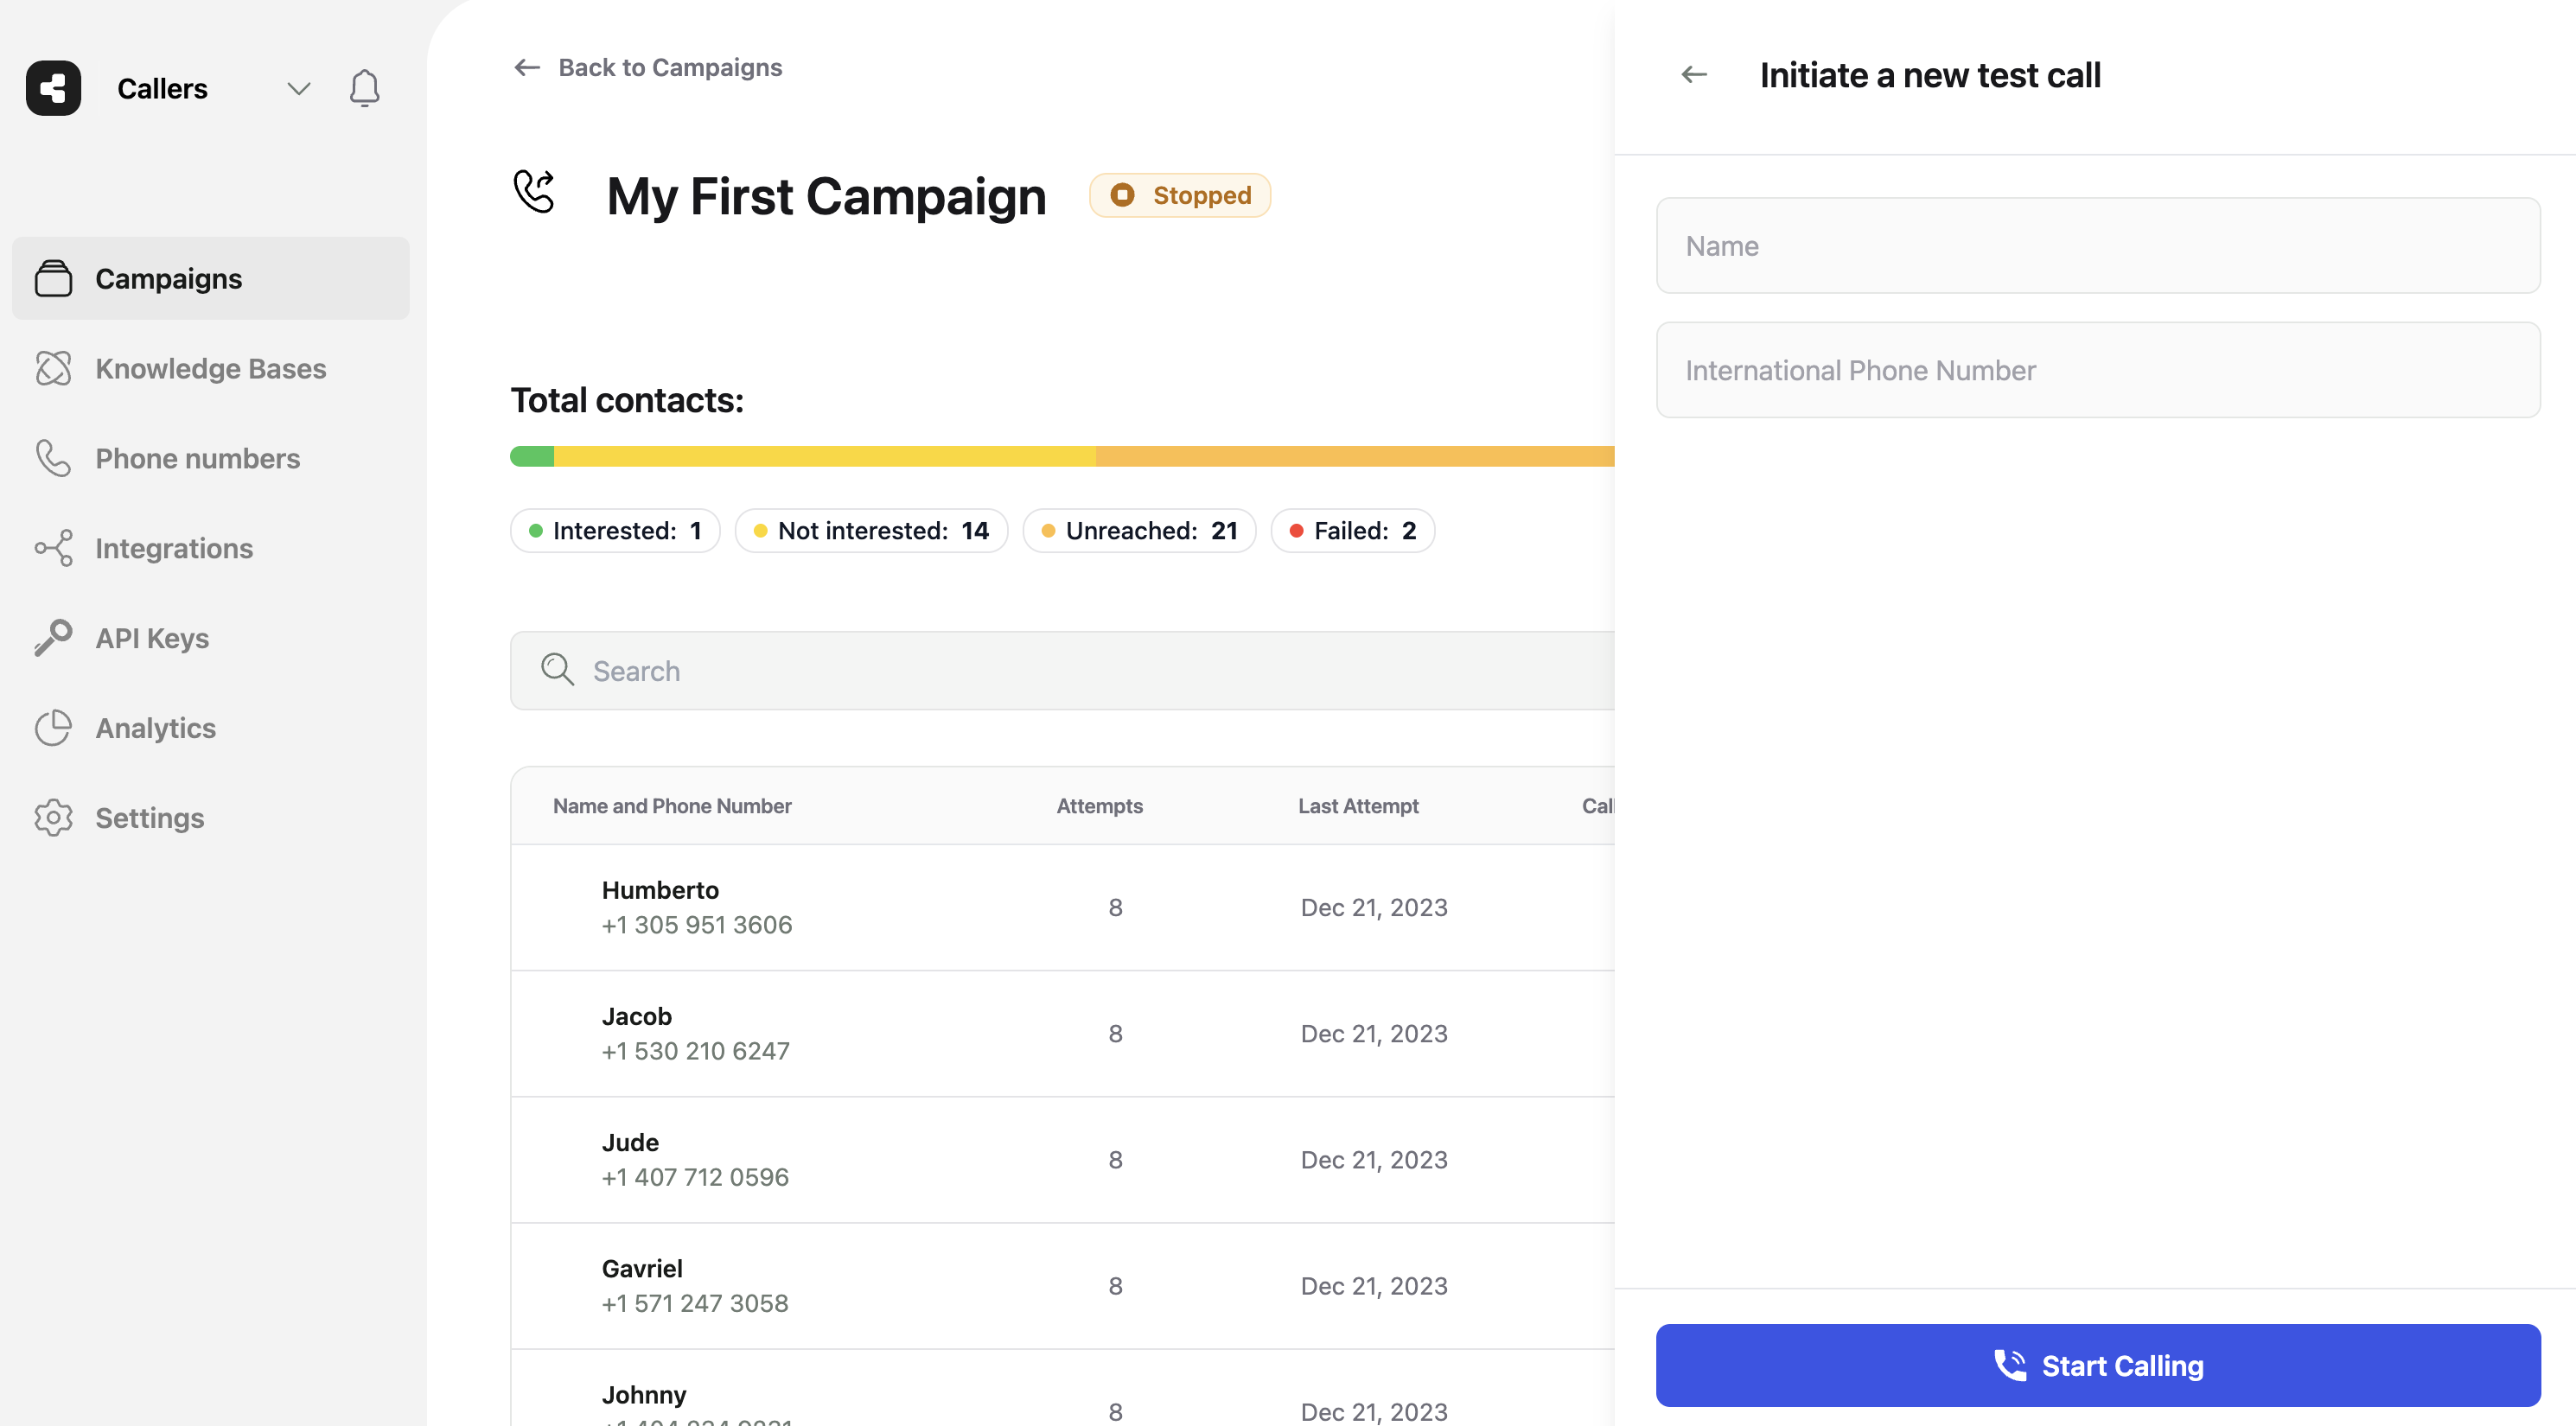
* Preview and test the campaign. Conduct test calls to check the flow and make necessary adjustments.
### **Validating the Flow**
* Ensure all node links are correctly made to prevent any dead ends or loops in the conversation.
* Preview and test the campaign. Conduct test calls to check the flow and make necessary adjustments.
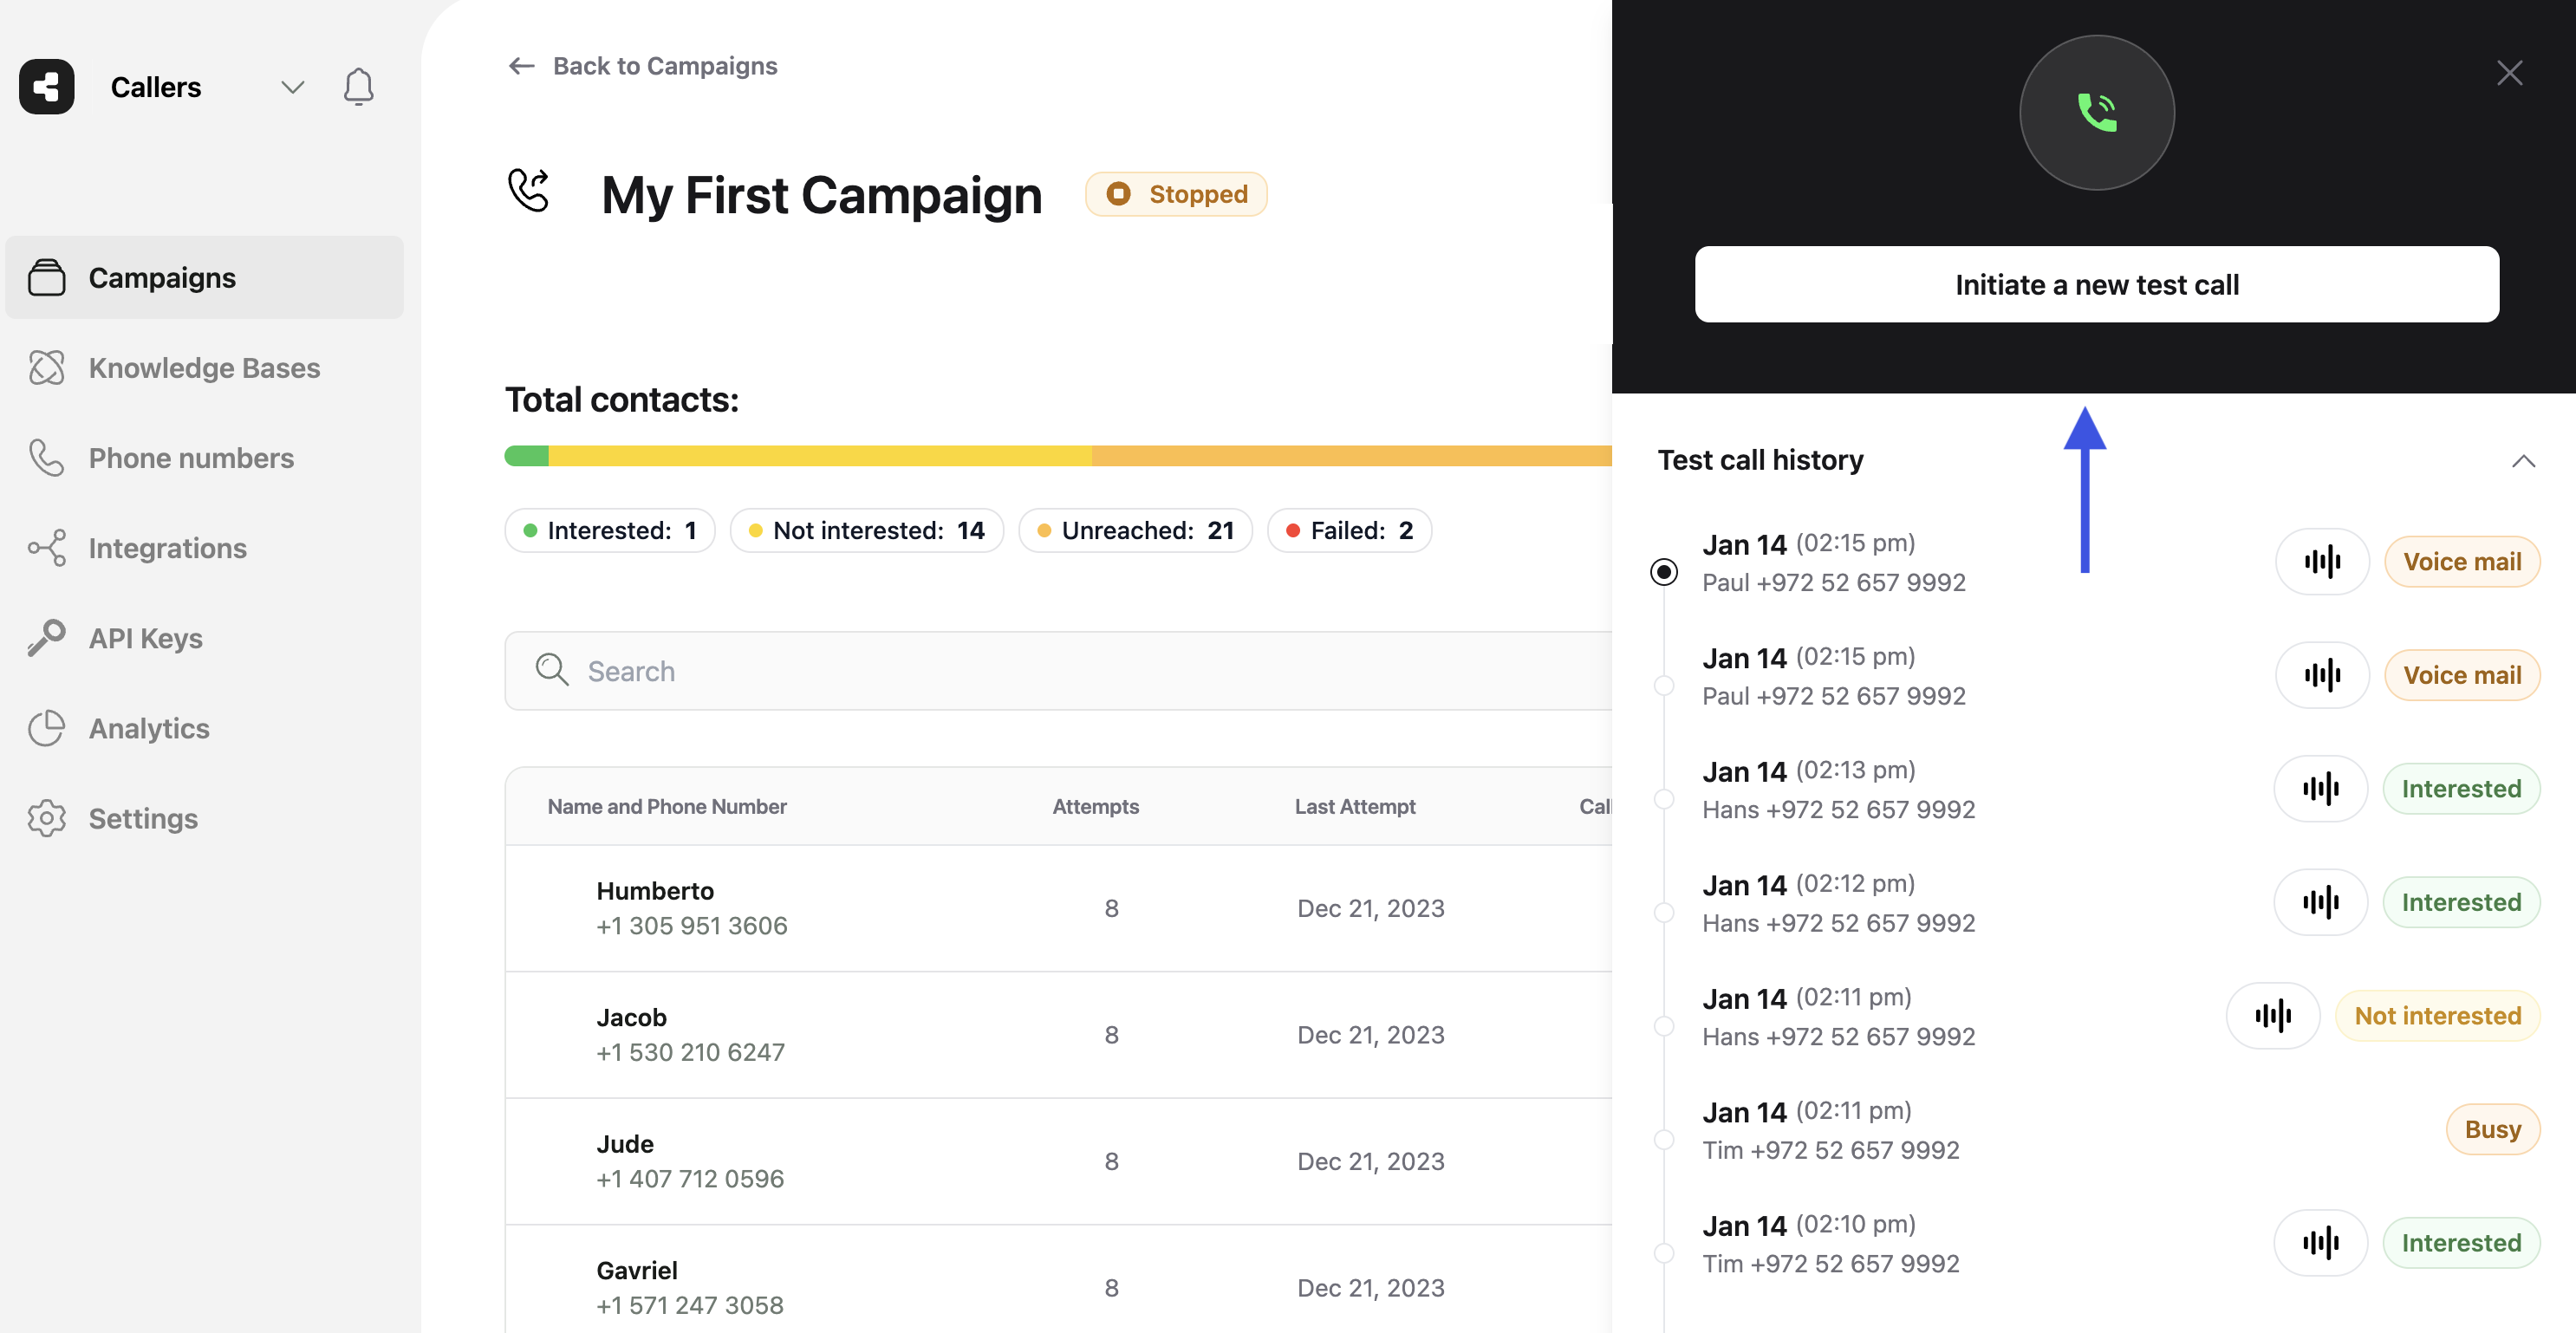 * Test call history will be saved and shown next time you press the `Test Call` button.