> ## Documentation Index
> Fetch the complete documentation index at: https://docs.callers.ai/llms.txt
> Use this file to discover all available pages before exploring further.
# Starting a New Agent
> Callers efficiently manages both inbound and outbound calls. Follow this step-by-step guide to create a new agent.
### Initiate Agent
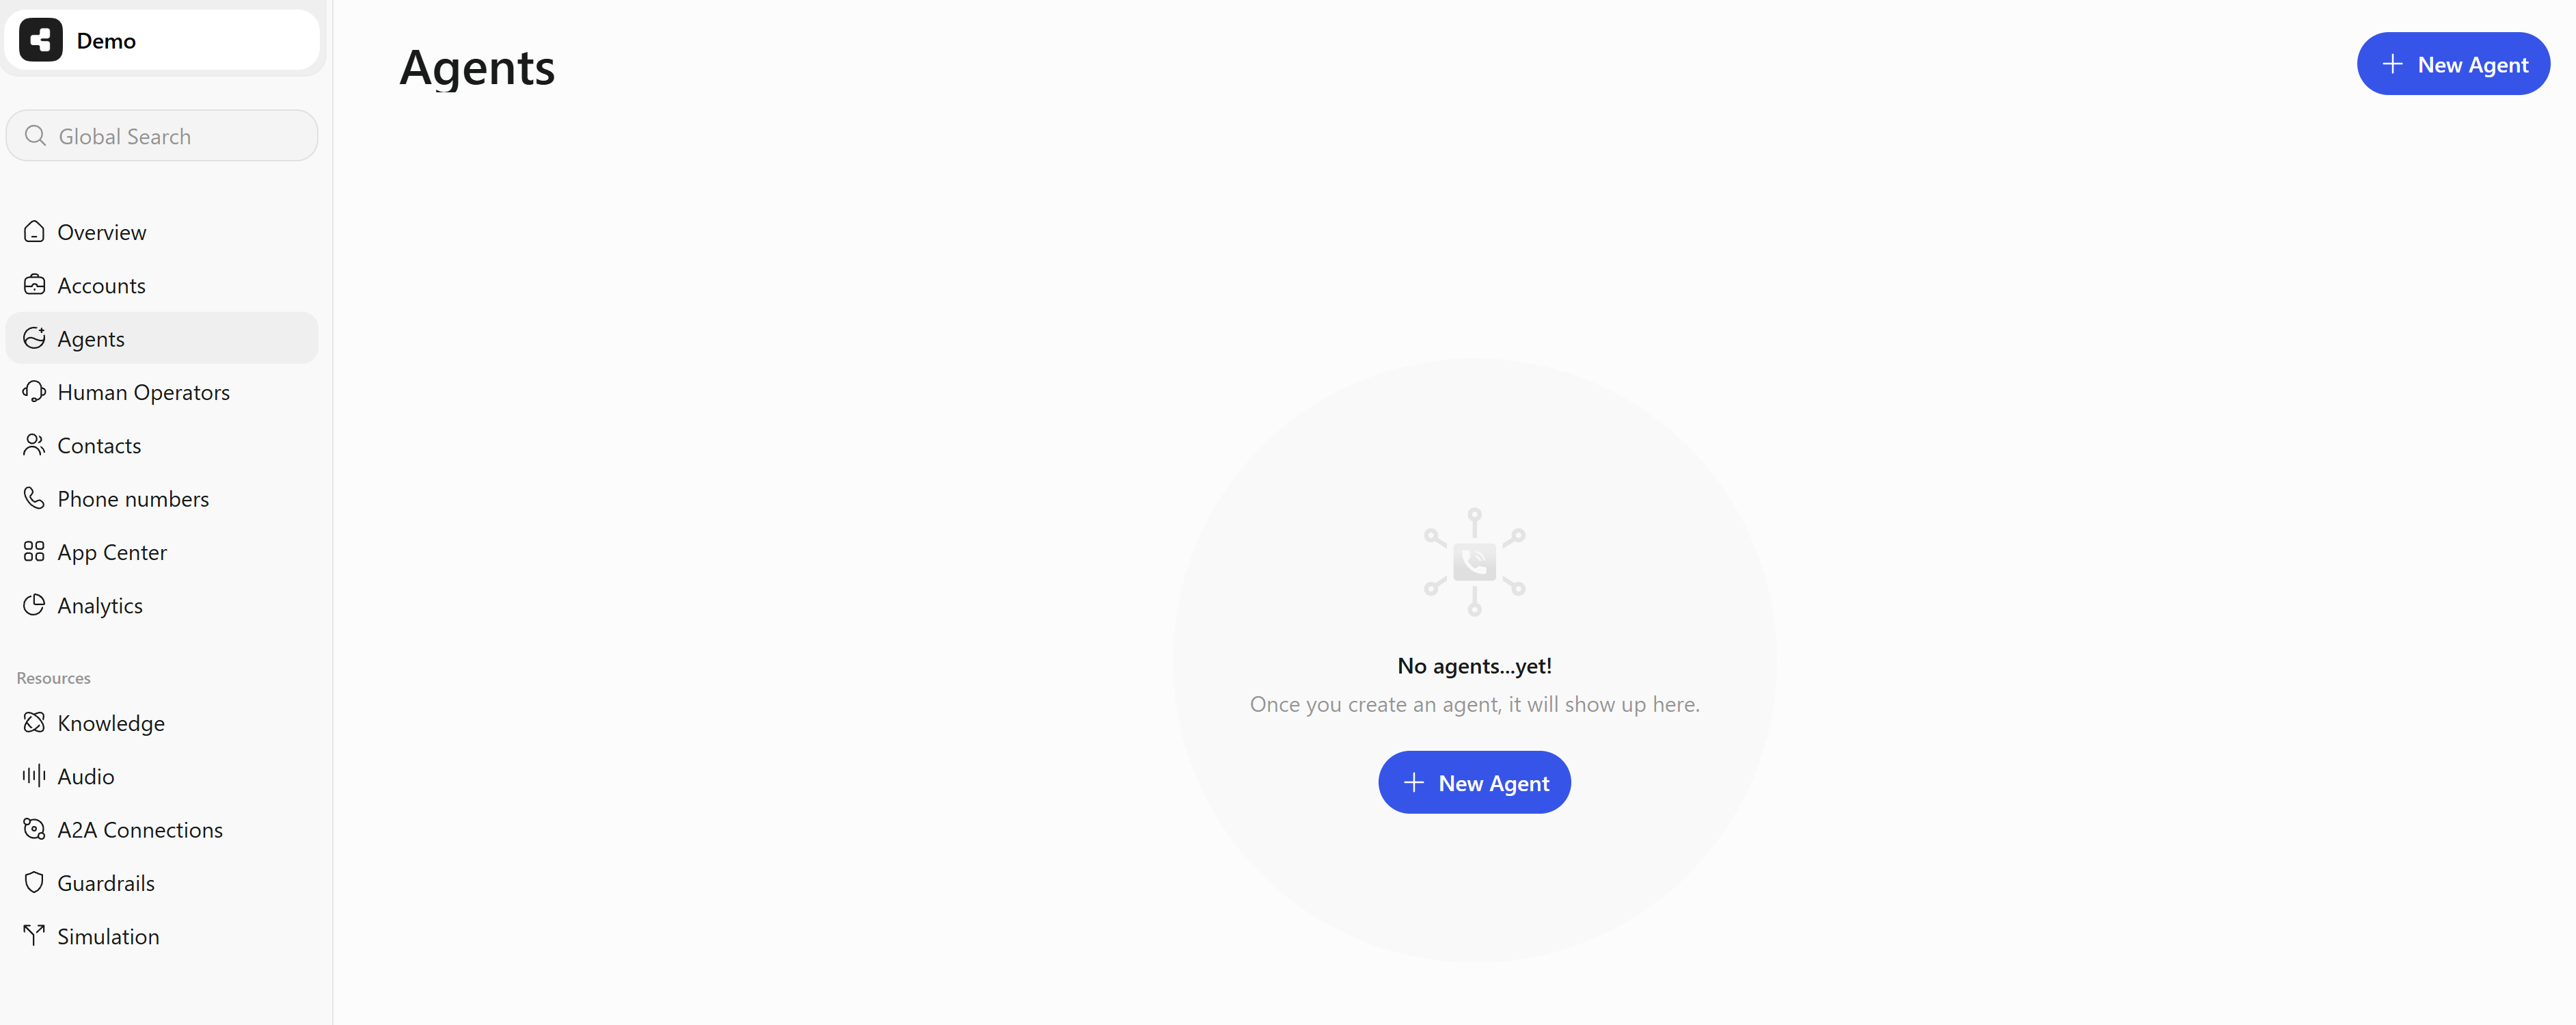
* Navigate to your dashboard.
* Click the `New Agent` button located at the top right or in the middle of your dashboard.
 ### Agent Setup
1. **Agent Name**: Enter a name for the agent. This name will be used by the agent for identification during calls.
2. **Use Case**: Describe the general script, purpose of the call, or topics to be covered during the call. Including company information can enhance the accuracy of the generated script, making it more tailored and effective for your specific needs.
A new agent is **outbound** by default. To make it inbound instead - or to have it handle both directions - change this in the agent's settings. See [Agent Setup](/documentation/build-your-agent/agent-setup).
### Choosing a Channel
An agent reaches your contacts over one channel, which you pick in the agent's settings. Each has its own guide:
Calls contacts, or takes their calls, over the phone.
Holds the conversation over SMS or WhatsApp.
Sends emails, reads the replies, and responds.
**Widget** is available as a fourth channel, letting visitors talk to the agent from your website. It is enabled per account - see [Installing the Widget](/documentation/widget-agents/installing-the-widget).
### Starting Your Agent
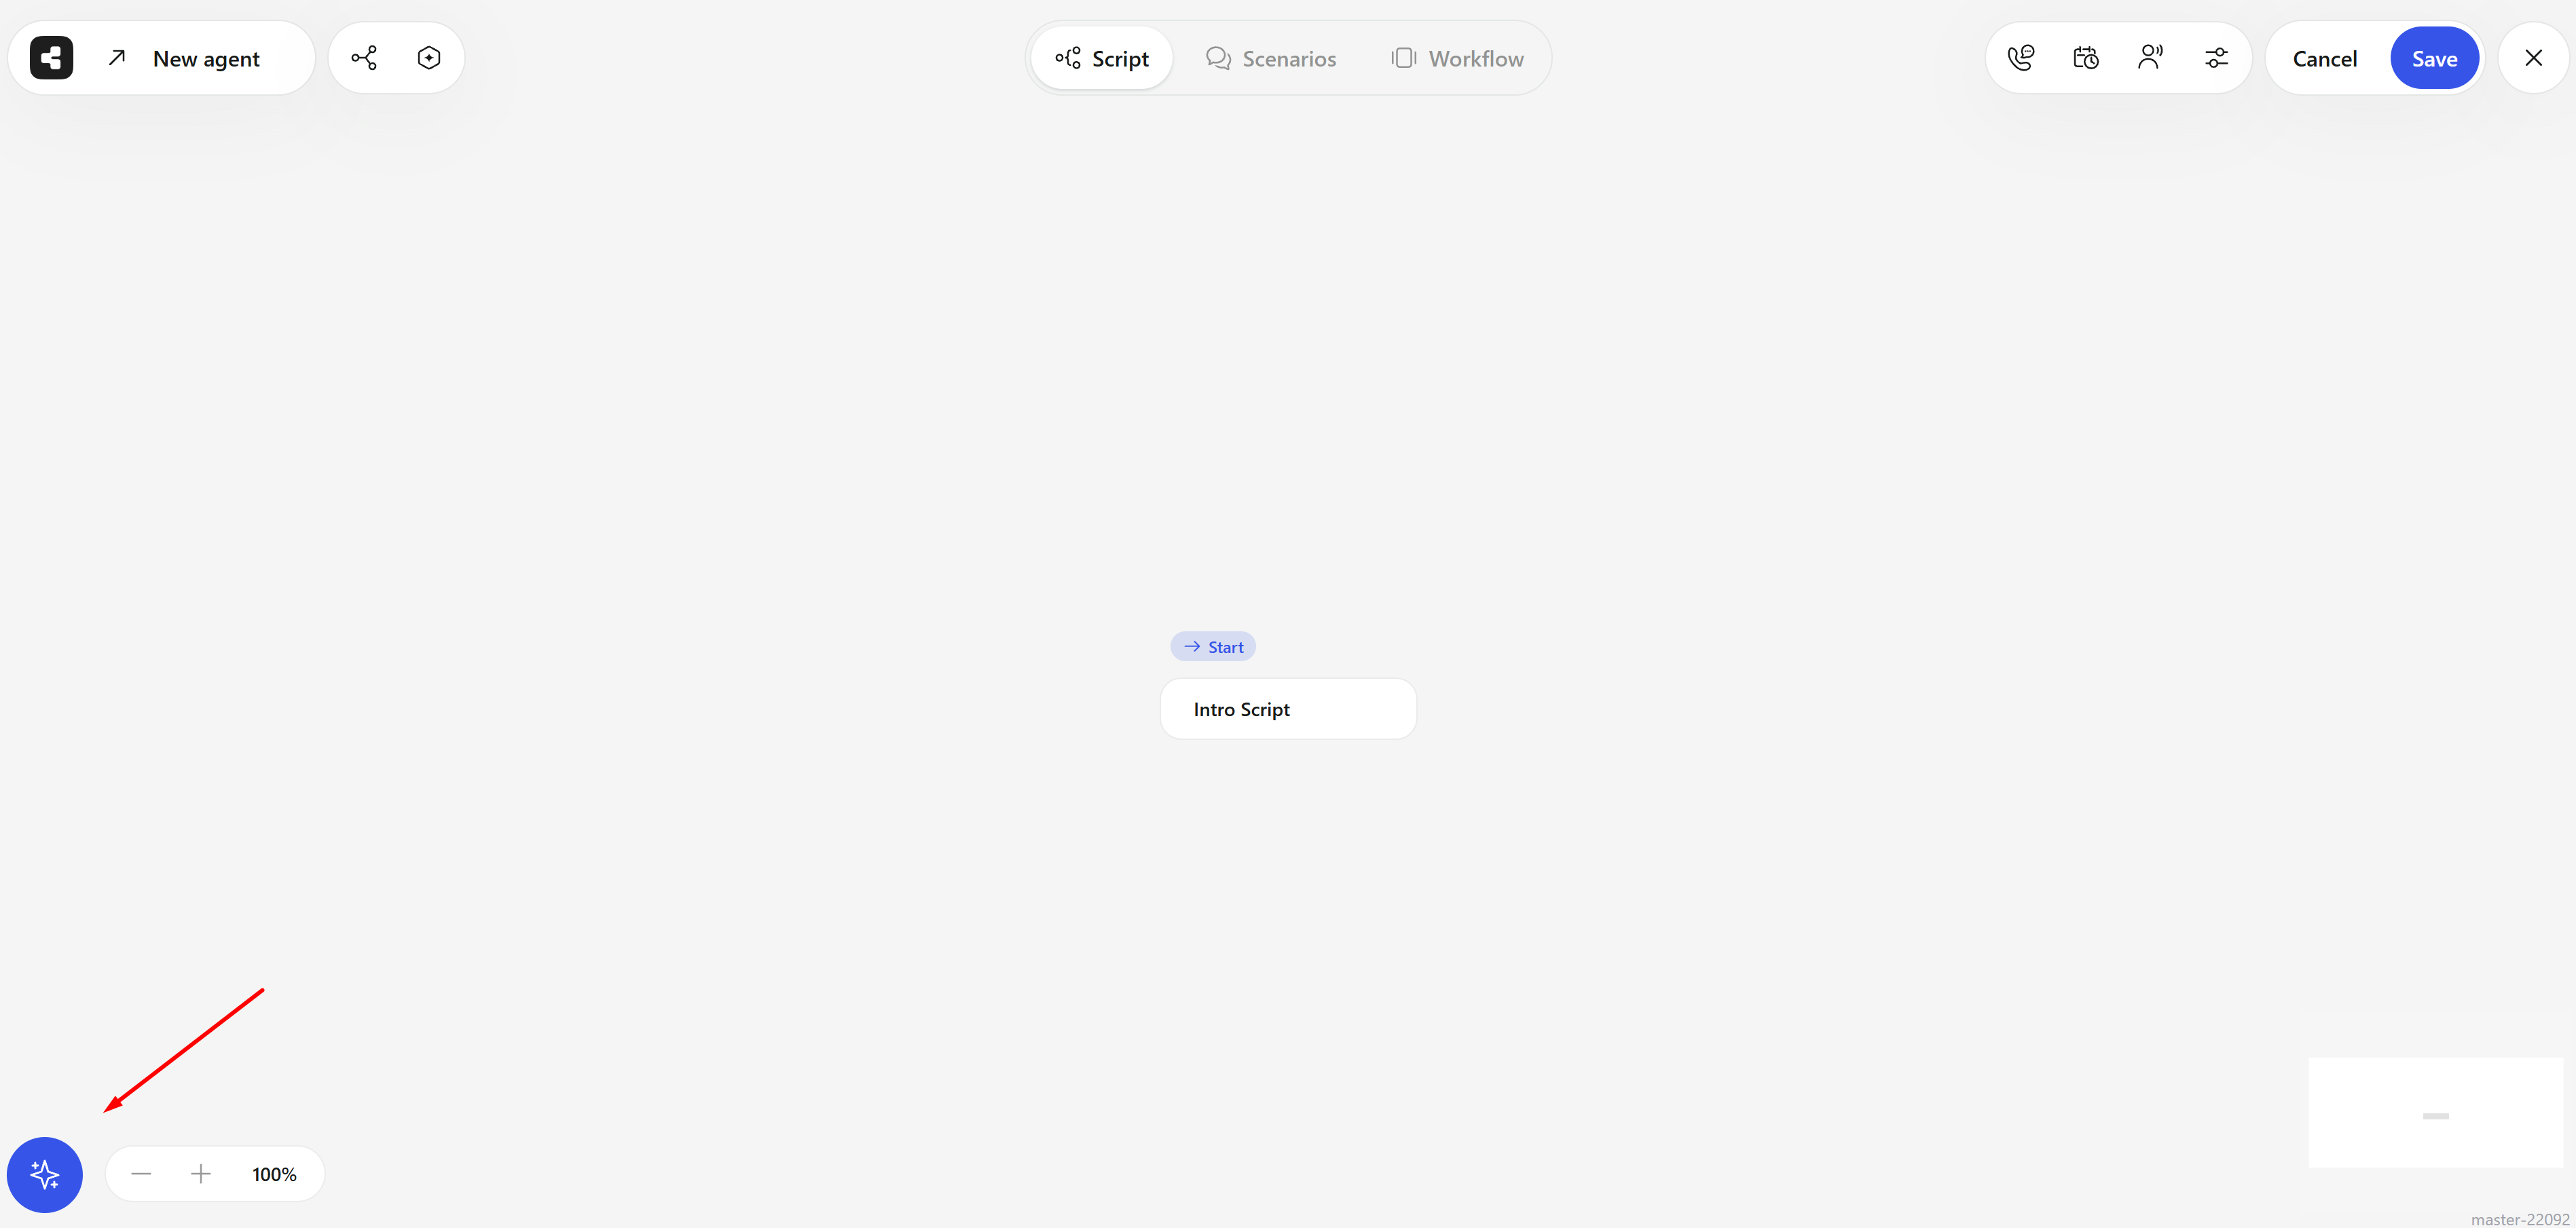
A new agent opens on the **Script** canvas with a single **Intro Script** step. That step is your starting point, and you can build the rest of the script in either of two ways.
* **Start from Scratch**: Add steps to the canvas yourself and shape the flow by hand.
* **Build It with AI**: Describe what you need and let the assistant draft the script for you.
To use the assistant, click the AI button in the bottom-left corner of the canvas.
### Agent Setup
1. **Agent Name**: Enter a name for the agent. This name will be used by the agent for identification during calls.
2. **Use Case**: Describe the general script, purpose of the call, or topics to be covered during the call. Including company information can enhance the accuracy of the generated script, making it more tailored and effective for your specific needs.
A new agent is **outbound** by default. To make it inbound instead - or to have it handle both directions - change this in the agent's settings. See [Agent Setup](/documentation/build-your-agent/agent-setup).
### Choosing a Channel
An agent reaches your contacts over one channel, which you pick in the agent's settings. Each has its own guide:
Calls contacts, or takes their calls, over the phone.
Holds the conversation over SMS or WhatsApp.
Sends emails, reads the replies, and responds.
**Widget** is available as a fourth channel, letting visitors talk to the agent from your website. It is enabled per account - see [Installing the Widget](/documentation/widget-agents/installing-the-widget).
### Starting Your Agent
A new agent opens on the **Script** canvas with a single **Intro Script** step. That step is your starting point, and you can build the rest of the script in either of two ways.
* **Start from Scratch**: Add steps to the canvas yourself and shape the flow by hand.
* **Build It with AI**: Describe what you need and let the assistant draft the script for you.
To use the assistant, click the AI button in the bottom-left corner of the canvas.
 The chat panel opens on the left. Type what the agent should do into **Tell AI what to do next** - up to 5,000 characters - and send it. Keep the conversation going to refine the result.
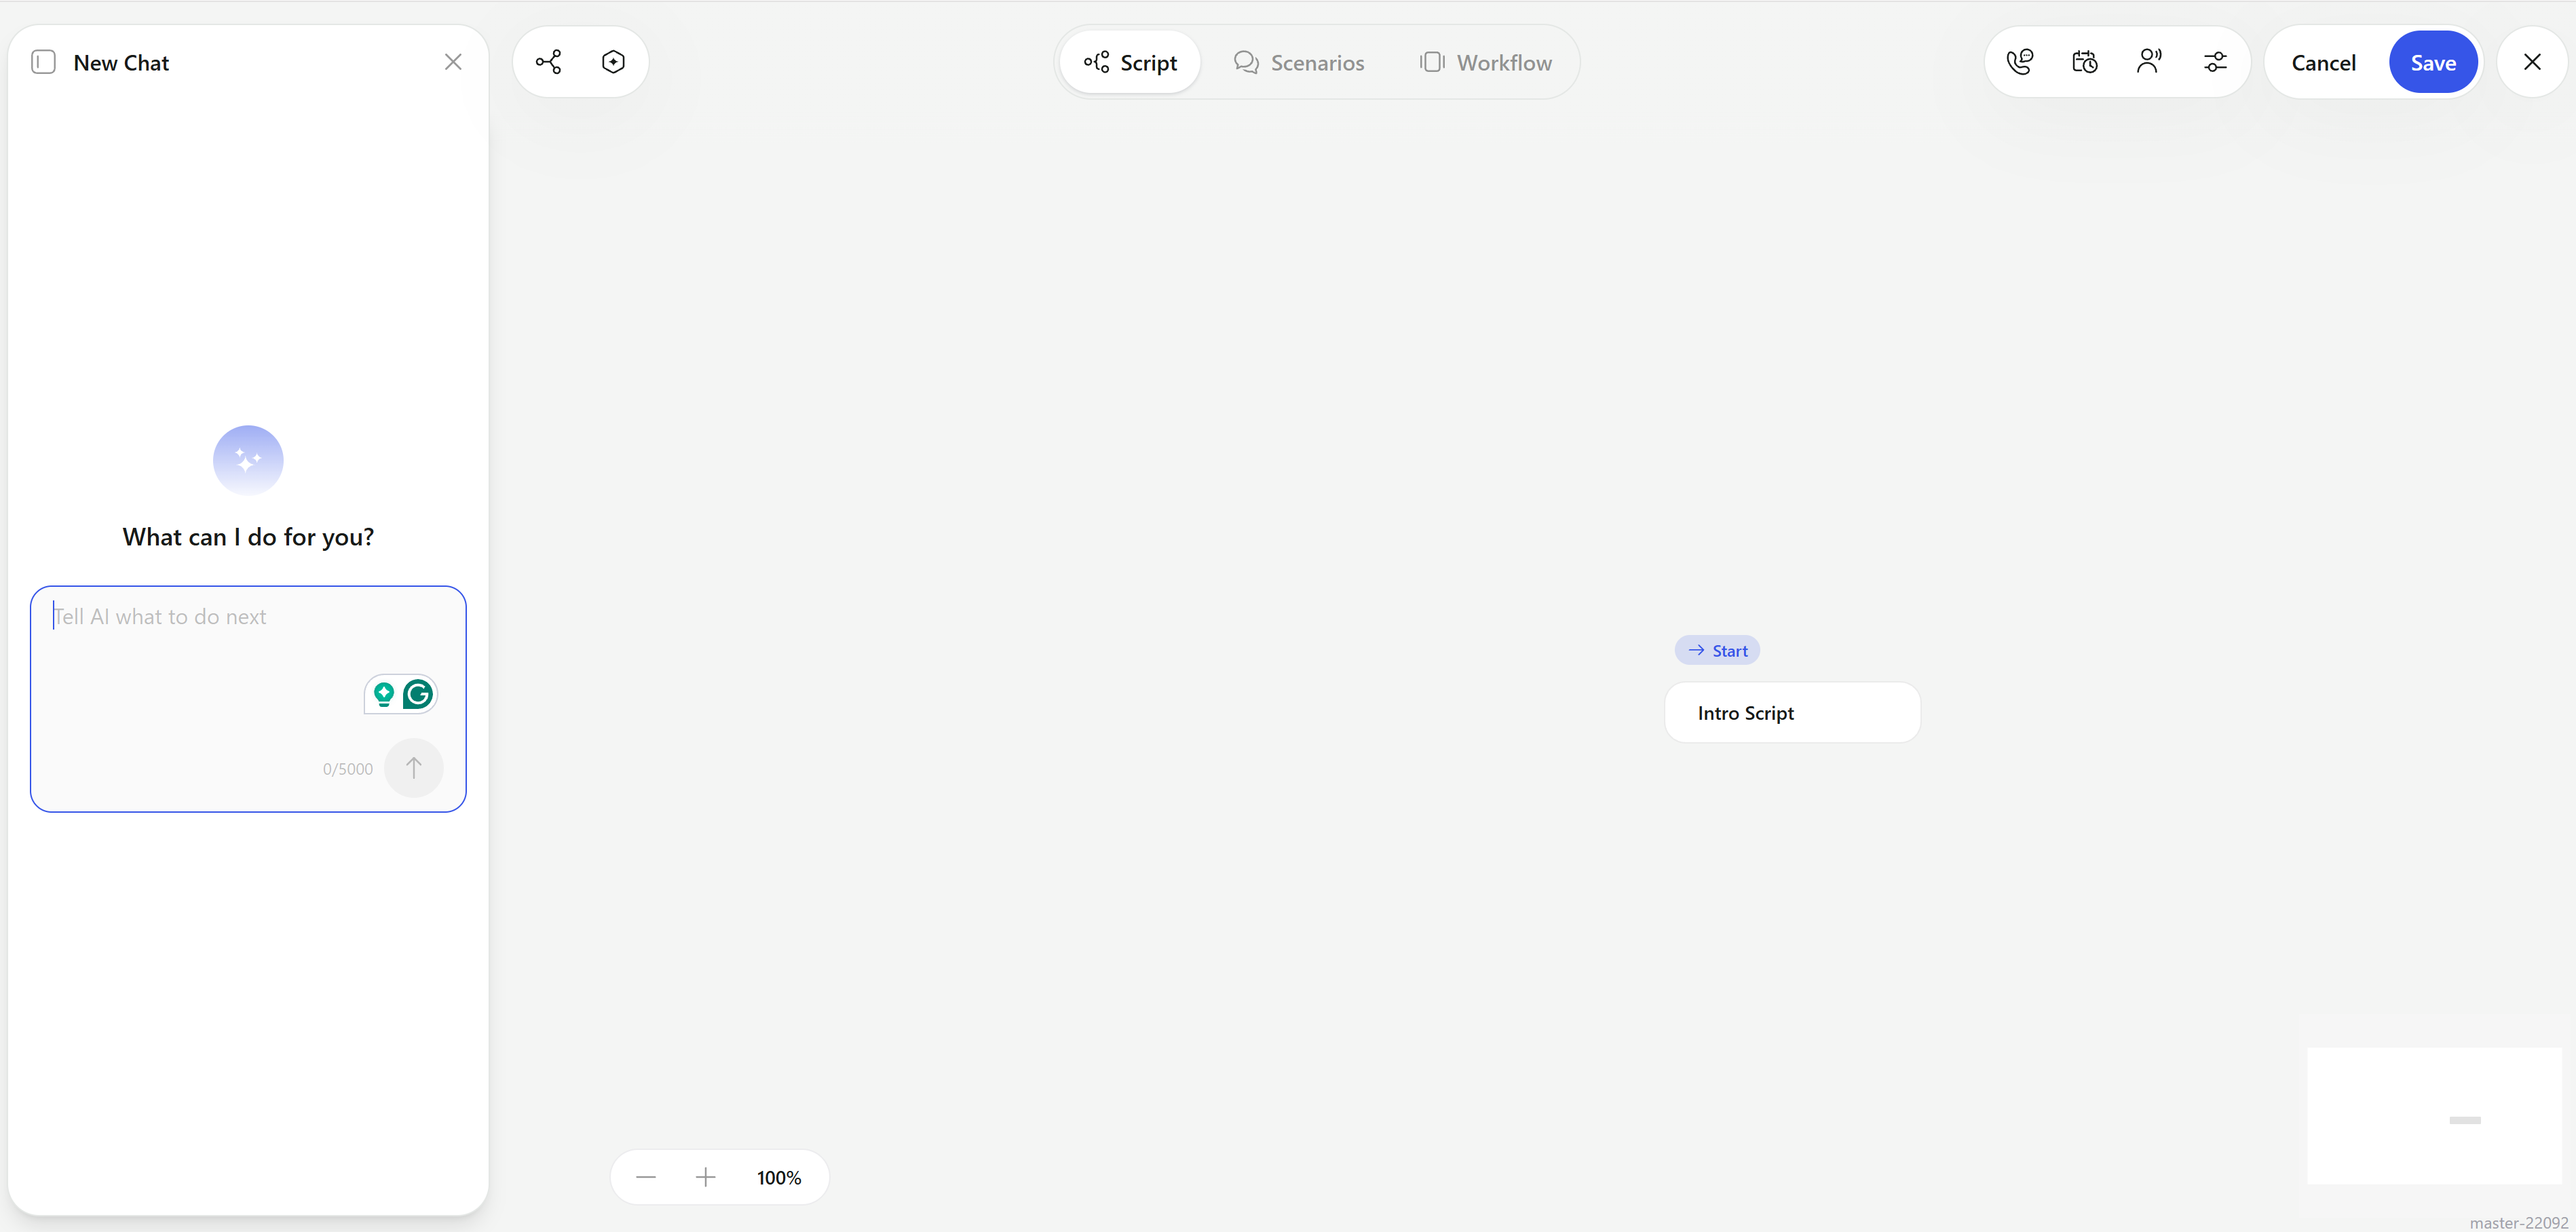 While you work, the tabs at the top of the screen - **Script**, **Scenarios**, and **Workflow** - let you move between the script, your scenarios, and the agent's settings. Click **Save** in the top right when you are done.
For detailed instructions on how to build and customize your script, refer to our [Script Building Guide](/documentation/build-your-agent/agent-script).
While you work, the tabs at the top of the screen - **Script**, **Scenarios**, and **Workflow** - let you move between the script, your scenarios, and the agent's settings. Click **Save** in the top right when you are done.
For detailed instructions on how to build and customize your script, refer to our [Script Building Guide](/documentation/build-your-agent/agent-script).