> ## Documentation Index
> Fetch the complete documentation index at: https://docs.callers.ai/llms.txt
> Use this file to discover all available pages before exploring further.
# White Label
> White-labeling allows organizations to rebrand and customize the Callers platform as their own, providing a seamless experience for clients.
White-labeling enables you to rebrand the Callers platform with your own logo, company name, and custom domain. This creates a seamless branded experience for your clients across the login page, dashboard, and entire platform.
## Prerequisites
**Before you begin:** You'll need a custom domain purchased through a web
hosting service or domain registrar (e.g., GoDaddy, Namecheap, Google
Domains). Make sure you have access to your domain's DNS settings to complete
the setup.
## How to Set Up White Labeling
### Step 1: Access Account Settings
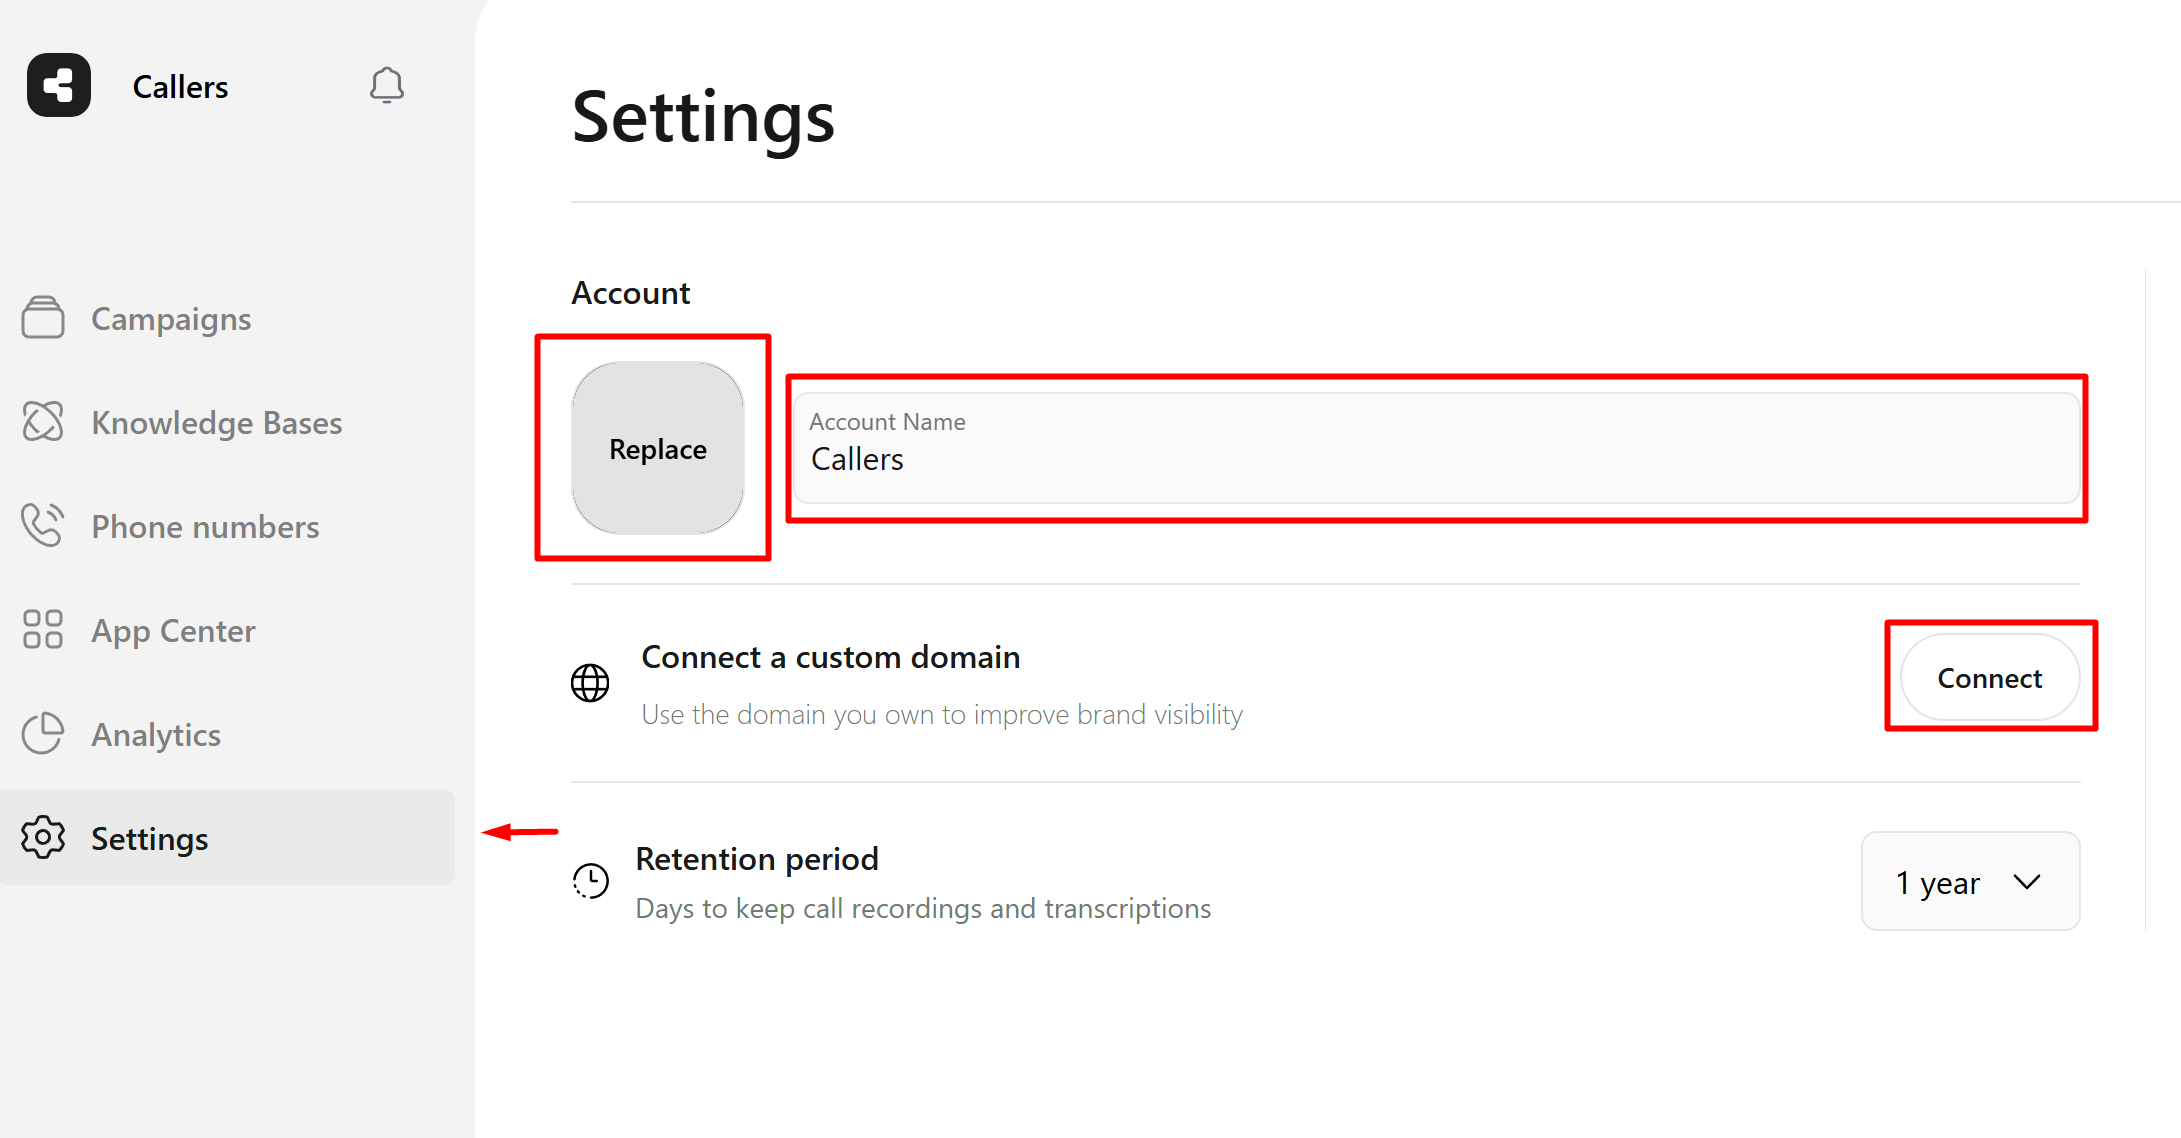
Navigate to **Settings** from the left sidebar and open the **Account** section.
 ### Step 2: Customize Your Branding
In the Account section, you can customize:
1. **Logo** — Click the logo placeholder (labeled "Replace") to upload your company logo
2. **Account Name** — Update the account name field with your company name
3. **Custom Domain** — Click the **Connect** button in the "Connect a custom domain" section
### Step 3: Connect Your Domain
After clicking **Connect**, enter the domain you own in the provided field.
### Step 2: Customize Your Branding
In the Account section, you can customize:
1. **Logo** — Click the logo placeholder (labeled "Replace") to upload your company logo
2. **Account Name** — Update the account name field with your company name
3. **Custom Domain** — Click the **Connect** button in the "Connect a custom domain" section
### Step 3: Connect Your Domain
After clicking **Connect**, enter the domain you own in the provided field.
 ### Step 4: Configure DNS Records
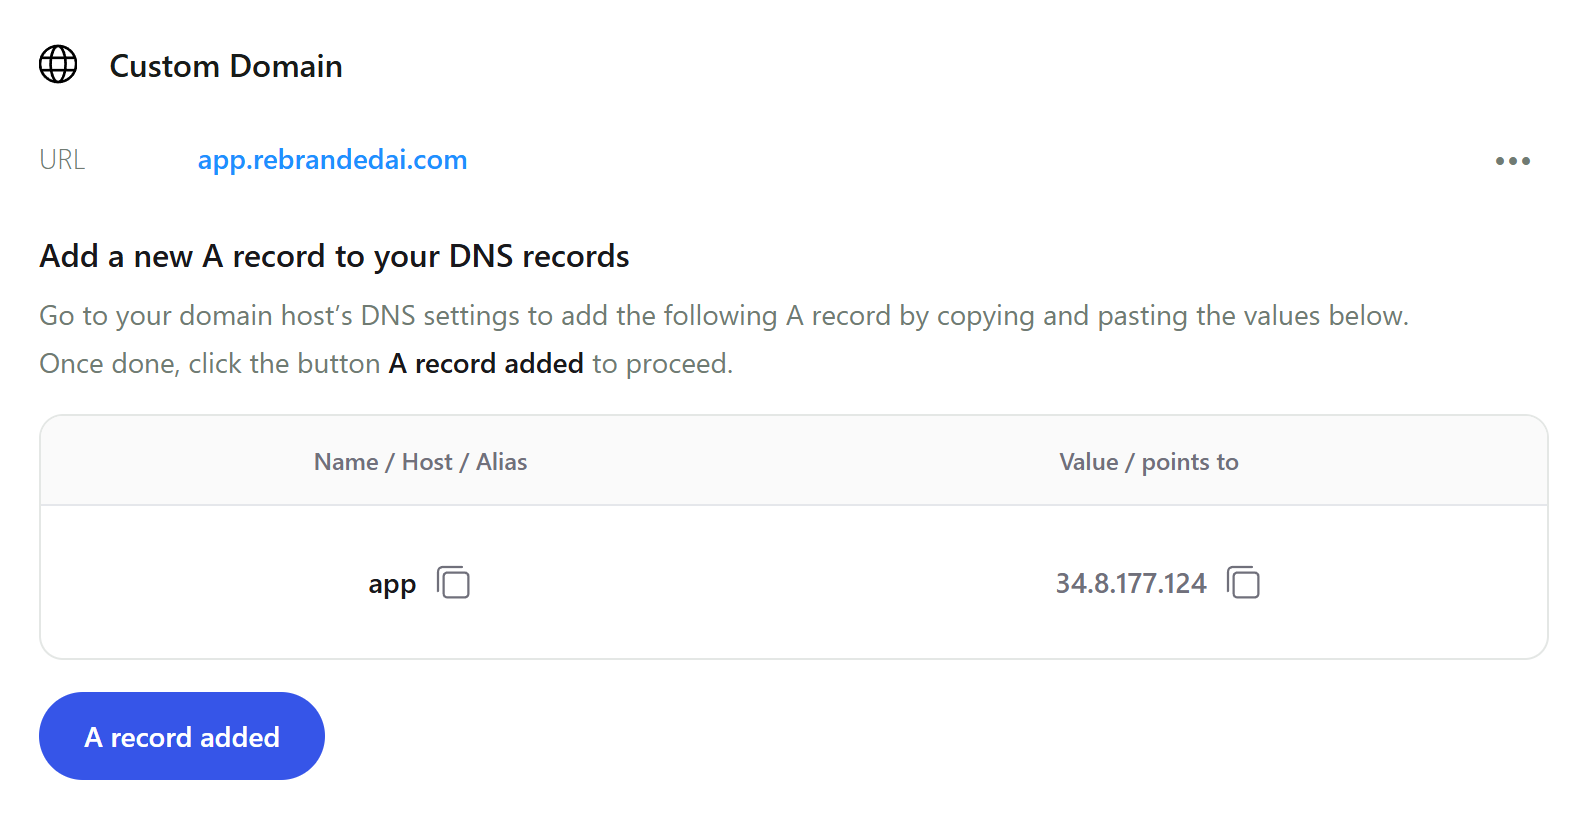
Once you submit your domain, the system will provide DNS configuration details. You need to add an **A record** to your domain's DNS settings.
### Step 4: Configure DNS Records
Once you submit your domain, the system will provide DNS configuration details. You need to add an **A record** to your domain's DNS settings.
 1. Go to your domain registrar's DNS settings (e.g., GoDaddy, Namecheap, Cloudflare)
2. Add a new **A record** with the provided values:
* **Name/Host/Alias**: The subdomain (e.g., `app`)
* **Value/Points to**: The IP address provided by Callers
3. Copy and paste the exact values shown in the platform
4. Click **A record added** to proceed
### Step 5: Wait for Verification
After adding the DNS record, your domain will enter a verification process.
1. Go to your domain registrar's DNS settings (e.g., GoDaddy, Namecheap, Cloudflare)
2. Add a new **A record** with the provided values:
* **Name/Host/Alias**: The subdomain (e.g., `app`)
* **Value/Points to**: The IP address provided by Callers
3. Copy and paste the exact values shown in the platform
4. Click **A record added** to proceed
### Step 5: Wait for Verification
After adding the DNS record, your domain will enter a verification process.
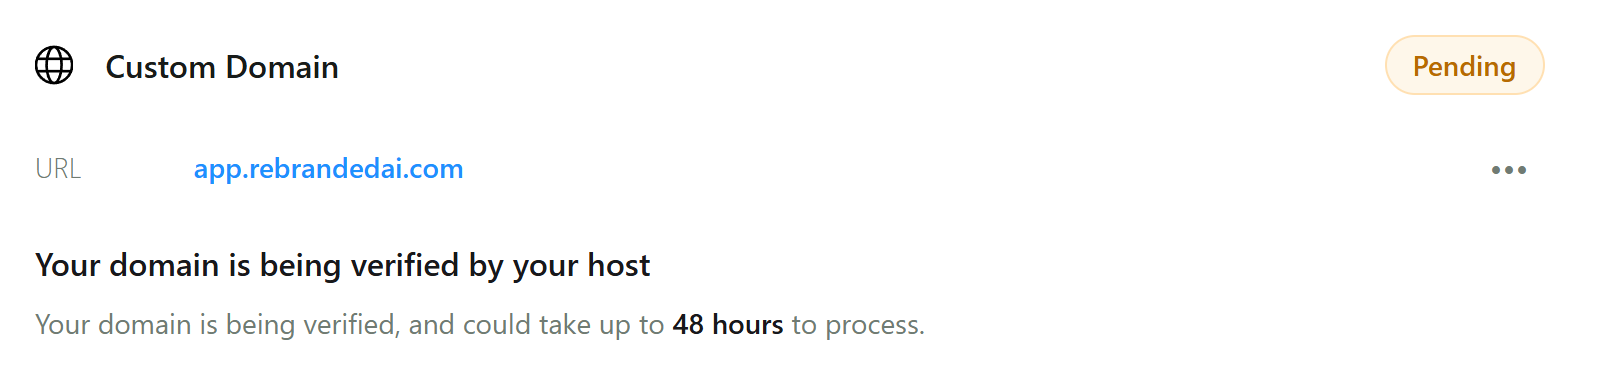 Domain verification can take up to **48 hours** to complete. The status will
show as "Pending" during this time. You'll be notified once the domain is
successfully connected.
## Results
Once your white-label settings are configured, your custom branding will appear throughout the platform:
### Login Page
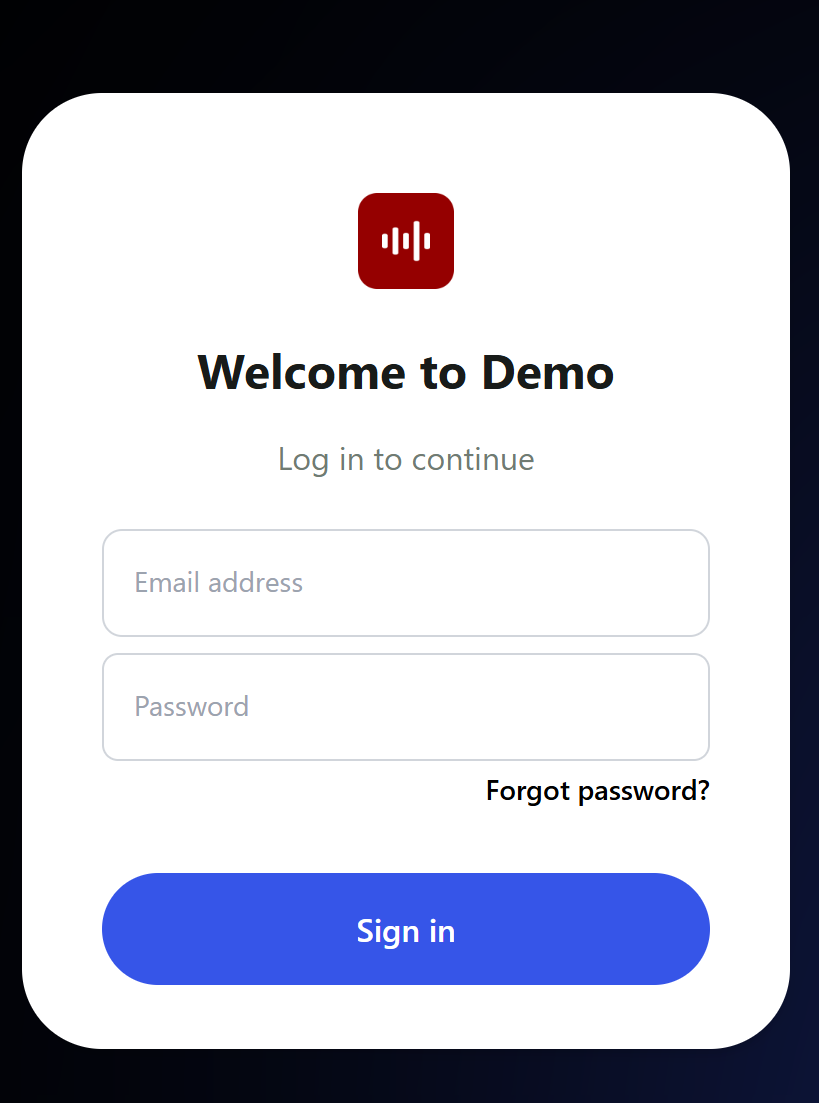
Your login page will display your custom logo and company name (e.g., "Welcome to Demo").
Domain verification can take up to **48 hours** to complete. The status will
show as "Pending" during this time. You'll be notified once the domain is
successfully connected.
## Results
Once your white-label settings are configured, your custom branding will appear throughout the platform:
### Login Page
Your login page will display your custom logo and company name (e.g., "Welcome to Demo").
 ### Platform Dashboard
Your logo and company name will appear in the top-left corner of the dashboard and throughout the interface. The custom domain will be shown as "Connected" in your account settings.
### Platform Dashboard
Your logo and company name will appear in the top-left corner of the dashboard and throughout the interface. The custom domain will be shown as "Connected" in your account settings.
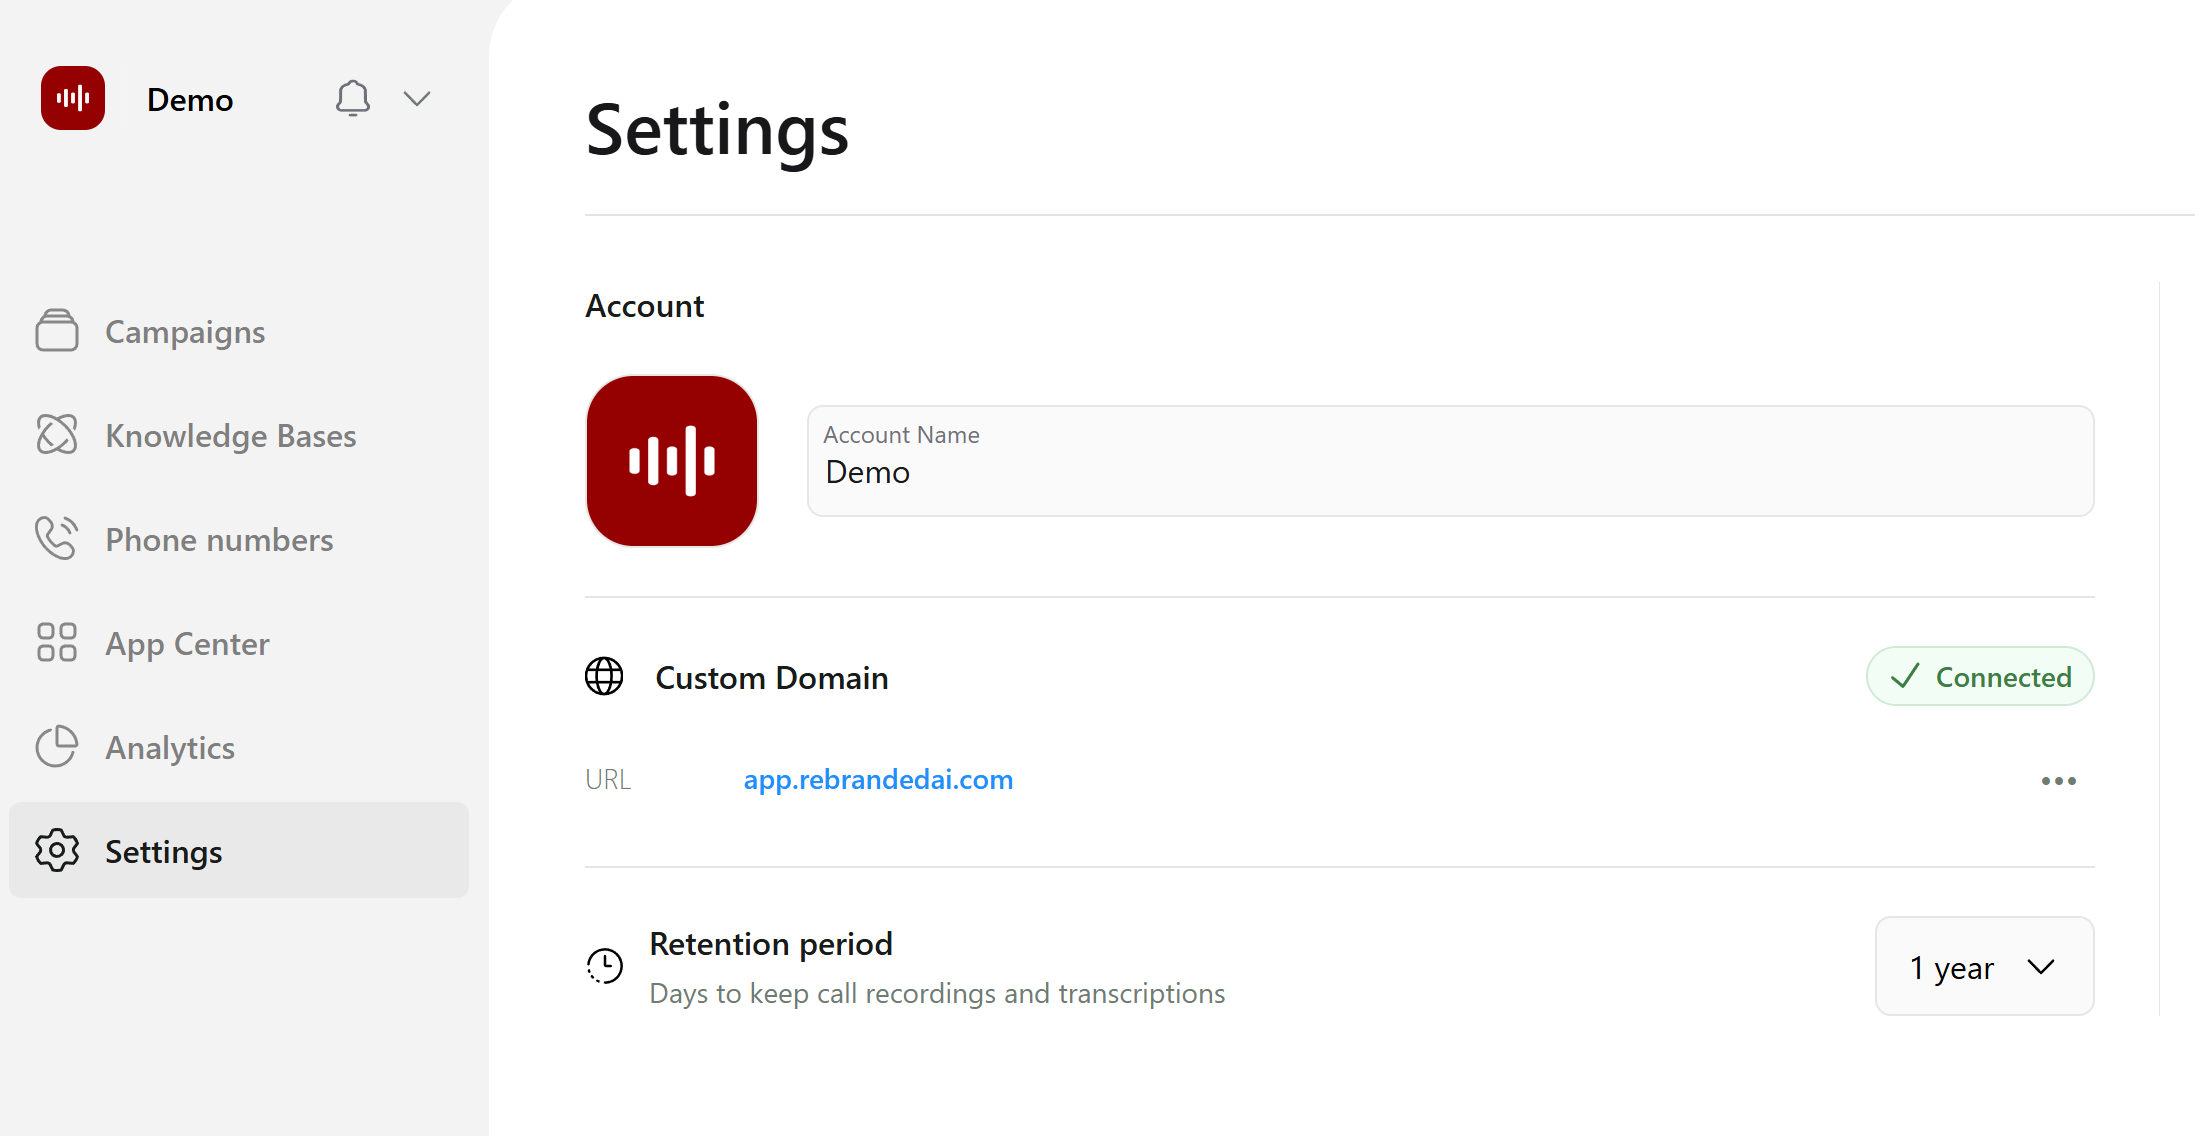 Your custom domain will be displayed in the Custom Domain section with a green
"Connected" status once successfully configured.
## API Access with Your Custom Domain
After successfully adding your custom domain, all API calls can be made using your new domain instead of the default Callers domain.
### API Endpoint
Once your custom domain is connected, you can access the API documentation and make API calls using your custom domain:
```
https://[your-custom-domain]/api/openapi
```
Replace `[your-custom-domain]` with your actual custom domain (e.g., if your domain is `app.example.com`, the API documentation would be available at `https://app.example.com/api/openapi`).
All API endpoints will work with your custom domain, allowing you to maintain a consistent branded experience across both the web interface and API integrations.
Your custom domain will be displayed in the Custom Domain section with a green
"Connected" status once successfully configured.
## API Access with Your Custom Domain
After successfully adding your custom domain, all API calls can be made using your new domain instead of the default Callers domain.
### API Endpoint
Once your custom domain is connected, you can access the API documentation and make API calls using your custom domain:
```
https://[your-custom-domain]/api/openapi
```
Replace `[your-custom-domain]` with your actual custom domain (e.g., if your domain is `app.example.com`, the API documentation would be available at `https://app.example.com/api/openapi`).
All API endpoints will work with your custom domain, allowing you to maintain a consistent branded experience across both the web interface and API integrations.